

Microsoft Family Safety helps families stay safe online. It lets you watch your kids’ activities. You can set limits on screen time. You can control what they see or buy. You can even share location information.
Here’s a simple guide on how to add someone to your Microsoft Family Safety group. You can use Windows 11 or any device with internet access.
What You Need Before You Start
- A Microsoft account that you can log into (this should be yours as the family organizer)
- Internet connection on your computer or device
- The Microsoft Family Safety app installed on your device (optional but helpful)
Once set up, you can add adults or kids to your family group. Adults help manage the group. Kids get the protections and limits you set.
Step 1: Sign in to Microsoft Family Safety
- Open your internet browser and go to the Microsoft Family Safety website.
- Sign in with your Microsoft account email and password. Don’t have an account? You can create one here.
Step 2: Open Your Family Settings
- After signing in, click on the Family tab at the top.
- Select your family group from the list shown.
- Click on Family settings to manage your family members.

Step 3: Add a Family Member
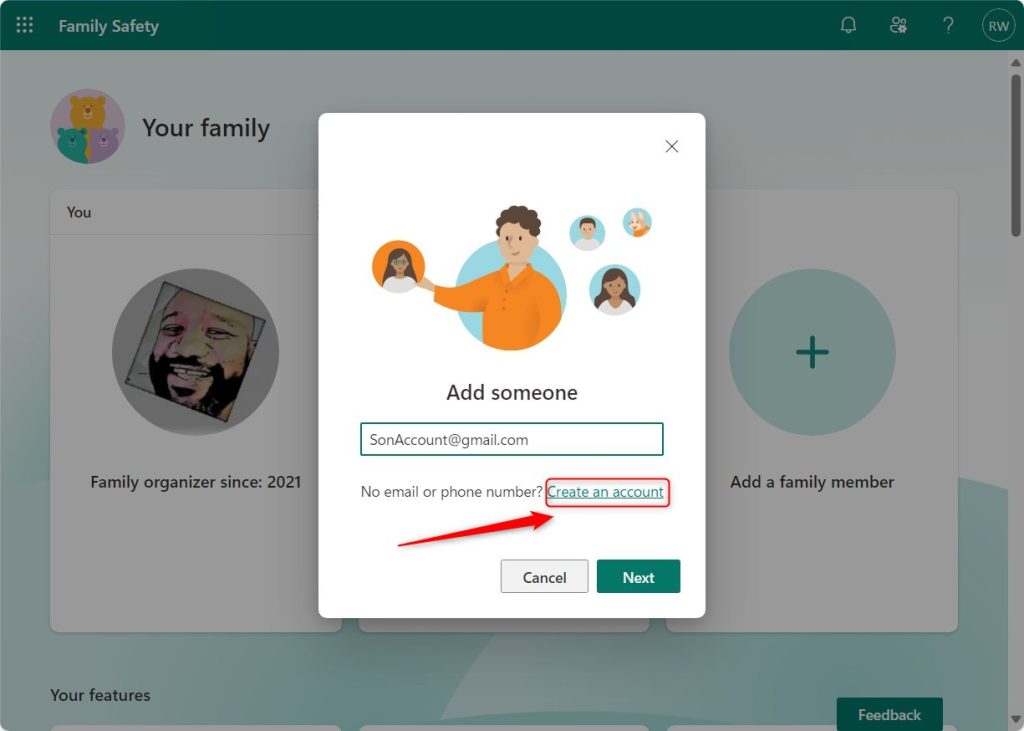
- In the Family settings page, click the Add a family member button.
- Choose if the new member is a Child or an Adult.
- Enter their email address linked to their Microsoft account. If they don’t have one, click Create an account to help them set one up.
- Follow the instructions on the screen to finish adding them.
Why this matters: You can only add people who have a Microsoft account. Make sure they have one or help them make one.

Step 4: Set Permissions and Restrictions
- After adding a member, click their name in the family list.
- Here you can set limits like how much screen time they get, which apps or games they can use, and what websites they can visit.
- Adjust settings based on what you think is best for that person.
What happens: Kids usually get more restrictions. Adults can help manage the family group.
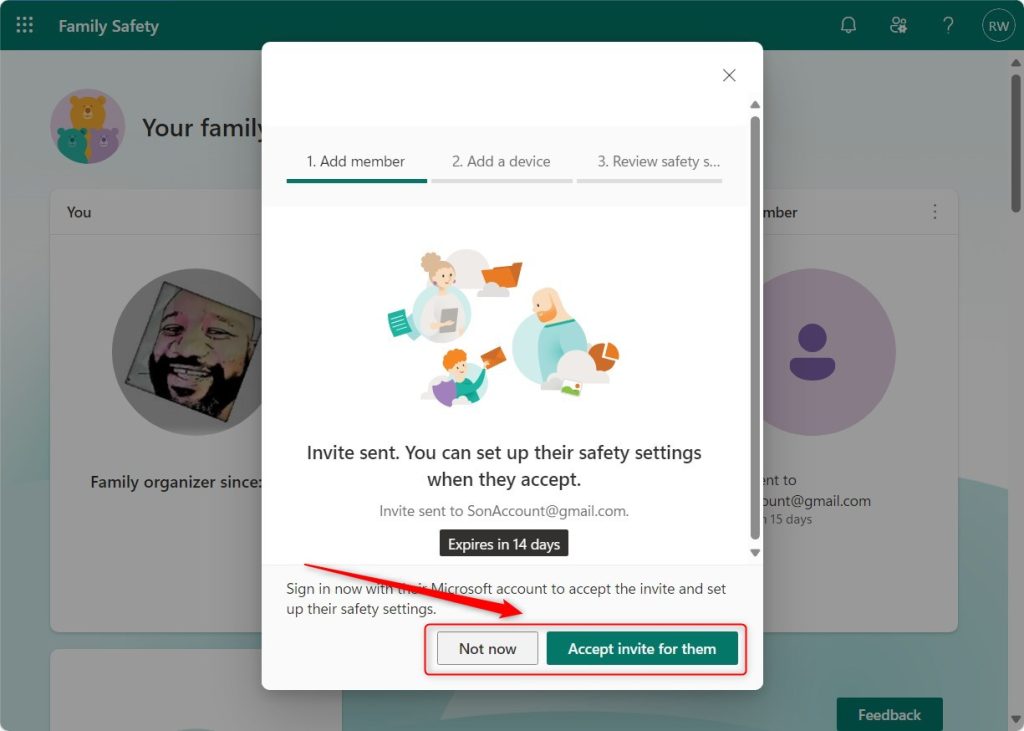
Step 5: Confirm the Invitation
- The new family member will get an email invite.
- They need to open the email and accept the invite by following the steps.
- You can also accept the invite for them if you have access to their account.

Step 6: Save and Review Regularly
- When you finish setting permissions, click Save or Done.
- Check back every now and then to update settings as your family’s needs change.
- You can add or remove family members anytime by following these steps.

Summary
Adding someone to Microsoft Family Safety is easy and helps keep your family safe online. Here’s what you do:
- Sign in to your Microsoft account and open Family Safety
- Add a family member by entering their Microsoft email
- Set up rules like screen time or content restrictions
- Send the invite and make sure they accept it
- Review settings regularly to keep up with your family’s needs
For more help, visit the official Microsoft Family Safety support page.

Leave a Reply Cancel reply