How to Enable Disk Write Caching in Windows 11
This guide will show you how to turn disk write caching on or off for your drives in Windows 11. We’ll walk through it step by step.
Enable disk write caching in Windows 11 through Device Manager or Disk Management. Open the drive’s Properties, navigate to the Policies tab, and check “Enable write caching on the device.” This speeds up saving data but carries a risk of loss during unexpected shutdowns.
What is Disk Write Caching?
Disk write caching is a way to make your computer save files faster by using a special memory area to hold data briefly before it goes to your hard drive or SSD.
Important: If your computer suddenly turns off or crashes before the cached data saves to the disk, you could lose recent changes.
How to Turn On or Off Disk Write Caching
You can change this setting using two methods: Disk Management or Device Manager.
Method 1Using Disk Management
- Press
Windows + Ron your keyboard to open the Run box. - Type
diskmgmt.mscand pressEnter. Disk Management opens. - In the left column, find the disk you want to change. Usually, Disk 0 is your main drive.
- Right-click on the disk label (like “Disk 0”) and choose Properties.
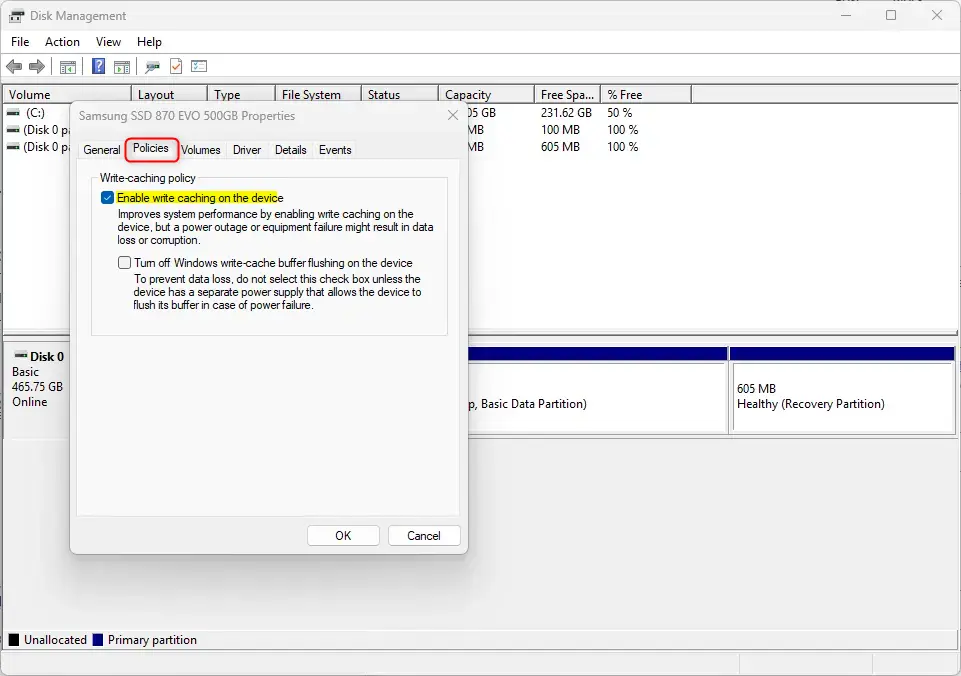
- Click the Policies tab.
- Check or uncheck the box next to “Enable write caching on the device” to turn it on or off.
- Click OK to save your changes.
You can turn on disk write caching in Windows 11 using Disk Management by opening the tool and finding your drive’s properties.
You can turn on disk write caching in Windows 11 using Disk Management by opening the tool and finding your drive’s properties.
- Close Disk Management when finished.
Method 2Using Device Manager
- Press
Windows + Xand select Device Manager from the list. - Expand the Disk drives section.
- Right-click on your disk drive and select Properties.
- Go to the Policies tab.
- Check or uncheck the box next to “Enable write caching on the device” to turn it on or off.
- Click OK to save.
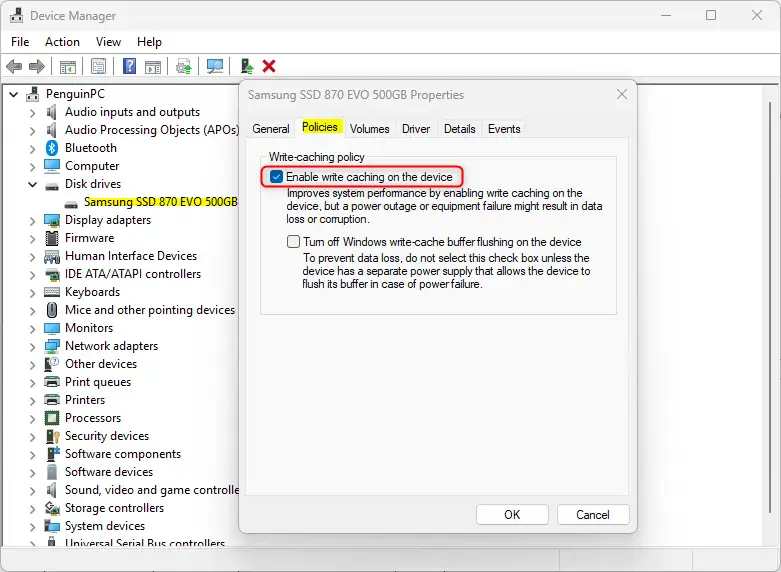
Another simple way to manage disk write caching in Windows 11 is through Device Manager, where you can find your drive and change its settings.
Important Things to Remember
When you use disk write caching in Windows 11, it speeds up saving files, but it’s important to know that sudden power loss could mean losing recent work.- Write caching can make your computer faster by speeding up how data saves.
- If your PC shuts down suddenly, some recent data might be lost if it’s still in the cache.
- You can easily turn this feature on or off anytime using Disk Management or Device Manager.
- Make sure to regularly back up your important files, especially if you use write caching.
- If you want to learn more about managing disks in Windows 11, check out this helpful article on How to Initialize a New Disk in Windows 11.
Summary
Disk write caching in Windows 11 helps your computer save files faster by using memory, and you can turn it on or off using Disk Management or Device Manager.
Was this guide helpful?

About the Author
Richard
Tech Writer, IT Professional
Richard, a writer for Geek Rewind, is a tech enthusiast who loves breaking down complex IT topics into simple, easy-to-understand ideas. With years of hands-on experience in system administration and enterprise IT operations, he’s developed a knack for offering practical tips and solutions. Richard aims to make technology more accessible and actionable. He's deeply committed to the Geek Rewind community, always ready to answer questions and engage in discussions.


No comments yet — be the first to share your thoughts!