
This simple guide will help you add a new language to your Windows 11 computer.
Why Add a Language?
Adding a language lets you:
- Change Windows menus and settings to another language.
- Use speech features like talking to your computer or hearing it read text aloud.
- Type with the right keyboard layout for that language.
- Write by hand if your device supports it.
Steps to Add a Language
Open Settings
Press the Win + I keys on your keyboard to open the Settings app.
Go to Language Settings
Click Time & language on the left side. Then click Language & region on the right side. Or click this link to open directly: Open Language & region settings
Add a Language
Under Preferred languages, click the Add a language button.

Pick Your Language
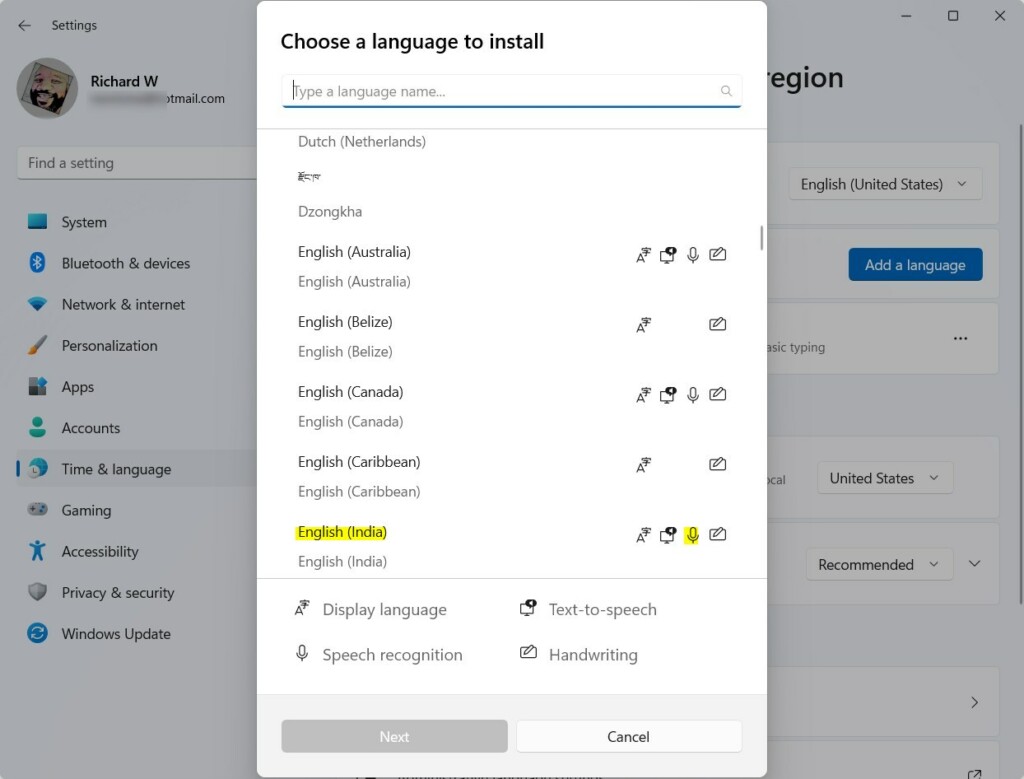
Find the language you want (for example, “English (United Kingdom)”), select it, and click Next.
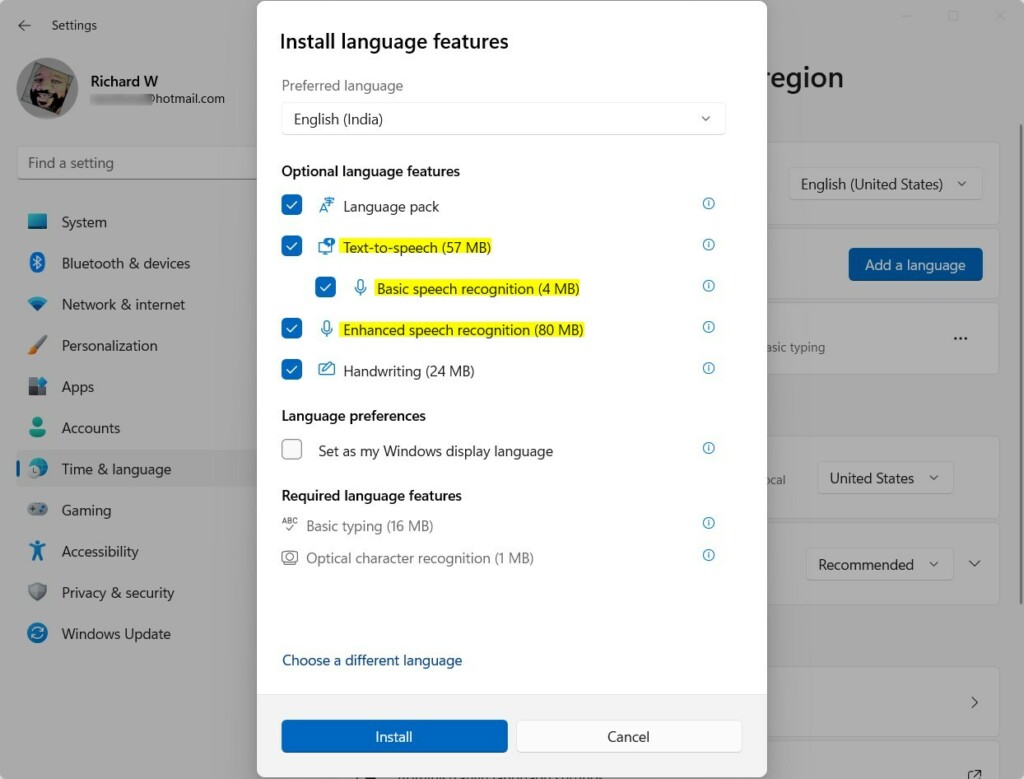
Choose Optional Features
You can pick extra options like:
- Language pack: Changes Windows menus to this language.
- Text-to-speech: Lets Windows read text out loud.
- Speech recognition: Talk to your PC instead of typing.
- Handwriting: Write on your device and Windows will understand.
- Keyboard layout: Changes the keyboard to match the language.
After picking what you want, click Install.
Wait for Installation
Windows will download and set up the language and features you chose.
Set as Display Language (Optional)
If you want Windows to show menus and settings in this new language, check Set as my Windows display language before installing. You will then be asked to sign out and sign back in to apply the change.
Important Notes
If you have the Single Language Edition of Windows 11, you can’t add another display language unless you upgrade your Windows version.
Adding languages can help you use Windows in your preferred language and enjoy features like voice typing and reading aloud.
Summary
- Open Settings with
Win + I. - Go to Time & language > Language & region.
- Click Add a language and pick your language.
- Choose extra features if you want (text-to-speech, keyboard, etc.).
- Click Install and wait for it to finish.
- Sign out and back in if you set the new language as your display language.
That’s it! Your Windows 11 is now set up with your new language.
Learn More
Official Microsoft Guide: Install a Language in Windows 11


Leave a Reply Cancel reply