
Network File System (NFS) is a way to share files between computers on a network. Think of it as a virtual filing cabinet that multiple computers can access at the same time. Why would you want this? If you have files stored on a Linux server, you can let Windows computers access those same files without copying them around. What happens when you set it up? Your Windows machine can read and write files on the Linux server just like they’re stored locally.
NFS is especially useful in mixed environments. Maybe your office has both Windows and Linux computers. NFS lets them all work with the same files smoothly. You also get better control over who can access what files. You can set permissions for different users and groups to keep your data secure.
Set Up an NFS Share First
Before you can use NFS on Windows, you need to create and share a folder on an NFS server (usually Linux). If you haven’t done this yet, follow the instructions here:
How to install and export NFS share on Ubuntu
Once your NFS share is ready on the server, come back and continue with the steps below.
Enable NFS Services on Windows 11
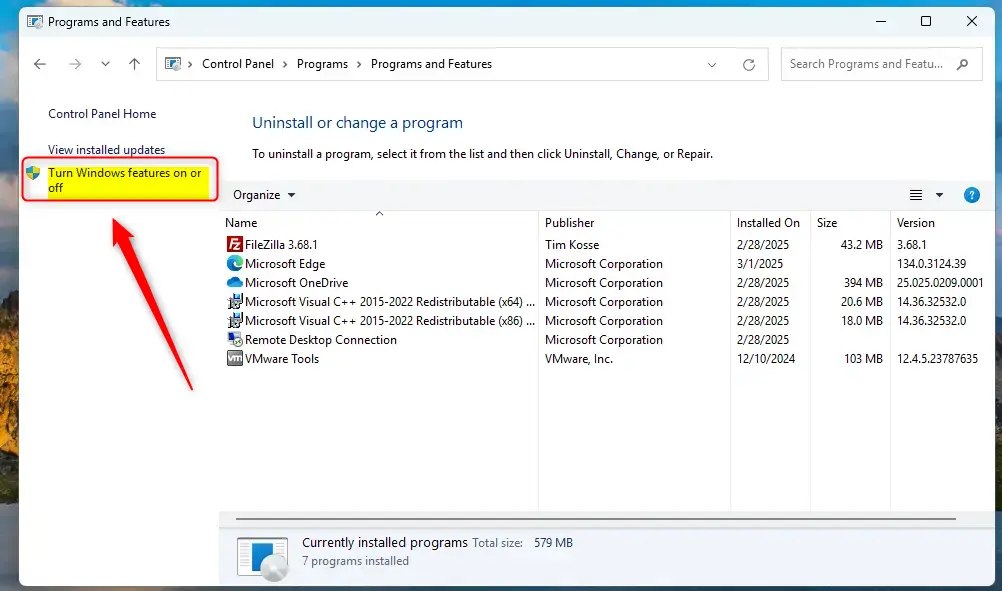
Now it’s time to prepare your Windows machine. You need to turn on a Windows feature called NFS Services.
- Open your Windows machine.
- Go to Settings > Programs > Programs and Features.
- Click on “Turn Windows features on or off” on the left side.
- A window will open. Look for NFS Services in the list.
- Check the box next to NFS Services to enable it.
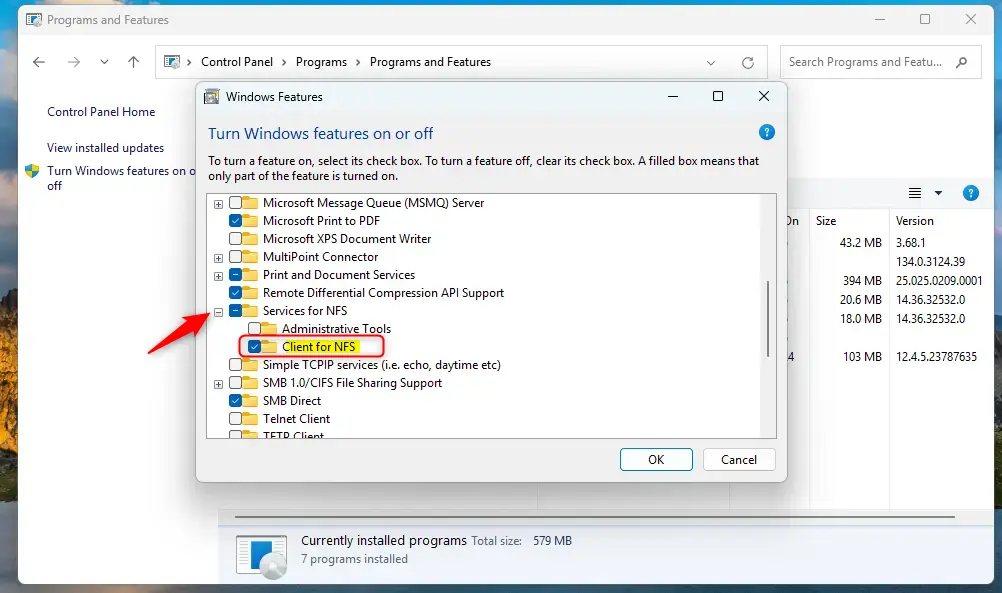
- Click OK and wait for Windows to install the feature.
- Close the window when done.
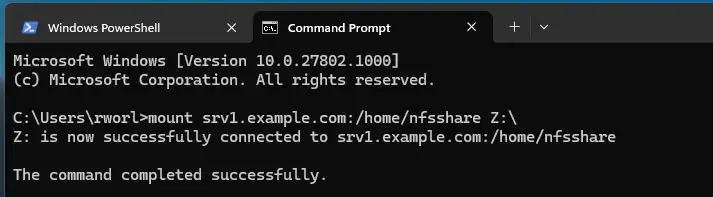
Mount the NFS Share Using Command Prompt
⚠️ Admin Required: You need admin privileges to run the next command.
Now your Windows machine is ready to access NFS shares. Follow these steps:
- Open Command Prompt as Administrator. (Right-click on Command Prompt and select “Run as administrator.”)
- Type the following command to mount the NFS share. Replace the server address and paths with your actual NFS server details:
mount 192.168.1.100:/home/nfsshare Z: - Press Enter.
What happens? Windows connects to your NFS server and links the shared folder to drive letter Z. You should see a message confirming the mount was successful.
Access Your Mounted NFS Share
Once mounted, accessing your files is simple:
- Open File Explorer on your Windows machine.
- Look for the mounted drive (labeled as Z: or whatever letter you chose).
- Click on it to view and use the files stored on your NFS server.
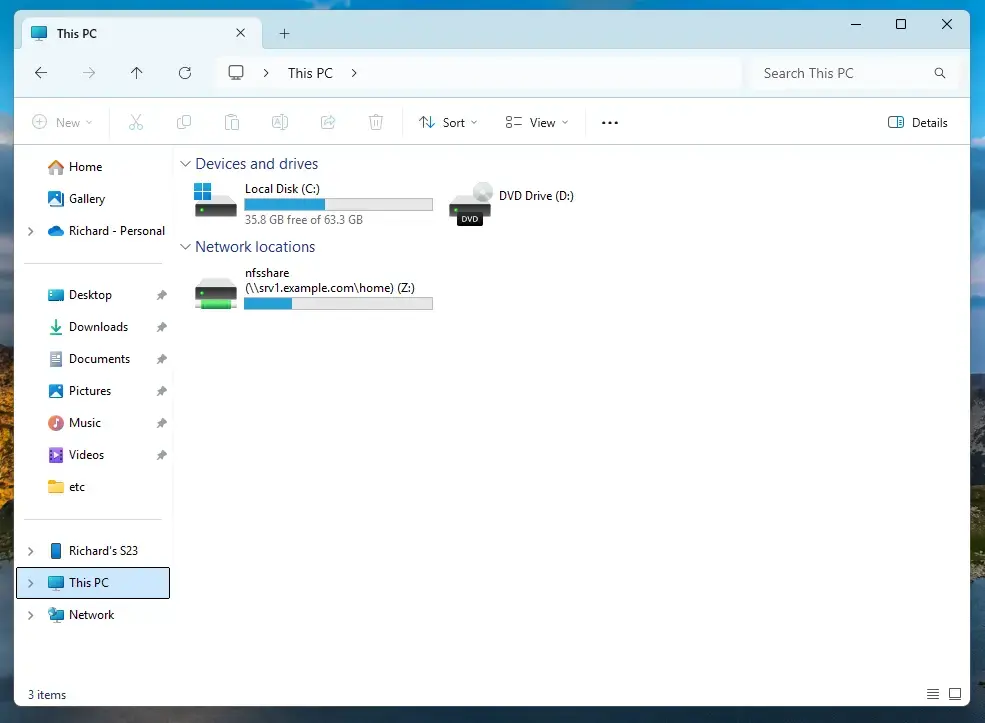
That’s it! You can now read, write, and manage files on the NFS share just like any other folder on your computer.
Summary
- What is NFS? A protocol that lets different computers share files over a network.
- Why use it? Seamlessly access files between Linux and Windows systems without copying files around.
- How to set it up: Enable NFS Services in Windows, then use Command Prompt to mount the share with the
mountcommand. - What happens when done? The shared folder appears in File Explorer and works like a regular drive on your Windows machine.
- Key benefit: Better file management and teamwork across mixed Windows and Linux environments.

Leave a Reply Cancel reply