
This article explains using phpVirtualBox to manage headless VirtualBox guest machines on Ubuntu Linux
phpVirtualBox is a web-based graphical user interface that allows you to manage headless VirtualBox guest machines on Ubuntu Linux. It can help you easily create and manage multiple virtual guest machines, which can be very useful if you are dealing with many machines.
It provides a user-friendly interface that can be accessed from any modern web browser, which makes it easy to use from anywhere. Additionally, it allows you to perform most of the operations you can do with the VirtualBox GUI directly from a web browser, making it a powerful tool for managing headless servers.
Again, Virtualization software like VirtualBox and VMware Workstation Pro or VMware Players allow users to run multiple guest operating systems simultaneously on a single host computer.
To get started with managing VirtualBox headless servers via phpVirtualBox, continue below:
Prerequisites – Install VirtualBox
Before you can install phpVirtualBox, you must first install VirtualBox. The link below shows you how to do just that.
Now that VirtualBox is installed, your next step is to install phpVirtualBox.
Install Apache2 HTTP Server
After installing VirtualBox, as described in our previous post, run the commands below to install the Apache2 HTTP server.
sudo apt install apache2
Install PHP 7.1 and Related Modules
PHP 7.1 isn’t available on Ubuntu default repositories… to install it, you will have to get it from third-party repositories.
Run the commands below to add the below third party repository to upgrade to PHP 7.1
sudo apt-get install software-properties-common
sudo add-apt-repository ppa:ondrej/php
Then update and upgrade to PHP 7.1
sudo apt update
Run the commands below to install PHP 7.1 and related modules.
sudo apt install php7.1 libapache2-mod-php7.1 php7.1-common libapache2-mod-php7.1 php7.1-mbstring php7.1-soap php7.1-xml php7.1-mysql php7.1-cli
After installing PHP 7.1 modules, run the commands below to open the Apache2 PHP default configuration file.
sudo nano /etc/php/7.1/apache2/php.ini
Then add the lines below just before Dynamic Extensions
extension=json.so
extension=soap.so
Save the file and exit.
Reload Apache2 HTTP Server
sudo systemctl reload apache2.service
Install phpVirtualBox
Finally, run the commands below to download the phpVirtualBox package
cd /tmp && wget https://sourceforge.net/projects/phpvirtualbox/files/phpvirtualbox-5.0-5.zip
After downloading, run the commands below to unzip the package and copy it to the Apache2 default document root directory.
unzip phpvirtualbox-5.0-5.zip
sudo mv phpvirtualbox-5.0-5 /var/www/html/phpvirtualbox
Next, run the commands below to create a phpVirtualBox configuration file from its sample file.
sudo cp /var/www/html/phpvirtualbox/config.php-example /var/www/html/phpvirtualbox/config.php
Create a phpVirtualBox dedicated user account
phpVirtualBox requires a dedicated user account to manage the VirtualBox. For that, you need to create a service account.
To create a service account called vbox and add the user to the vboxusers group. Run the commands below and the second line to create a new password.
sudo useradd -m vbox -G vboxusers
sudo passwd vbox
Next, set the permissions for the phpVirtualBox directory for the vbox user.
sudo chown -R vbox:vboxusers /var/www/html/phpvirtualbox
sudo chmod -R 755 /var/www/html/phpvirtualbox
Setup phpVirtualBox connection
The final step is to configure the phpVirtualBox user connection. This can be done by opening its default configuration file and adding the phpvbox user to the settings.
Open and edit the file by running the commands below:
sudo nano /var/www/html/phpvirtualbox/config.php
Then, fill in the user account for phpvbox, as shown below.
/* Username / Password for system user that runs VirtualBox */
var $username = ‘vbox‘;
var $password = ‘vbox_password‘;
var $location = ‘http://localhost:18083/’;
Next, run the commands below to open the VirtualBox config file in the /etc/default directory.
sudo nano /etc/default/virtualbox
Then, add these lines at the end of the file and save it. This allows VirtualBox SOAP API service to run as vbox.
VBOXWEB_USER=vbox
VBOXWEB_HOST=localhost
Finally, start the phpVirtualBox service account by running the commands below.
sudo systemctl enable vboxwebsrv.service
sudo systemctl start vboxwebsrv.service
sudo systemctl reload apache2.service
Restart the Apache2 server, then browse to the host via IP or hostname followed by /phpvirtualbox
http://example/phpvirtualbox
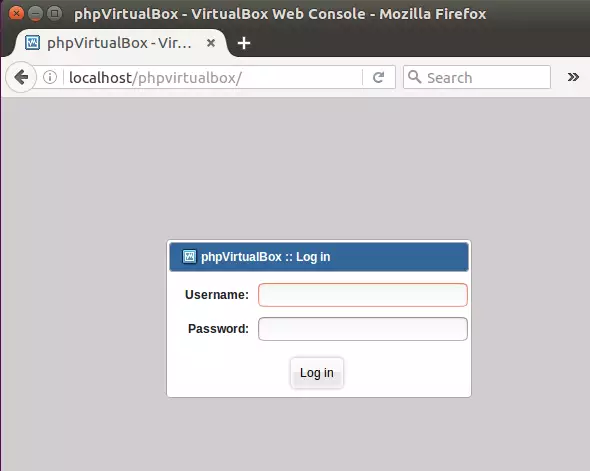
This is how to manage VirtualBox remotely.
Enjoy!
You may also like the post below:
Leave a Reply