
This article explains changing the ‘System Product Name‘ in Windows 11.
The System Product Name is a unique identifier assigned to a computer’s hardware components. The operating system uses it to identify the computer’s model and manufacturer.
If you built a custom PC, the device’s model name will probably not be displayed. Instead, a default’ System Product Name’ will be displayed. Windows allows you to change the default placeholder name to anything you want.
The method below usually cannot be used to change an OEM device’s system product name (e.g., HP EliteBook).
People might want to replace the default’ System Product Name’ with a custom name for various reasons. For instance, if you built a custom PC, you might want to give it a unique name that reflects your style or preferences.
Alternatively, if you’re using a pre-built PC, you might want to change the name to something more memorable or easier to identify. Whatever the reason, changing the ‘System Product Name’ can be a simple way to personalize your computer and make it stand out from the crowd.
Replace ‘System Product Name’ in Windows 11
As described above, users can replace the default’ System Product Name’ placeholder in Windows with a custom and unique name.
Here’s how to do it.
First, open Windows Registry Editor.
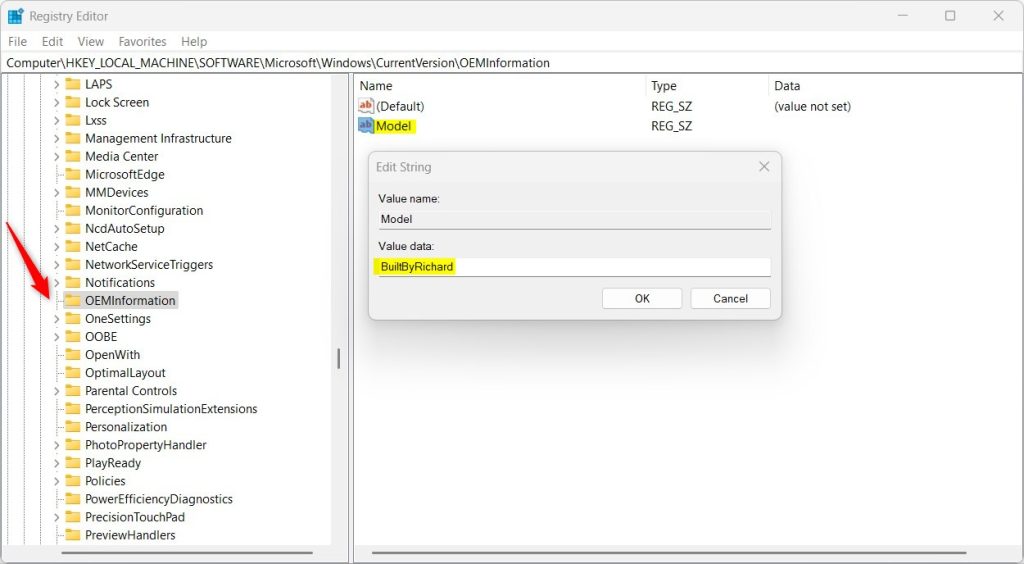
Then, navigate to the registry key below.
ComputerHKEY_LOCAL_MACHINESOFTWAREMicrosoftWindowsCurrentVersionOEMInformation
Next, double-click the Model (REG_SZ) string name on the Explorer key’s right pane to open it.
Then, enter a custom name in the field to identify your computer.
If you do not see the ‘Model ‘item, right-click a blank area and create a new String Value. Then, enter the name ‘Model ‘.
Type the custom name in the Value data field and click OK to save it.
You may have to restart your computer for the changes to apply.
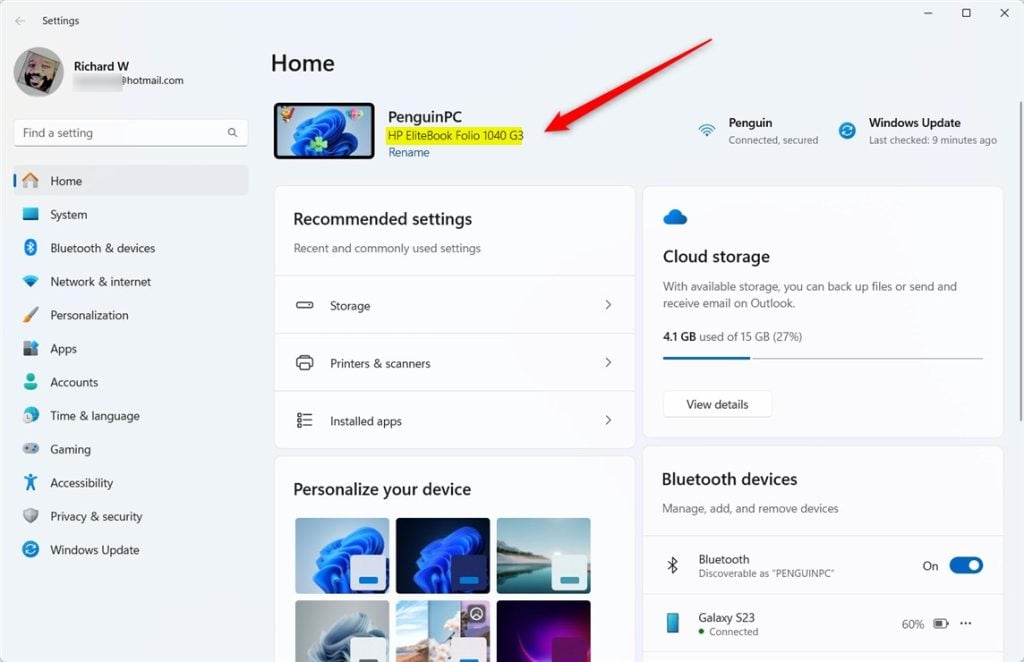
You can find your PC’s Model or (System Product Name) in the Settings app under the device’s name.
That should do it!
Conclusion:
- Personalizing your computer by changing the System Product Name can make it stand out and reflect your style and preferences.
- Whether you built a custom PC or are using a pre-built one, replacing the default placeholder name with a unique one can help with easy identification.
- Following the simple steps outlined above can allow you to replace the System Product Name with a custom and memorable name in Windows 11.
Leave a Reply Cancel reply