This article describes how one can install Windows on VMware Workstation Pro.
We previously discussed using VMware Workstation Pro and VirtualBox virtualization software to run multiple operating systems from a single computer and the benefits they provide, especially for IT students and professionals.
With this virtualization software, you can run multiple lab environments on virtual guest machines without the additional cost of getting hardware for each guest machine running an individual operating system.
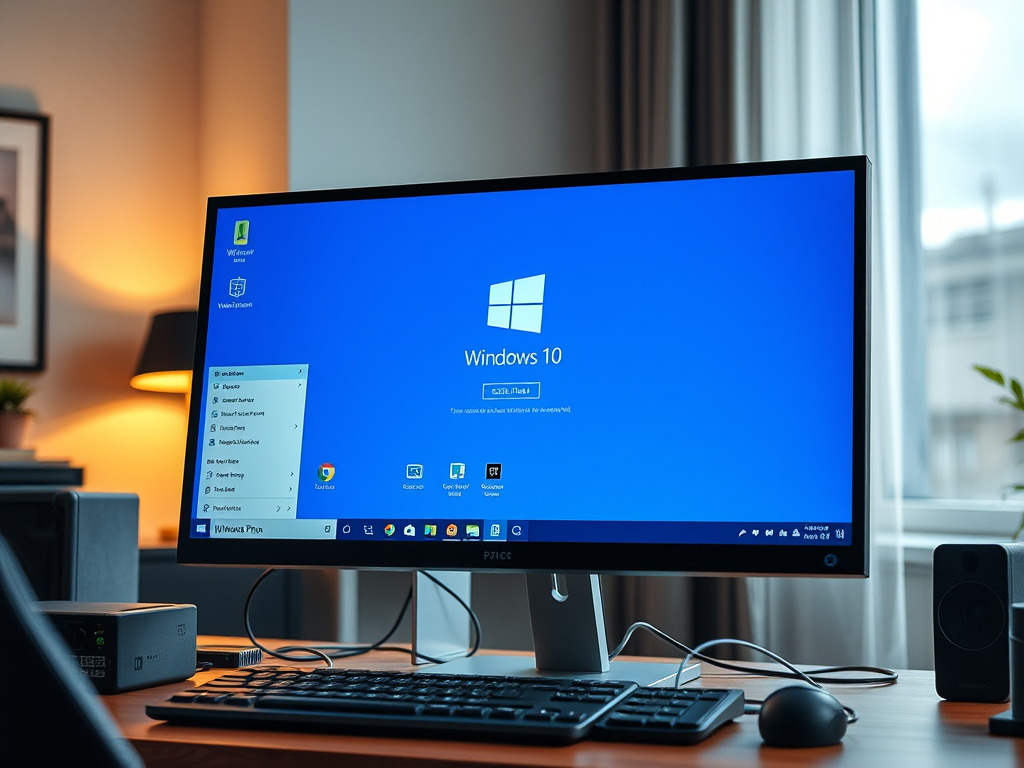
After setting up VMware Workstation Pro, the steps below show you how to create a virtual guest machine and install Windows 10.
The guest machine will run Windows 10 as if Windows 10 were on separate and independent hardware. That’s the magic of virtualization software.
To install Windows 10 on VMware Workstation, follow the steps below
Setup the Guest Machine
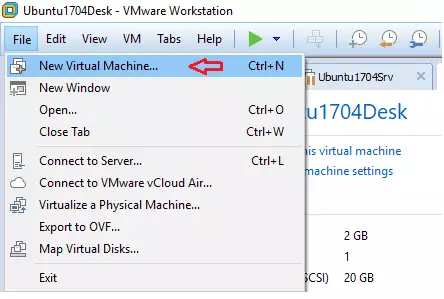
Go to File –> New Virtual Machine from VMware Workstation Host software to create a new Virtual Machine.
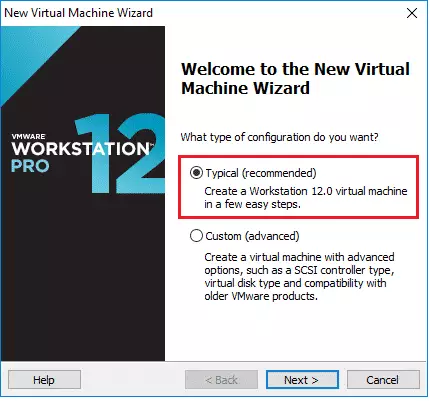
Next, select the Typical (recommended) configuration. This option is excellent for new students or users. If you choose the Typical option, VMware Workstation will attempt to identify the operation you want to install and automatically configure it.
The Custom (advanced) option lets you customize the installation.
Next, install it from an installer disc or an image ISO file. The Image ISO file option is when you have an ISO image of a Windows file, not the disc.
If you have a Windows 10 disc, insert it into the host computer and boot from it.
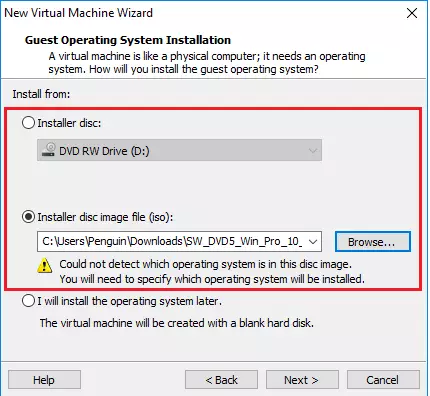
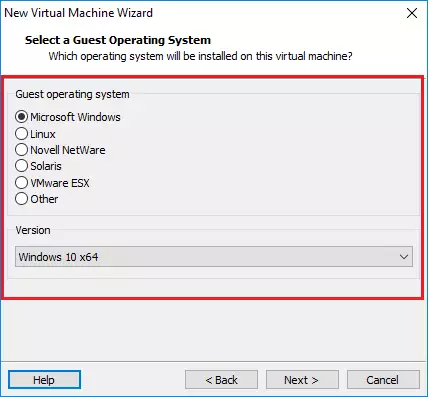
VMware will attempt to configure the OS for you. If it can’t identify the operating system you’re installing, it will provide a wizard to follow and configure the guest machine yourself.
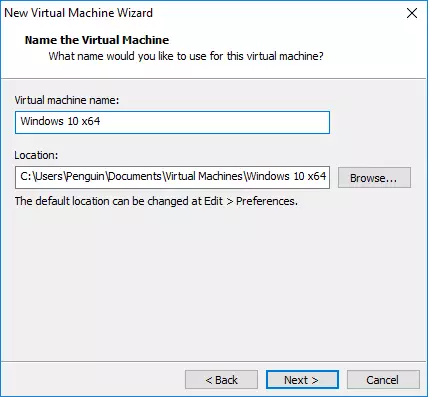
Accept the default Virtual machine name and location or give it to something else and save it somewhere else.
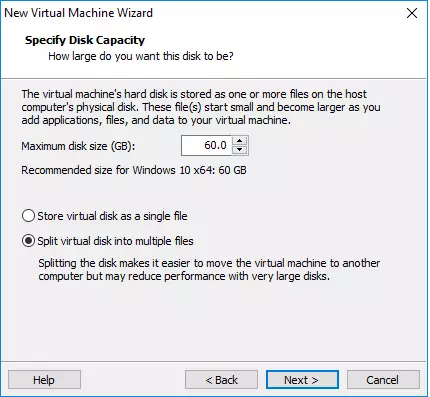
Accept the default maximum disk storage or increase if you need more and continue.
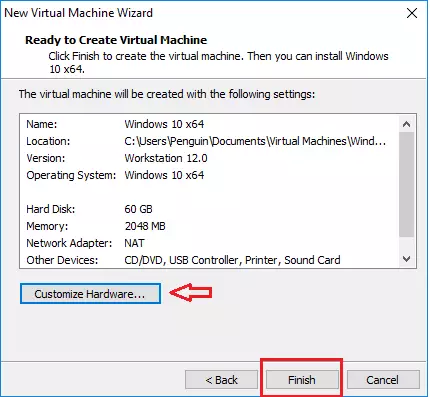
When you’re done, click Finish to complete the Virtual machine creation.
Boot Up and Install Windows 10
Now that the virtual machine is created and the installed disc or ISO image has been added click the green start button to boot up the virtual machine.

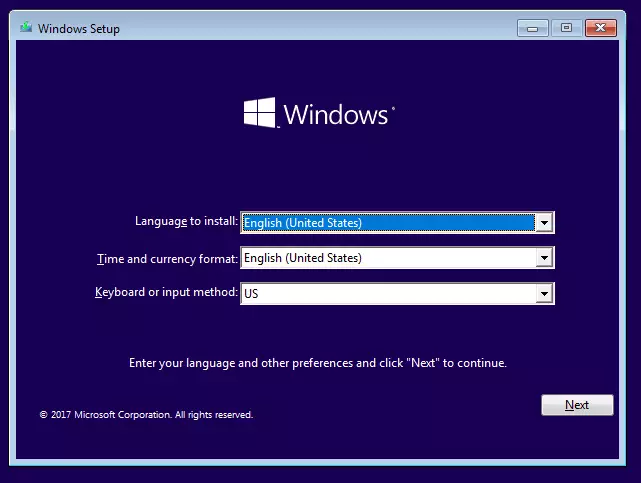
Windows 10 should boot up and begin installing. You must follow the Windows 10 installation wizard until you’re done.
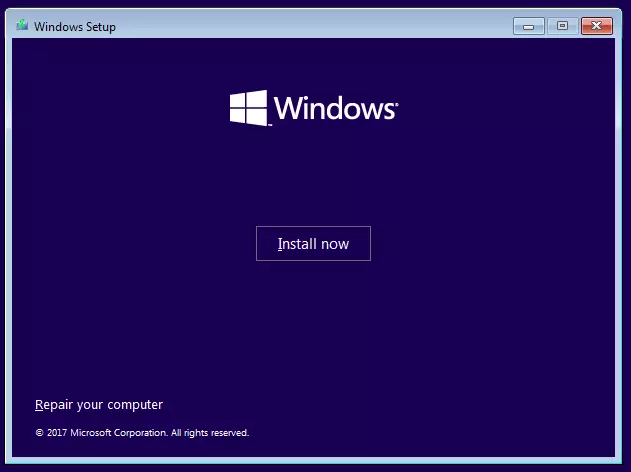
Click Install Now
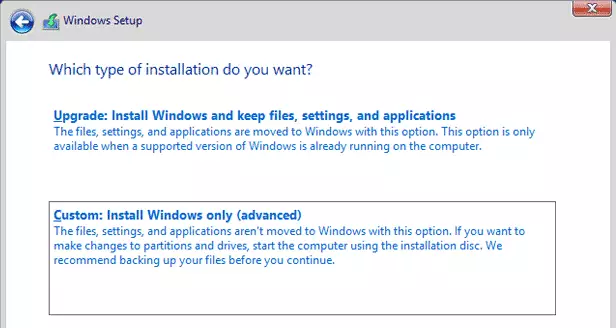
Choose the Custom install option (advanced)
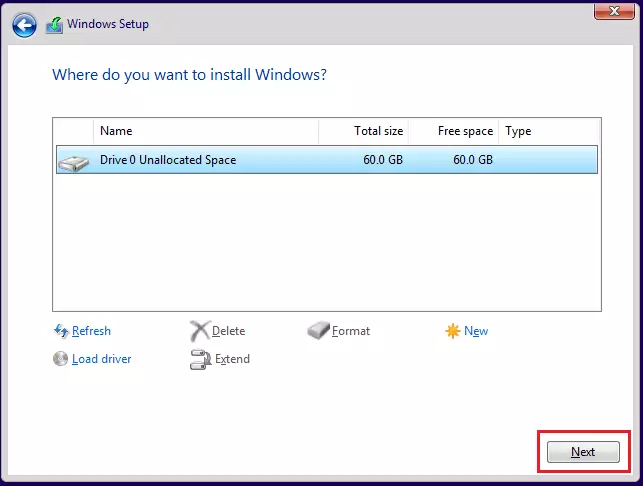
Then select the disk to install on and click Next.
Windows should automatically install and reboot, allow you to create a username/password, and have you sign in.
Sign on to Windows 10 and enjoy!
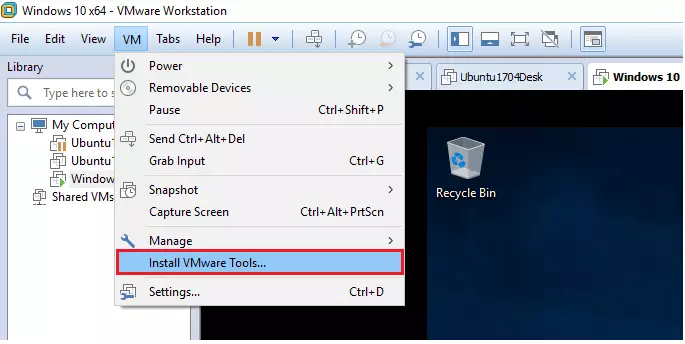
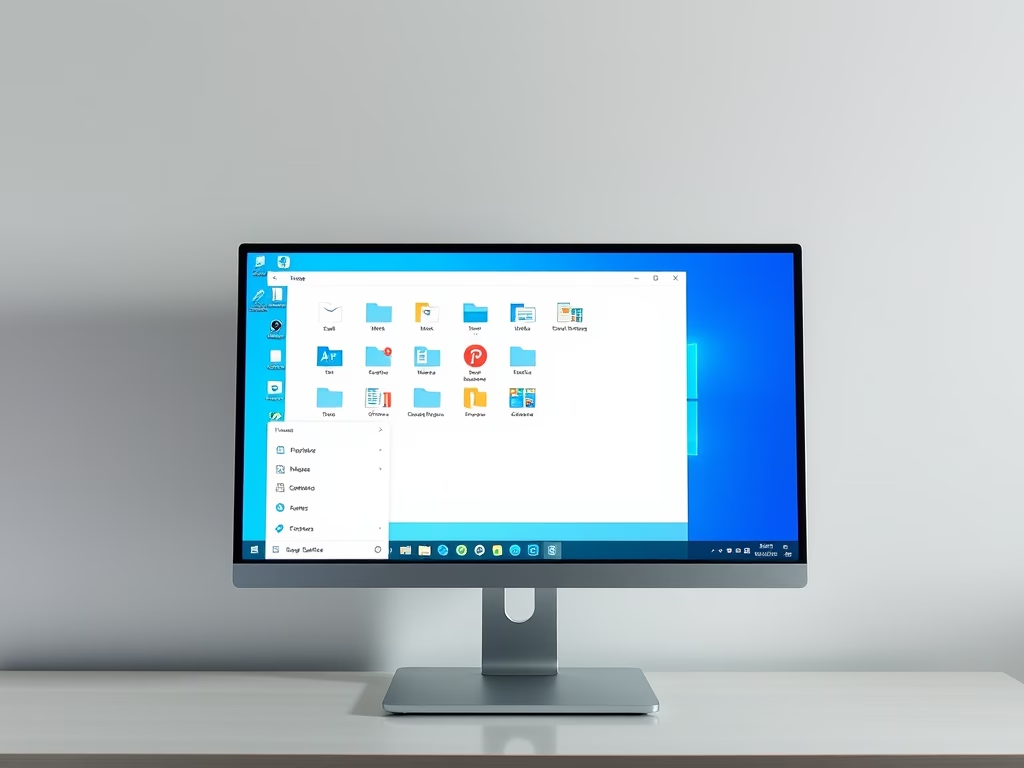
Sign in after the installation and setup, and you first want to install VMware Guest Tools. To do that, click VM –> Install VMware Tools. as shown in the image below.
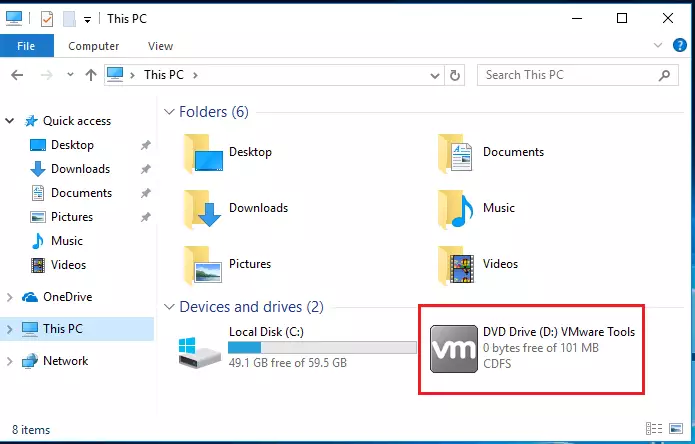
Windows 10 should load the virtual disk drive with the installer. If it doesn’t open automatically, go to File Explorer and launch the installer. Then, follow the wizard to install.
That’s it!
This is how to create a VMware guest machine and install Windows 10.
Leave a Reply Cancel reply