
This brief tutorial shows students and new users how to upgrade the Linux Kernel on Ubuntu 16.04 | 18.04 LTS systems.
The Linux kernel is the core of the Linux distribution ecosystem’s many distributions. Without the Linux kernel, there wouldn’t be operating systems like Ubuntu and the many others that rely on the Linux Kernel.
The kernel sits between the computer hardware and the software(s) that want to use the hardware. The kernel is the middleman and processes requests from software apps requiring the machine to perform some functions or tasks.
The kernel is essential!
If you run older Linux kernels than the computer it runs on, you can use the steps below to upgrade to the latest so supported devices can function correctly.
Update and Verify the Current Kernel
Before upgrading your system kernel, you should do a system backup. Since the kernel is essential, it may render your system inoperable if done incorrectly.
After backing up your system, run the commands below to update Ubuntu.
sudo apt update && sudo apt dist-upgrade && sudo apt autoremove
The command above will update all pending packages and kernel headers. And prompt you to remove unneeded applications and kernels.
Once updated, run the commands below to verify the installed kernel.
uname -r
That should output something similar to the line below:
Output:
4.15.0-48-generic
Now that you know the current working kernel, follow the steps below to upgrade:
Install UKUU Package
UKUU, or Ubuntu Kernel Update Utility, is used to install mainline or the latest versions of the Linux kernels on Ubuntu-based distributions. Unfortunately, it does not come with Ubuntu by default, so you must install it from a third-party PPA repository.
Run the commands below to add the repository and install from there.
sudo add-apt-repository ppa:teejee2008/ppa
sudo apt-get update
sudo apt-get install ukuu
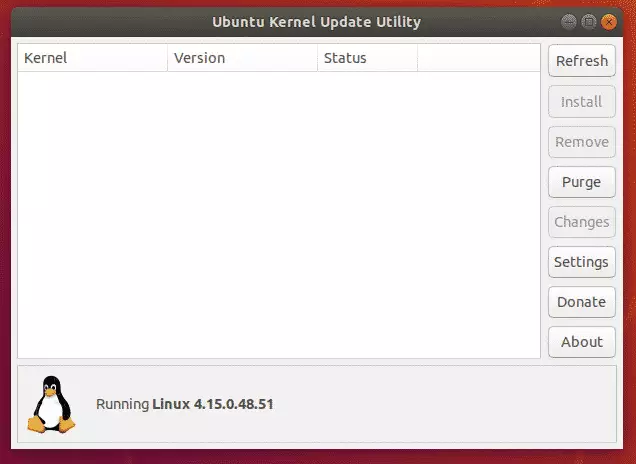
After installing the app, go and launch it from the Activities Overview.

Upgrade Ubuntu Linux Kernel
Now that the app is installed launch it, then refresh it to display all available kernels for your system. From there, you can select the latest version and choose to install it.
Select the latest version from the list. They are listed from top to bottom. Top as the latest and click Install.
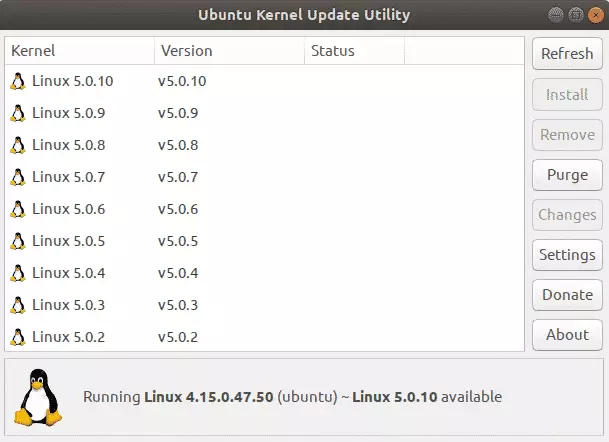
You’ll be prompted to type in your username and password. Do it to continue. Once done, the system will have the latest kernel installed.

A notice will appear that shows you how to reload the previous kernel if something goes wrong. Then, to apply the latest, reboot the machine, and if everything goes well, your system should be running the latest.
Verify all your devices and those that weren’t working previously; test to see if they are.
That should do it!
Congratulations! You have successfully installed UKUU, too, to upgrade the Ubuntu Linux Kernel.
You may also like the post below:
Leave a Reply Cancel reply