This brief tutorial shows students and new users how to install and configure the Monit monitoring package on Ubuntu 16.04 | 17.10 | 18.04 LTS servers.
For those who don’t know about Monit, it is an open-source utility for managing and monitoring Linux systems, including Ubuntu. It can automate, maintain, and repair Linux services, restoring and restarting them. A complete enterprise-grade server and log monitoring system.
This post will show you how to perform a basic configuration after installation. You can also log on to the Monit server once installed.
For more about Monit, please visit its homepage.
When you’re ready, continue below with the steps:
Install Monit Package
To install Monit, run the commands below on the Ubuntu server. Most Linux distributions include Monit. Please consult with your package manager. You may also want to check that they have a recent Monit version.
sudo apt update
sudo apt install monit
After installing Monit, the commands below can be used to stop, start, and enable the Monit service.
sudo systemctl stop monit.service
sudo systemctl start monit.service
sudo systemctl enable monit.service
Configure Monit Service
Monit configuration files are located under the/etc/monit/ directory. The main configuration file is /etc/monit/monitrc and has a basic setup configured in it. You’ll need to make some changes to suit your environment.
By default, all files located on /etc/monit/conf.d/ and /etc/monit/conf-enabled/ are read by monit when the service is started. Therefore, use the /etc/monit/conf.d/ directory to put all your monitoring configuration files.
You can have as many files as you want. Or group each service into a single file.
Open the Monit main config file, make the highlighted changes below, and save the file.
sudo nano /etc/monit/monitrc
The highlighted changes will allow HTTP access to the Monit web interface.
## for this is that the Monit client uses the HTTP interface to send these
## commands to a running Monit daemon. See the Monit Wiki if you want to
## enable SSL for the HTTP interface.
#
 set httpd port 2812 and
     use address localhost  # only accept connection from localhost
     allow localhost        # allow localhost to connect to the server and
     allow admin:monit      # require user 'admin' with password 'monit'
#     #with ssl {            # enable SSL/TLS and set path to server certificate
#     #    pemfile: /etc/ssl/certs/monit.pem
#     #}
With the settings above, you should be able to login to the Monit server via the localhost name or IP and username: admin, password: monit
Save your changes and exit.
Restart the Monit service by running the commands below:
sudo systemctl restart monit.service
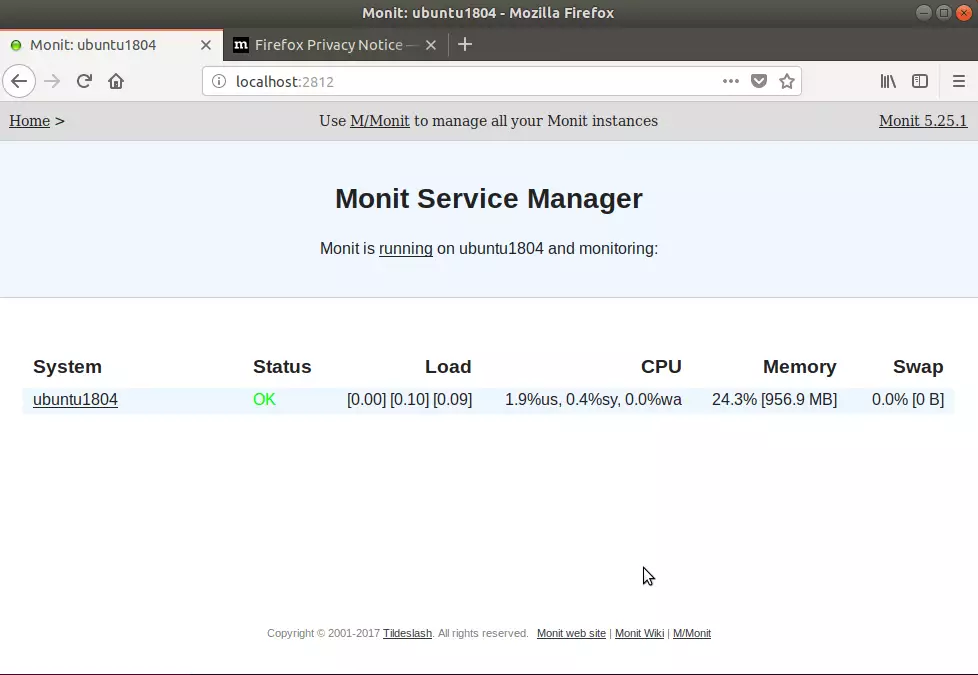
Access Monit Web Portal
Now that the Monit server has been installed and access is allowed from the local machine, use the address below to access the Monit portal.
http://localhost:2812
With username: admin and password monit as defined in the configuration file above.
By default, not much is being monitored by Monit. However, you can add custom monitoring services by creating them in the /etc/monit/conf.d/ directory. For example, to monitor the Apache2 service, create a custom config file called apache2.conf in the /etc/monit/conf.d/ directory.
sudo nano /etc/monit/conf.d/apache2.conf
Then add the lines below:
# Apache configuration
check process apache2 with pidfile /run/apache2/apache2.pid
    start program = "/bin/systemctl start apache2" with timeout 60 seconds
    stop program  = "/bin/systemctl stop apache2"
    restart program = "/bin/systemctl restart apache2" with timeout 120 seconds
Finally, save the file and run the commands below to Monit to monitor Apache2.
sudo monit check -t
sudo monit reload
sudo monit start all
Check this page for Monit examples of how to configure custom configurations. https://mmonit.com/wiki/Monit/ConfigurationExamples#apache
You should see the Apache2 service initializing/running in the portal online.

That’s it!
You may also like the post below:


Leave a Reply Cancel reply