
This post describes the steps to enable or disable shadow under the mouse pointer in Windows 11.
Windows 11 has a standard mouse pointer size and color, which is small and white. Unfortunately, the tiny default size usually isn’t helpful, especially for people with poor vision.
With wide screens and higher resolutions, spotting the mouse pointer across bigger areas or even double screens cannot be easy.
One Windows feature that may help people with poor vision is to turn on the mouse pointer shadow. When this is on, it helps make the mouse stand out on your screen so you can see it better.
Another helpful post we have written to help you quickly locate the mouse pointer on your screen can be found here and here.
So, continue below to learn how to enable mouse pointer shadow in Windows 11.
How to enable shadow under the mouse pointer in Windows 11
As described above, if you are having difficulties locating the mouse pointer on your screen, you can enable mouse pointer shadow to help you locate your mouse quickly.
Below is how to do that.
Windows 11 has a centralized location for the majority of its settings app. From system configurations to creating new users and updating Windows, all can be done from the System Settings pane.
To get to the System Settings, you can use the Windows key + I shortcut or click on Start ==> Settings, as shown in the image below:

Alternatively, you can use the search box on the taskbar and search for Settings. Then select to open it.
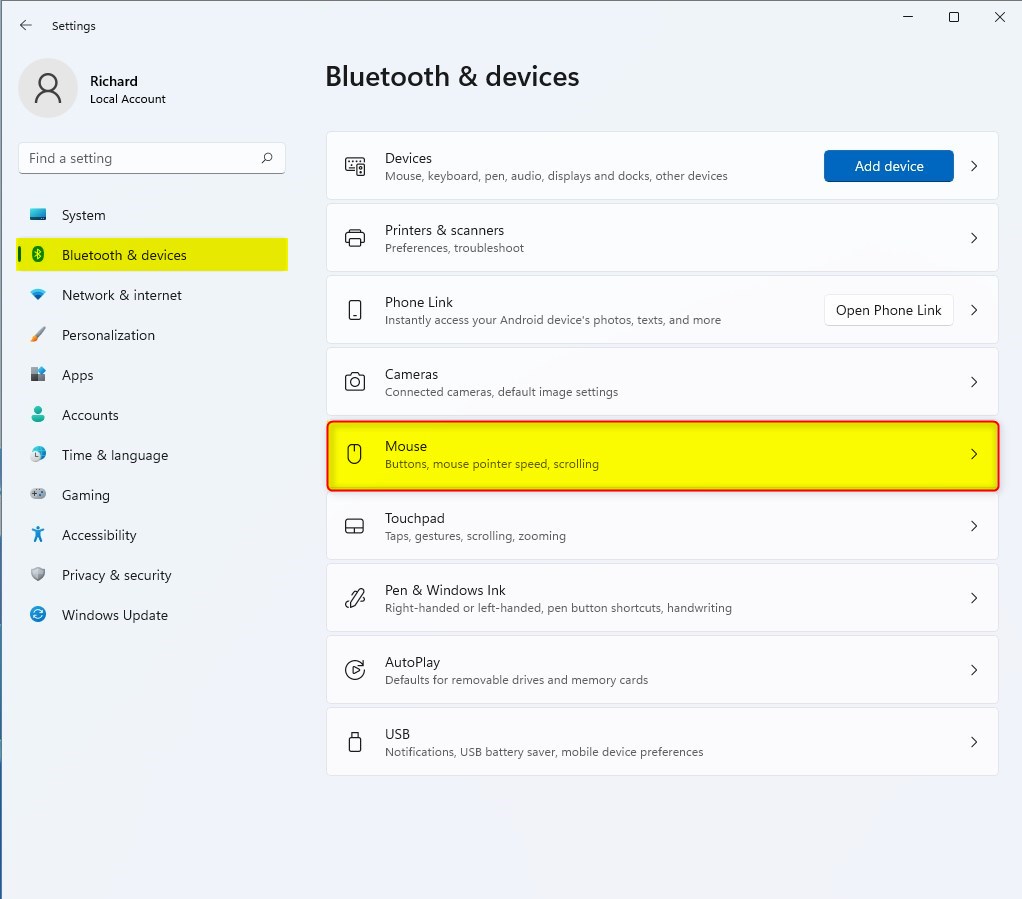
Windows Settings pane should look similar to the image below. In the Windows Settings app, click Bluetooth & devices, and select the Mouse tile on the right, as shown in the image below.
On the Bluetooth & devices -> Mouse settings pane, under Related settings, click on Additional mouse settings as highlighted below.

Select the Pointer tab on the Mouse Properties window and check or uncheck the box “Enable pointer shadow” to enable or disable this feature.
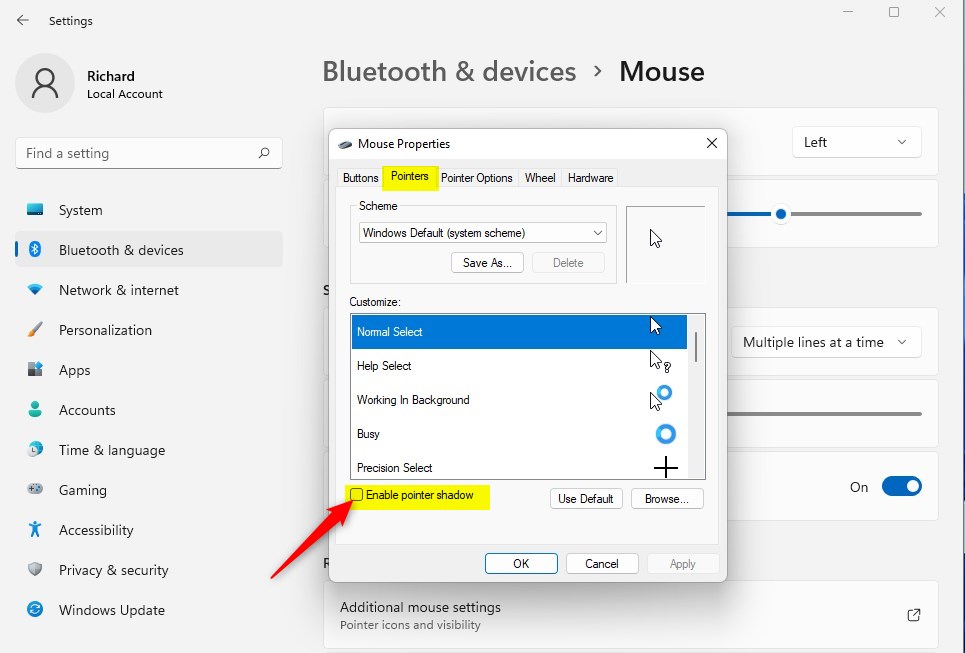
Click OK to save your changes and exit.
Alternatively, you can use the classic Control Panel app to change the date format.
Click the Start button, and then search for and select the Run app. In the box, type the command below and press Enter.
SystemPropertiesPerformance.exe

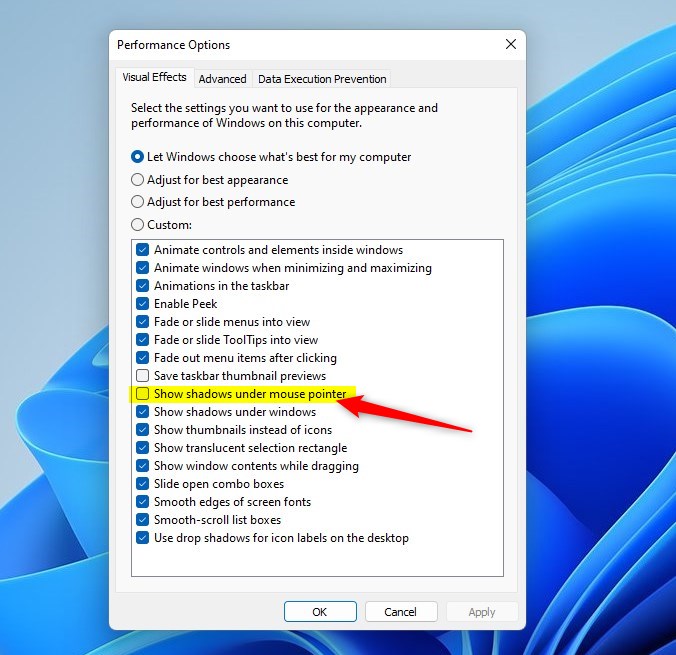
When the SystemPropertiesPerformance window opens, under the Visual Effects tab, check or uncheck the box “Show shadow under mouse pointer” to enable or disable the feature.
That should do it!
Conclusion:
- Enabling mouse pointer shadow in Windows 11 can significantly improve visibility for users with poor vision, especially on wide screens and higher resolutions.
- The centralized Windows Settings pane allows users to enable or disable the mouse pointer shadow by accessing the Mouse settings under Bluetooth & devices.
- Alternatively, users can access the classic Control Panel app by using the Run app and the command “SystemPropertiesPerformance.exe” to make the same changes.
- By following these simple steps, users can quickly enhance their Windows 11 experience and make the mouse pointer more visible on their screens.


Leave a Reply Cancel reply