
This article explains how to enable or disable “Let Windows manage my default printer” in Windows 11.
When you connect a printer to your PC or add a new printer to your home network, you can usually start printing immediately. In many cases, you won’t have to install a printer driver for your printer to work.
Windows 11 has many printer drivers that are already installed and ready to use.
By default, Windows automatically makes the last printer used as your default printer. Your default printer is automatically selected in your print dialog box.
Your default printer is selected because a “Let Windows manage my default printer” feature is automatically turned on or enabled. With this, Windows sets your printer for you, even if it’s not your favorite.
Below is how to turn off or on “Let Windows manage my default printer” in Windows 11.
How to disable or enable “Let Windows manage my default printer” in Windows 11
As mentioned above, the last printer you used to print will automatically be assigned as your default printer in Windows. This is done because you allow Windows to manage your default printer.
Below is how to disable or re-enable this feature.
- Select Start > Settings.
- Go to Bluetooth & devices > Printers & scanners > select a printer. Then select Set as default.
- If you don’t see the Set as the default option, the Let Windows manage my default printer option may be selected. You’ll need to clear that selection before you can choose a default printer on your own.
Windows 11 has a centralized location for the majority of its settings. Everything can be done, from system configurations to creating new users and updating Windows from its System Settings pane.
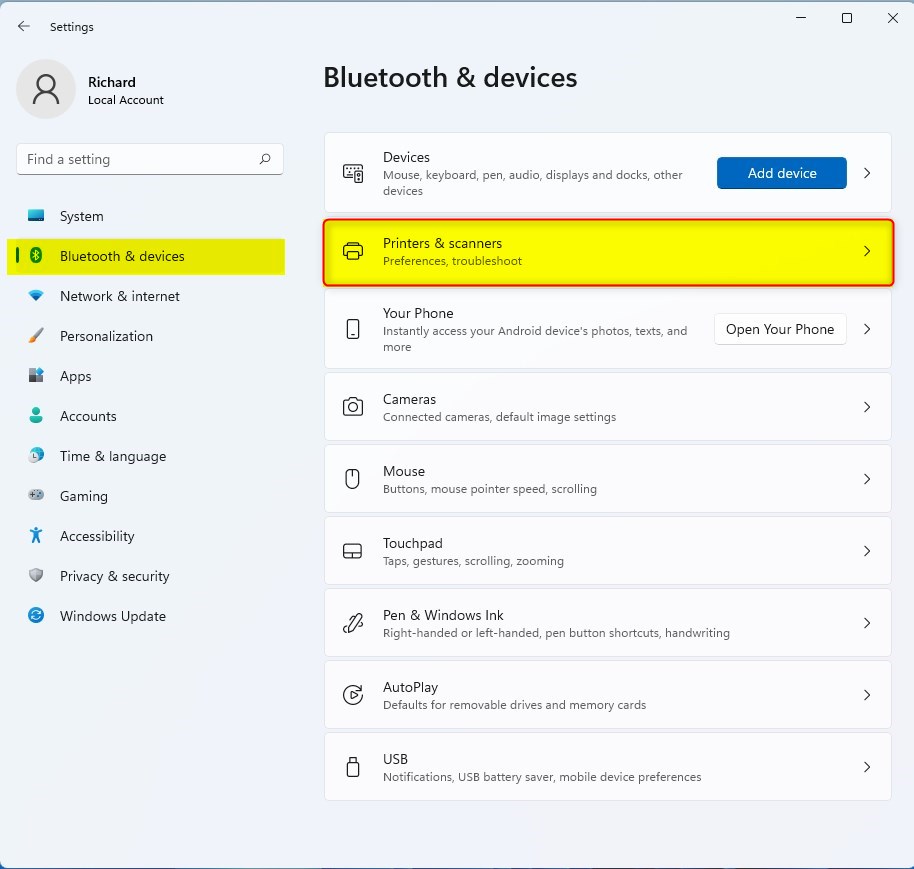
To get to System Settings, you can use the Windows key + I shortcut or click on Start ==> Settings, as shown in the image below:

Alternatively, you can use the search box on the taskbar and search for Settings. Then select to open it.
Windows Settings pane should look similar to the image below. For example, click Bluetooth & devices in Windows Settings, then select the Printers & scanners tile on the right pane as highlighted in the image below.
On the Bluetooth & devices > Printers & scanners settings pane, under Printer preferences, select the Let Windows manage my default printer tile and toggle the switch to the On or Off position to enable or disable Windows managing your default printer.
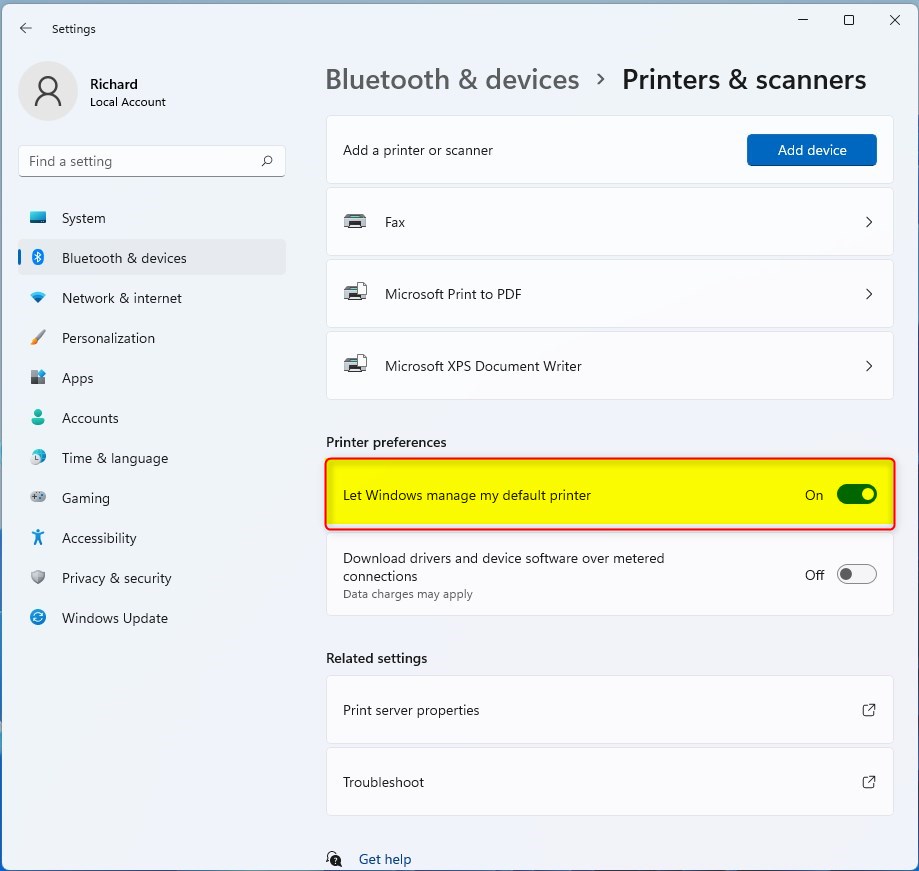
That should do it!
Conclusion:
- Enabling or disabling the “Let Windows manage my default printer” feature in Windows 11 is straightforward and can be done through the Windows Settings pane.
- By following the provided steps, users can take control of their default printer assignment, ensuring they can seamlessly select their preferred printer for their printing needs.
- Understanding how to manage default printers in Windows 11 can lead to a more efficient and personalized printing experience for students and new users.
Leave a Reply