
This article explains how to enable or disable a cellular network adapter in Windows 11.
If your Windows 11 device has a built-in SIM or eSIM card with network connectivity, you can connect to a cellular data network anywhere there’s a cellular signal.
If your device has no built-in SIM card, you may be able to connect an external cellular adapter to a cellular network anywhere you get a signal.
Cellular connections work similarly to Wi-Fi and hotspot connections, where you can connect to available networks simply by knowing the connection credentials. Once connected, you can browse, send emails, and perform other network activities.
How to enable or disable the cellular Network in Windows 11
As mentioned above, if your Windows 11 device has a built-in SIM or eSIM card with network connectivity, you can connect to a cellular data network anywhere there’s a cellular signal.
Below is how to enable or disable the cellular network adapter in Windows 11
Windows 11 has a centralized location for the majority of its settings. Everything can be done, from system configurations to creating new users and updating Windows from its System Settings app.
To get to System Settings, you can use the Windows key + I shortcut or click on Start ==> Settings, as shown in the image below:

Alternatively, you can use the search box on the taskbar to search for Settings. Then select to open it.
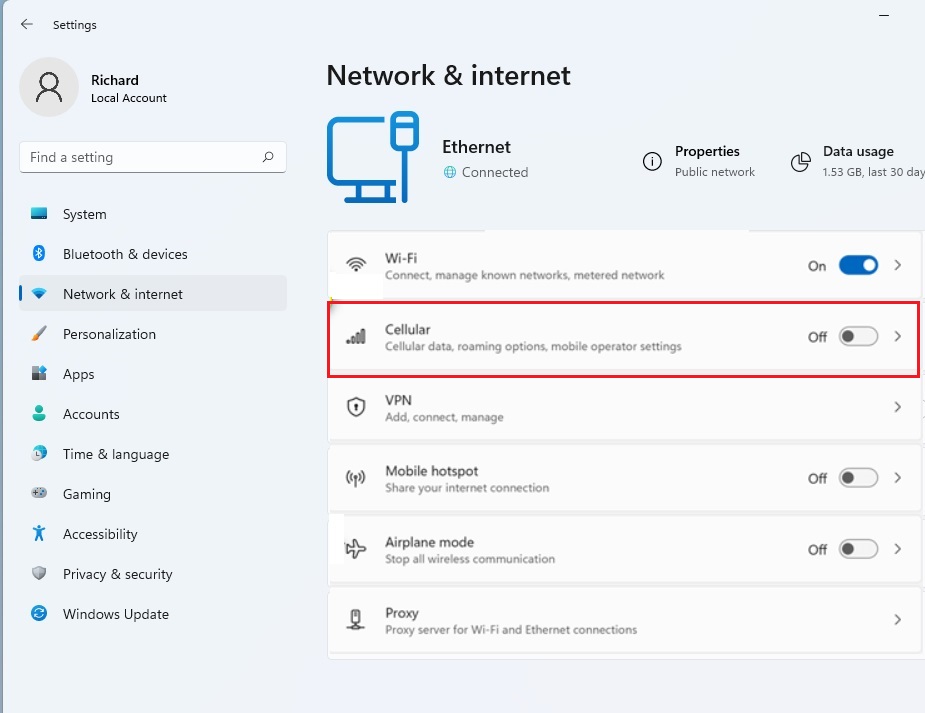
In Windows Settings, click Network & Internet, and select the Cellular tile on the right pane of your screen, shown in the image below.

Toggle the Cellular switch to On to enable cellular network connection in Windows 11.
To disable, go to Start > Settings > Network & internet > Cellular and toggle the switch to the Off position.
That should do it!
Conclusion:
- Enabling or disabling the cellular network adapter in Windows 11 is a straightforward process that can be accessed through the System Settings app or via the search box on the taskbar.
- Users can toggle the Cellular switch to On or Off within the Network & Internet settings to enable or disable the cellular network connection.
- Whether using a built-in SIM, eSIM card, or an external cellular adapter, Windows 11 offers the flexibility to connect to a cellular data network and enjoy seamless browsing and network activities from anywhere with a cellular signal.

Leave a Reply Cancel reply