AutoPlay is a feature in Windows 11 that lets your computer decide what to do when you plug in devices like USB drives, cameras, or CDs. For example, it can open your photos automatically or play music right away. If you want, you can turn this feature on or off — here’s how to do it in simple steps.
What is AutoPlay?
When you plug in a device or insert a DVD or USB stick, Windows can automatically open files or ask you what to do. This is AutoPlay in action. You can change these settings anytime to make your computer work just how you like.
Turn AutoPlay On or Off Using Settings
Follow these easy steps to enable or disable AutoPlay from the Windows Settings app:
- Open Settings: Click the Start button (Windows icon) at the bottom left, then click Settings. Or press Windows key + I on your keyboard to open it quickly.
- Go to Bluetooth & Devices: In the Settings window, click Bluetooth & devices on the left side.
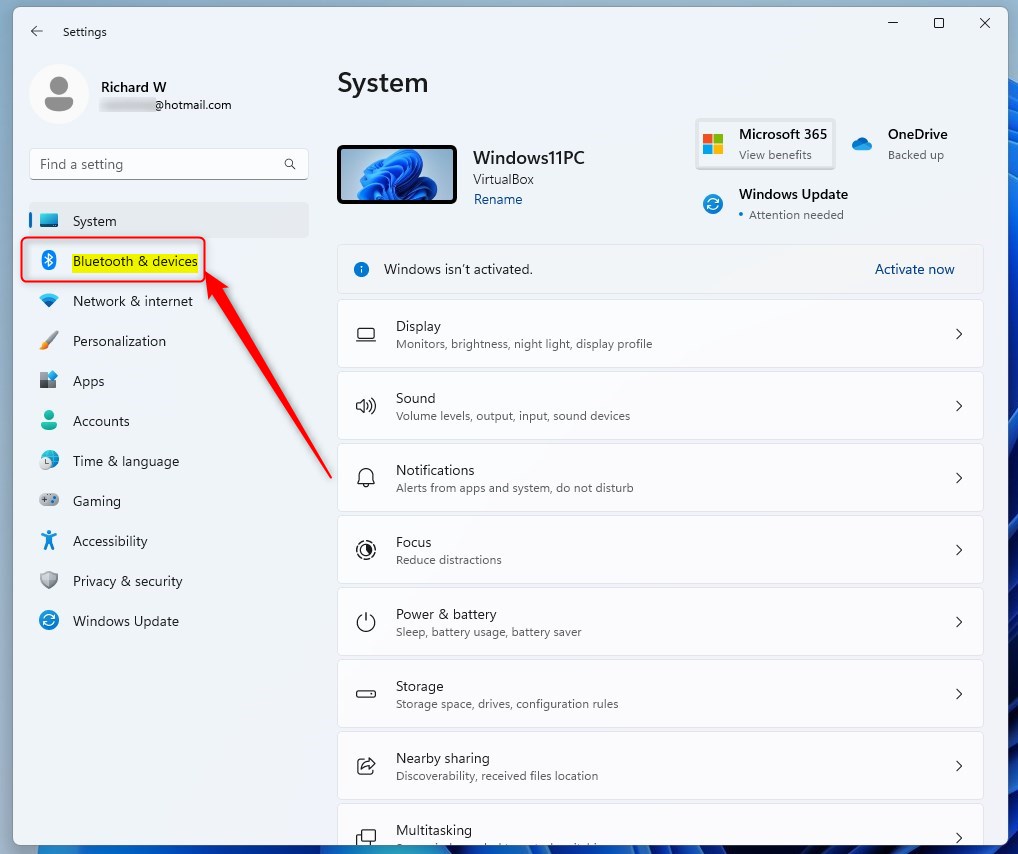 Windows 11 Bluetooth and devices settings
 - Click on AutoPlay: Find and click the AutoPlay option on the right side.
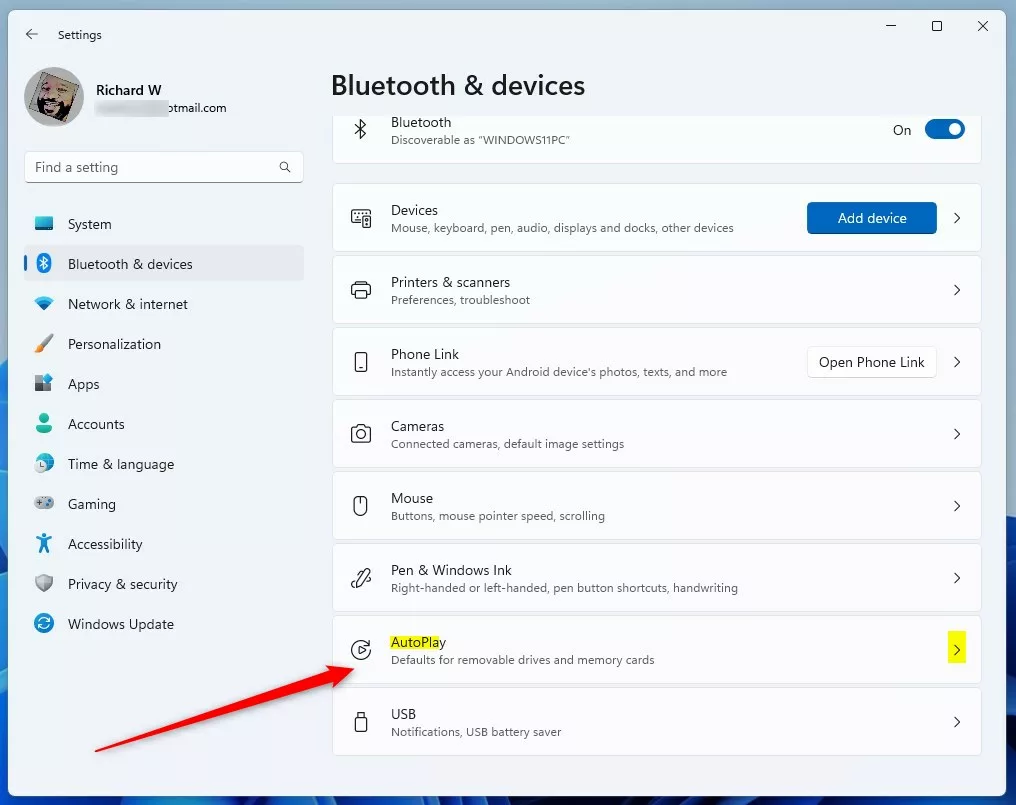
AutoPlay settings tile in Windows 11 - Switch AutoPlay On or Off: Use the toggle button to turn AutoPlay On or Off.
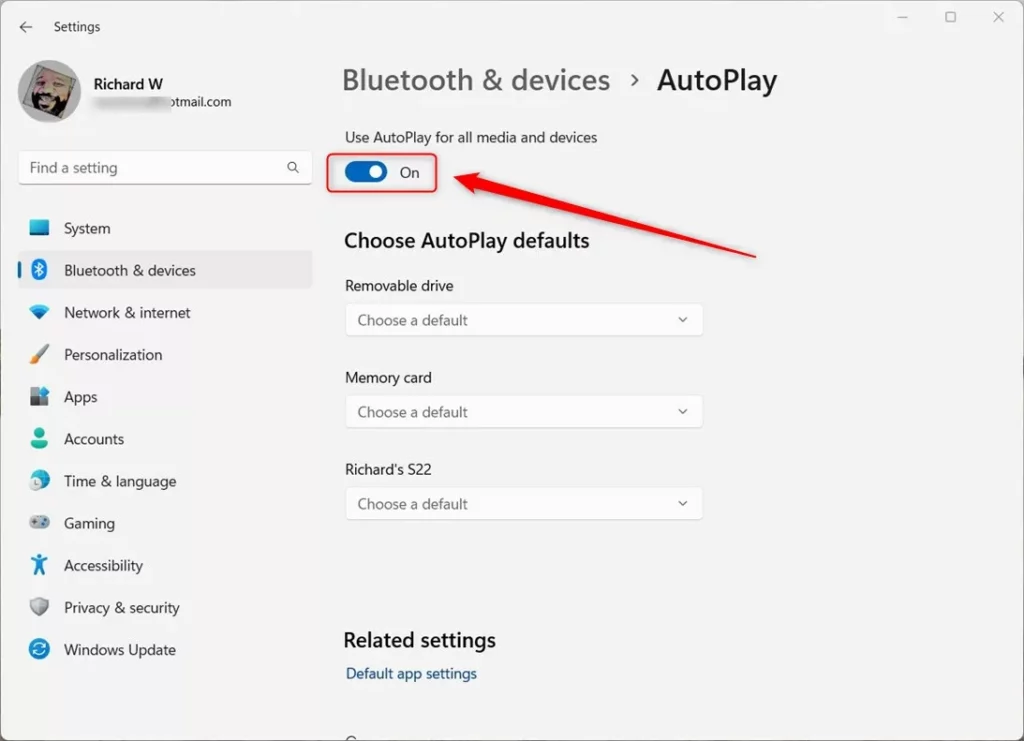
Turn AutoPlay on or off from Settings - Close the Settings window when you’re done.
Turn AutoPlay On or Off Using Control Panel
If you prefer, you can also change AutoPlay settings through the Control Panel:
- Open Control Panel: Press the Windows key, type Control Panel, and press Enter.
- Go to AutoPlay settings: Navigate to Hardware and Sound > AutoPlay.
- Control Panel → Hardware and Sound → AutoPlay
- Enable or disable AutoPlay: Check the box that says Use AutoPlay for all media and devices to turn it on, or uncheck it to turn it off.
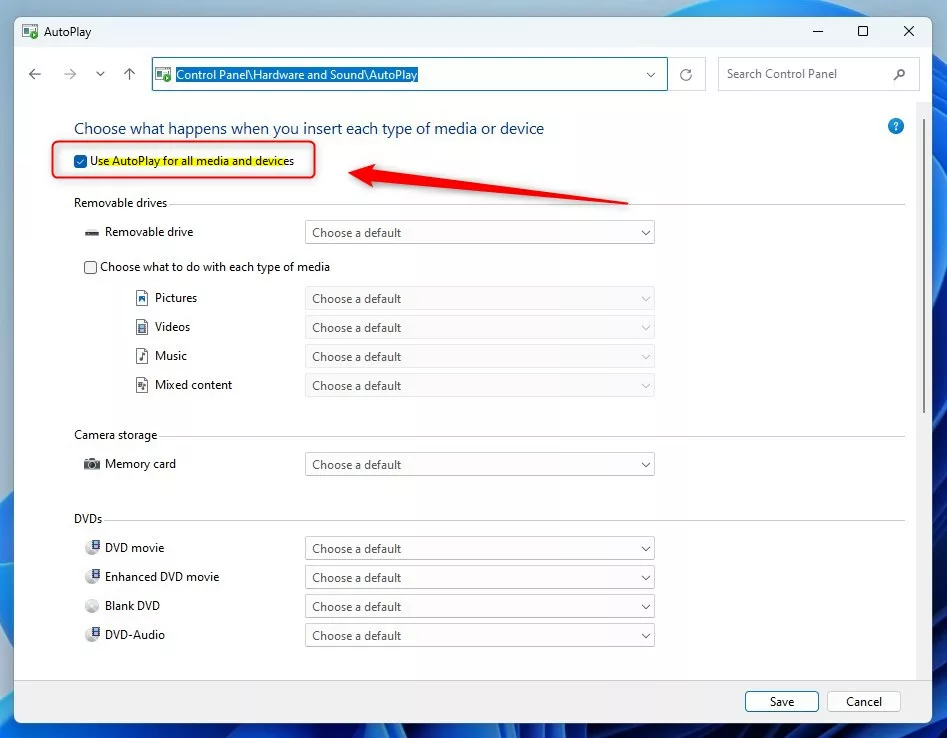
Control AutoPlay from the Control Panel - Click Save or OK if available, then close the Control Panel.
Turn AutoPlay On or Off Using Windows Registry (Advanced)
Note: This method is for advanced users. Changing the Windows Registry incorrectly can cause problems. Be sure to follow the steps carefully.
- Open Registry Editor: Press Windows key + R, type regedit, and press Enter.
- Navigate to this folder path:
HKEY_CURRENT_USERSoftwareMicrosoftWindowsCurrentVersionExplorerAutoplayHandlers
- If you don’t see the AutoplayHandlers folder, right-click on the Explorer folder, select New > Key, and name it AutoplayHandlers.
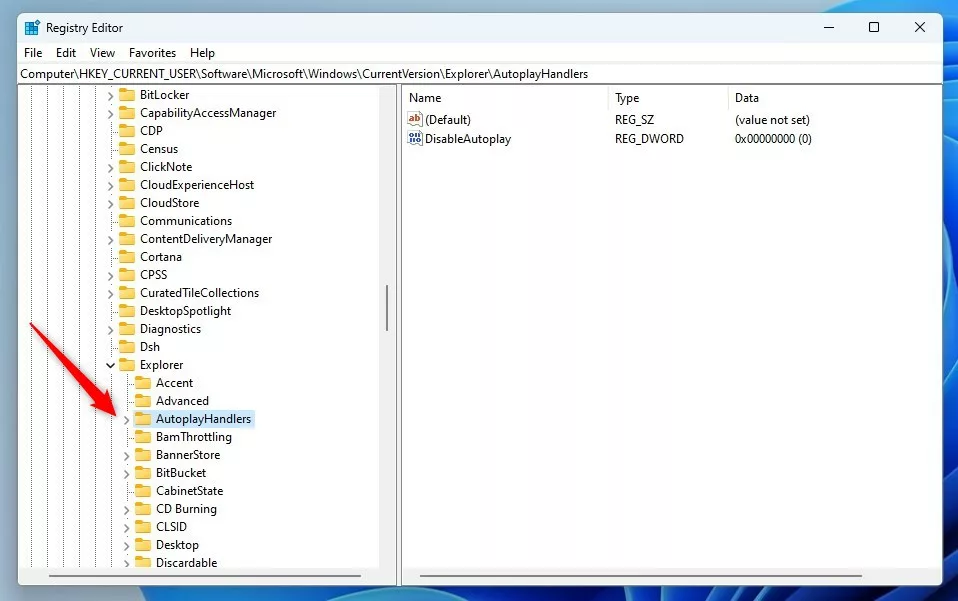
AutoPlay folder inside Windows Registry Editor - Right-click inside the right pane, choose New > DWORD (32-bit) Value, and name it DisableAutoplay.
- Double-click DisableAutoplay, set the Base to Decimal, and enter the value:
- 0 to turn AutoPlay on
- 1 to turn AutoPlay off
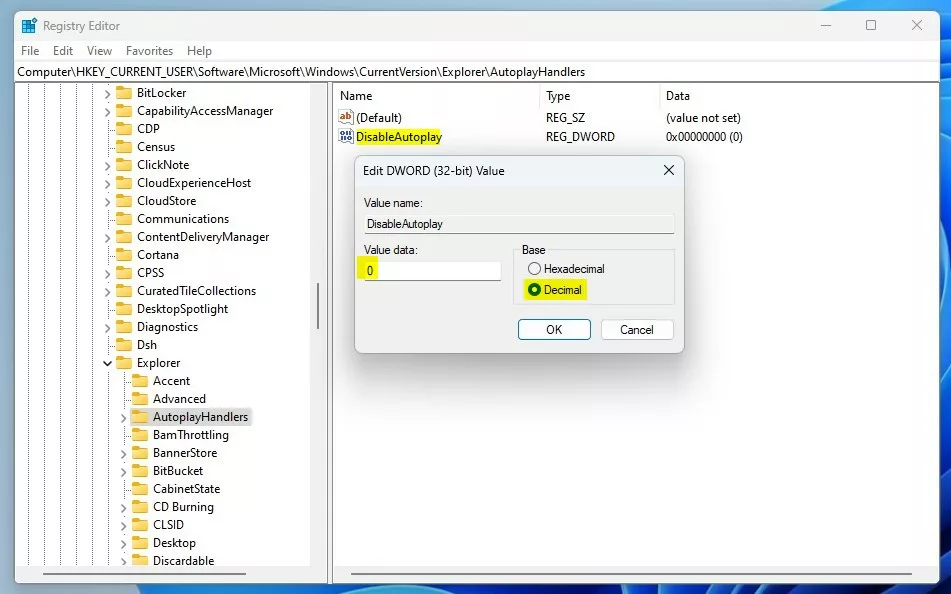
Setting AutoPlay On/Off value in Registry
- Click OK to save, close Registry Editor, and restart your computer.
Quick Tip
If you want to skip AutoPlay temporarily when inserting a device, hold down the Shift key while plugging it in. This will show you the AutoPlay prompt regardless of your settings.
Summary
- You can easily turn AutoPlay on or off to control how Windows 11 handles devices and media.
- Use the Settings app for the simplest way, or Control Panel if you prefer the classic interface.
- Advanced users can use the Registry Editor to customize AutoPlay more deeply.
- Remember to save your changes and restart if needed.
With these tips, you can make sure your Windows 11 PC works just the way you want when you plug in devices!

Leave a Reply Cancel reply