
This article explains how to change the display orientation when using Windows 11.
By default, Windows can rotate your screen without additional software. Windows can adjust the screen to the correct orientation if you have a rotated display.
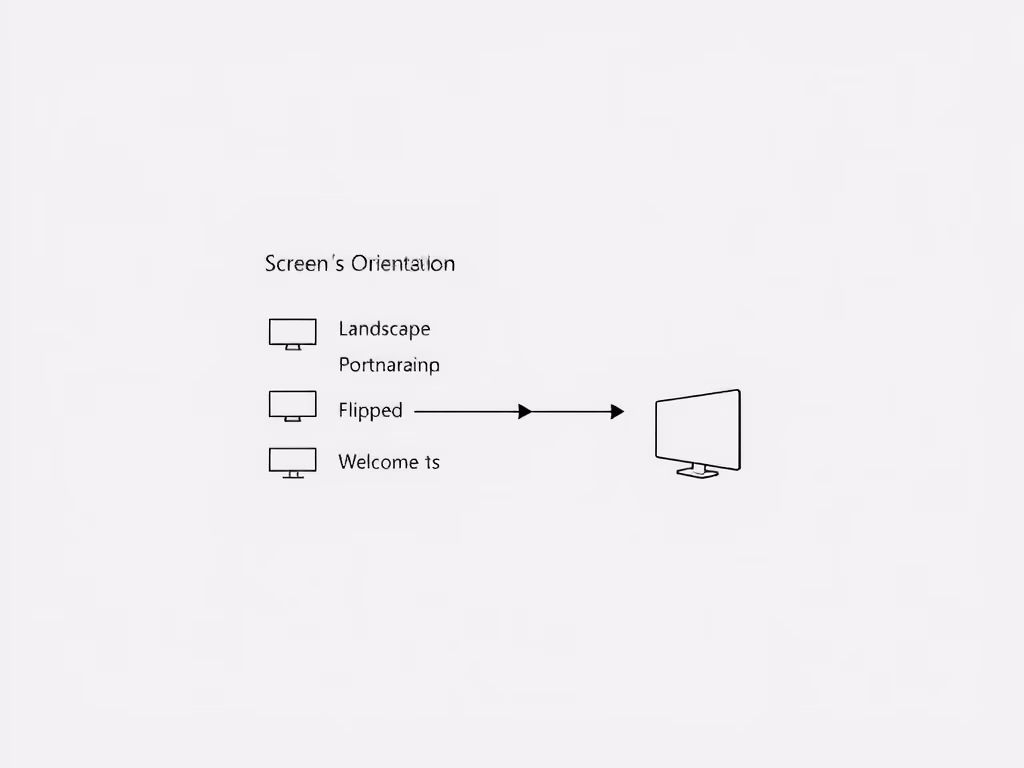
Windows 11 supports different screen orientations. You can easily change your screen orientation to landscape, portrait, landscape (flipped), or portrait (flipped). This setting is automatic for some tablet and mobile devices, and the screen orientation changes when the device rotates.
Some hotkeys can rotate your screen, too, and if one of these hotkeys is accidentally pressed, users get confused when their display is suddenly in landscape mode when it should be in portrait.
If you have a graphics card from Intel, NVIDIA, or AMD, this software may also offer options to rotate your PC’s screen. However, the built-in Windows option should work on all PCs. If Windows can’t rotate your screen, you may want to use the options on your graphics card.
How to rotate the display in Windows 11
As mentioned above, one can easily change their screen orientation to landscape, portrait, landscape (flipped), or portrait (flipped) in Windows 11.
The steps below show you how.
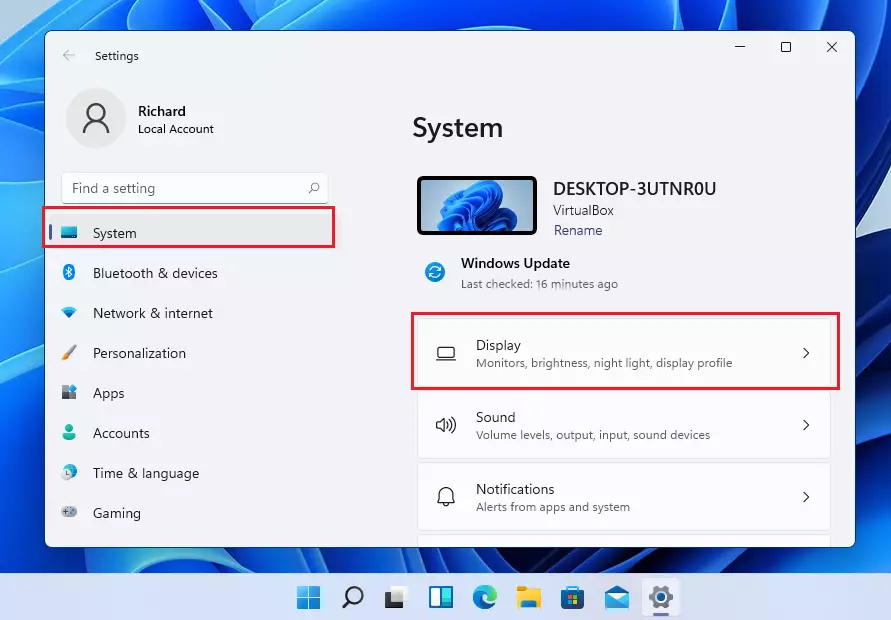
Windows 11 has a centralized location for the majority of its settings. Everything can be done, from system configurations to creating new users and updating Windows from its System Settings pane.
To get to System Settings, you can use the Windows key + I shortcut or click on Start ==> Settings, as shown in the image below:

Alternatively, you can use the search box on the taskbar to search for Settings. Then select to open it.
In Windows Settings, click System, then select the Display tile on the right pane of your screen, as shown in the image below.
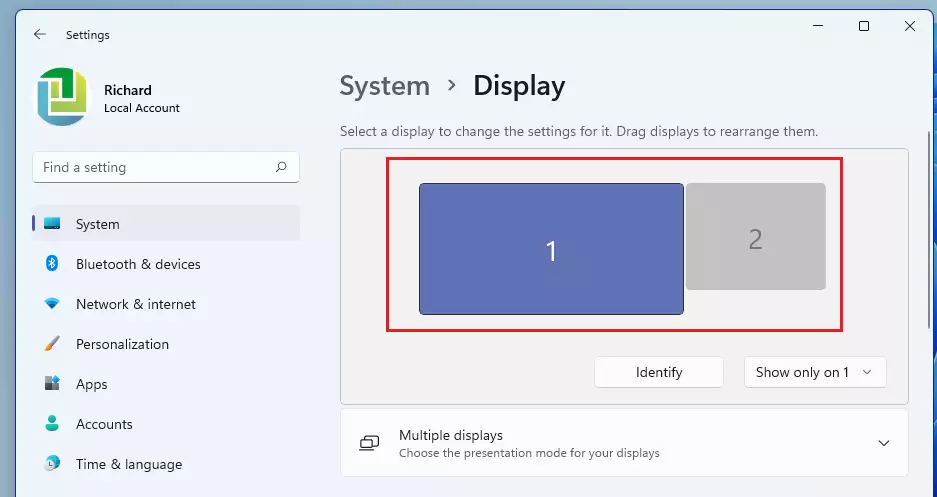
Select the monitor you want to change the orientation of on the Display settings pane. If you have more than one display, then select the correct one. (ex. Display 1, 2, 3, etc..).
Next, scroll down, and under the Scale & layout, choose the display orientation you want. Your options are Landscape (default), Portrait, Landscape (flipped), or Portrait (flipped).
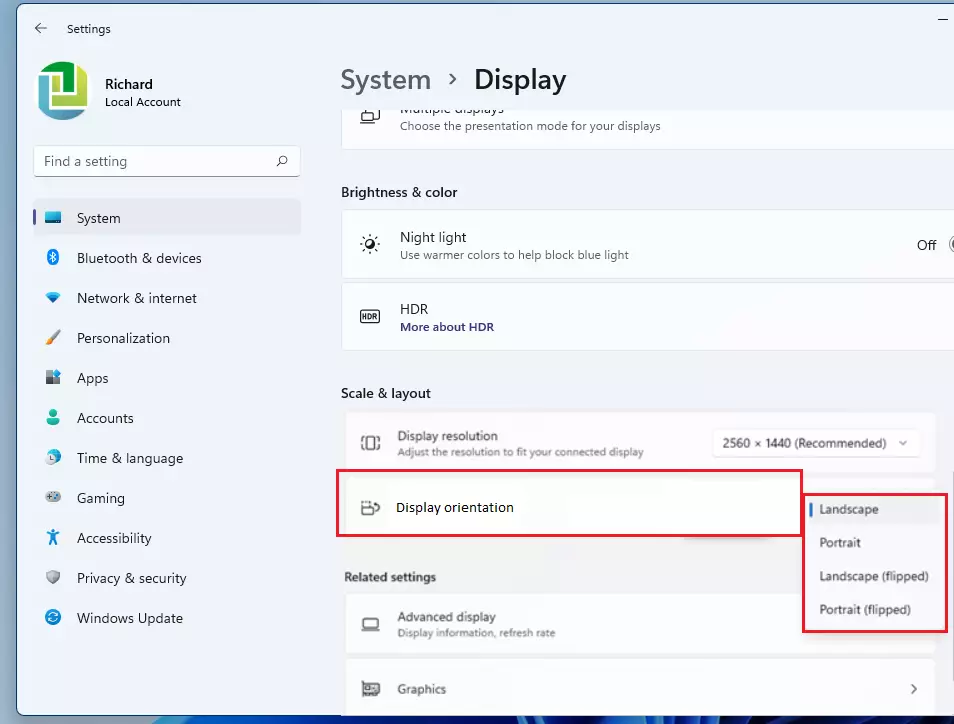
When you choose a display orientation, you’ll be prompted to decide whether to keep the new settings, and you have 20 seconds to decide. If you don’t decide within 20 seconds, the changes will be reverted to the previous state.
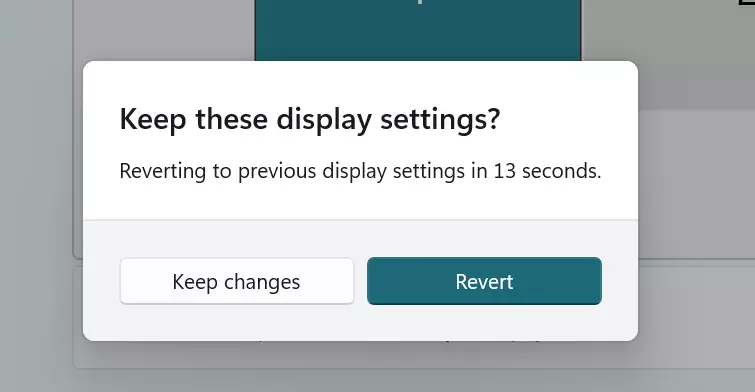
If the changes are ok, click the Keep changes button to keep the new display settings.
How to change display orientation with keyboard shortcuts in Windows 11
One can also change the screen orientation in Windows 11 using keyboard shortcuts. The keyboard shortcuts below will give you the same results as described above.
- Ctrl + Alt + Up arrow = Rotates display orientation to landscape. (default)
- Ctrl + Alt + Down arrow = Rotates display orientation to upside down.
- Ctrl + Alt + Right arrow = Rotates display orientation 90 degrees to the Right.
- Ctrl + Alt + Left arrow = Rotates display orientation 90 degrees to the left.
That should do it!
Conclusion
- Windows 11 provides an easy way to change your display orientation, whether you prefer landscape or portrait modes.
- The built-in settings in the System Settings pane make adjusting your screen orientation straightforward.
- Keyboard shortcuts offer a quick alternative for users who prefer to make changes without using the mouse.
- If you encounter issues with screen rotation, check your graphics card settings for additional options.
- Familiarizing yourself with these methods can enhance your overall user experience on Windows 11.


Leave a Reply Cancel reply