
This post shows students and new users steps to turn On or Off contributing voice clips to Microsoft in Windows 11.
Voice clips are audio recordings of what you say when you use your voice to interact with Microsoft products and services. For example, when you use your voice to talk to your PC, Windows speech recognition technology automatically generates the audio of what you say into words.
Microsoft uses voice clips to help train its speech recognition technology to be better, more accurate, and more precise for you and everyone who speaks your language.
Windows has opt-in voice settings that allow you to allow Microsoft to sample and listen to these voice clips to improve its speech recognition technology.
Below is how to enable or disable submitting voice clips to Microsoft.
How to turn on or off contributing voice clips to Microsoft in Windows 11
As mentioned above, Microsoft uses voice clips to help train their speech recognition technology to be better, more accurate, and more precise for you and everyone who speaks your language.
You can opt out of contributing voice clips to Microsoft by turning the settings off.
Below is how to do that.
Windows 11 has a centralized location for the majority of its settings. As a result, everything can be done, from system configurations to creating new users and updating Windows from its System Settings pane.
To get to System Settings, you can use the Windows key + I shortcut or click on Start ==> Settings, as shown in the image below:

Alternatively, you can use the search box on the taskbar and search for Settings. Then select to open it.
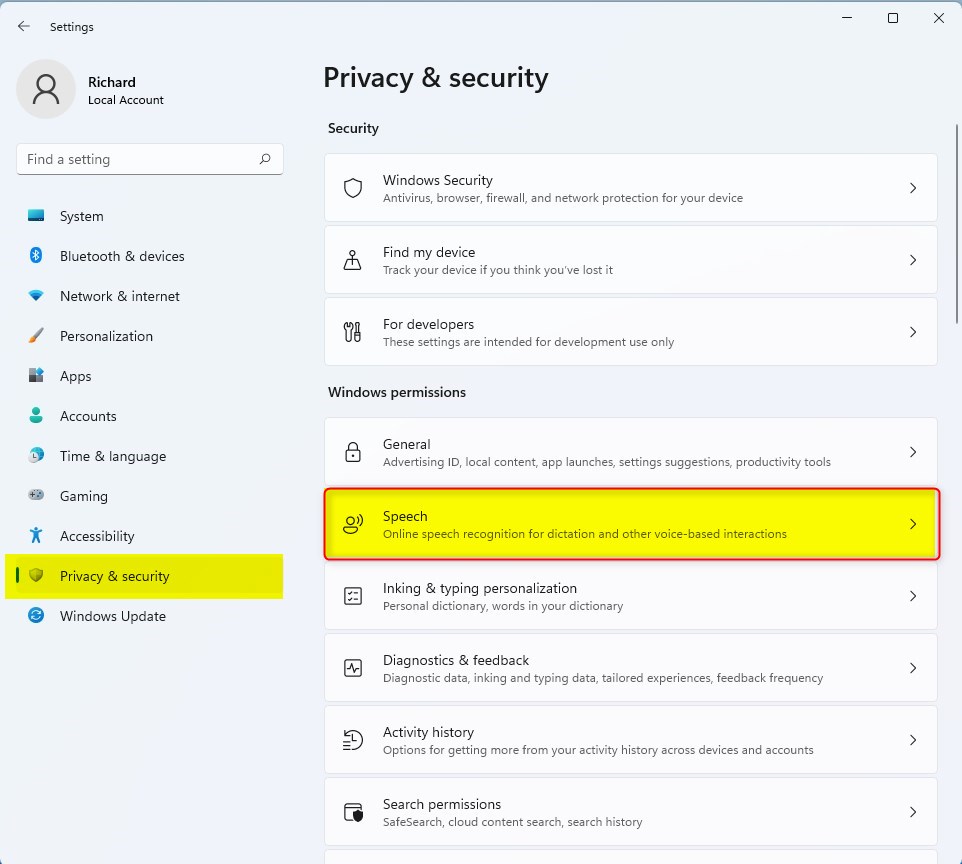
Windows Settings pane should look similar to the image below. For example, click Privacy & Security in Windows Settings, then select the Speech tile on the right pane, as highlighted in the image below.
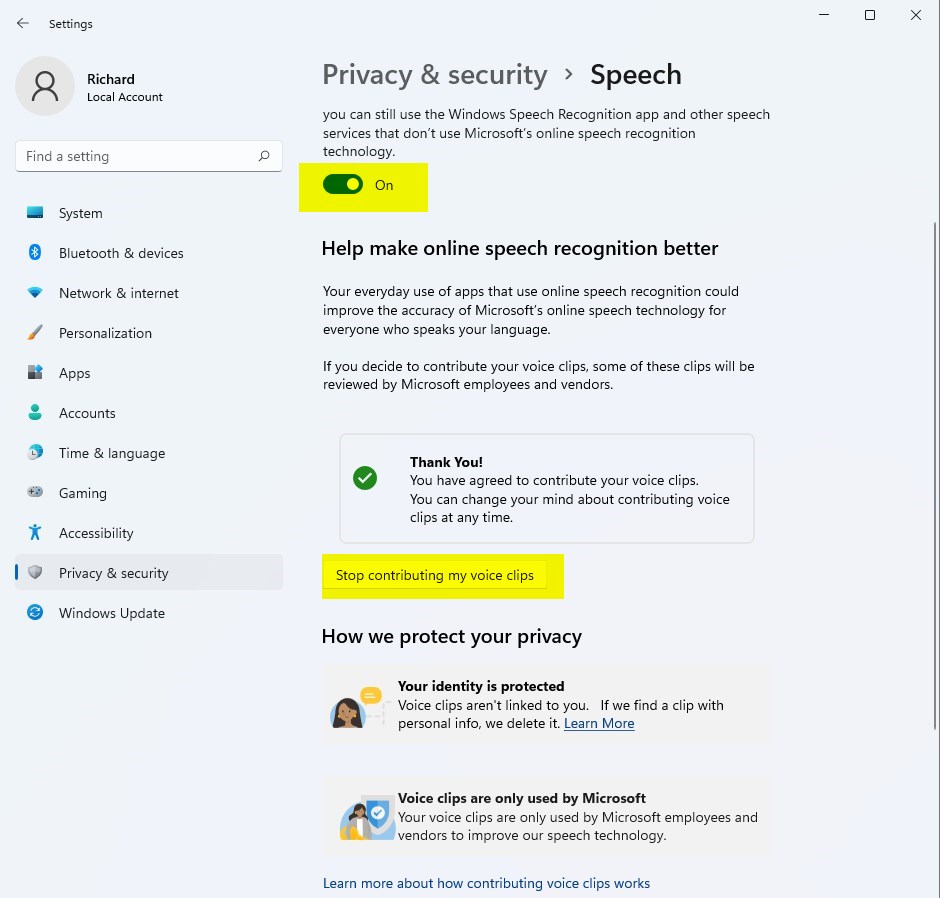
On the Privacy & security > Speech settings pane, make sure Online speech recognition is enabled or turned On.
Next, click the button to Start or Stop contributing my voice clips button to enable or disable.
That should do it!
Conclusion:
- It’s important to know how Microsoft uses your voice clips to improve speech recognition technology.
- You can easily control whether your voice clips are submitted to Microsoft by adjusting the settings in Windows 11.
- Following the steps outlined in this post, you can make an informed decision about contributing your voice clips to Microsoft.
Frequently Asked Questions
How do I enable voice clips in Windows 11?
Can I disable voice clip contributions in Windows 11?
What are voice clips used for in Windows 11?
Is it safe to allow Microsoft to use my voice clips?
How can I access the Speech settings in Windows 11?

Leave a Reply Cancel reply