
This article explains how to set up PuTTY with SSH Key (no passwords) authentication with Windows 11.
SSH supports various authentication methods. Using a public key is more secure and convenient than traditional password authentication.
Our previous post showed you how to set up SSH Key-based authentication with Windows 11 without additional software. However, because of its simplicity, some people prefer to use PuTTY as their SSH client. If you want to use PuTTY to connect to an SSH server using key authentication with Windows 11, the steps below will show you how to do that.
The steps below show you how to install and generate an SSH key pair and configure PuTTY to connect to an SSH server without a password.
How to create an SSH key for key authentication
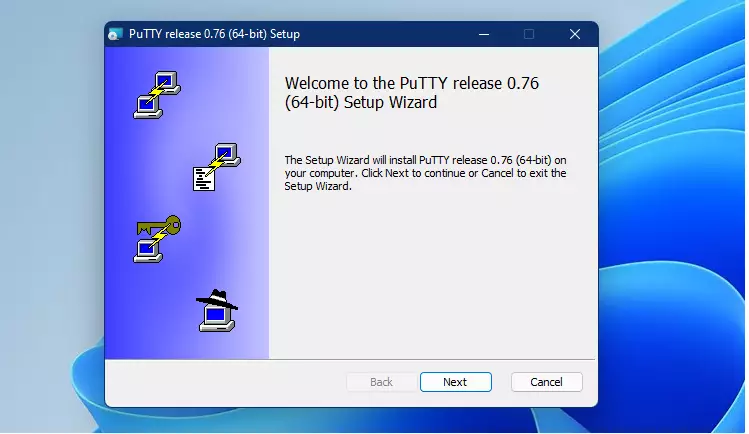
How to download and install PuTTY on Windows 11
PuTTY is an SSH and telnet client originally developed for the Windows platform. It’s now available on other platforms, including Linux systems.
To download and install PuTTY in Windows 11, use the link below.
Select the 64-bit x86 .msi file and save. By default, in your Downloads folder.

In your Downloads folder, double-click the downloaded installer to initiate the installation process.
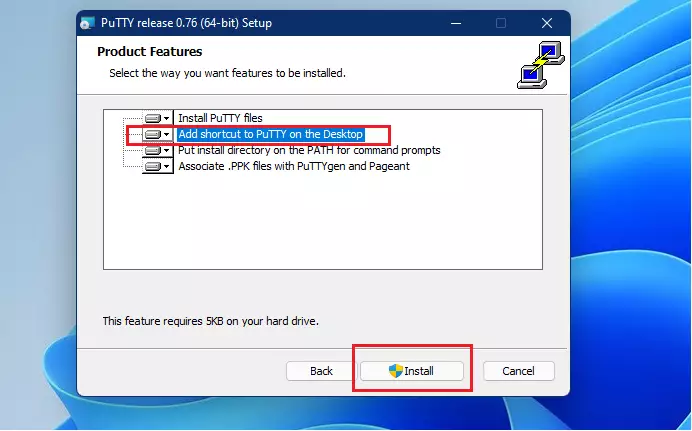
Follow the installer wizard until complete. On the screen below, choose Add Shortcut to PuTTY on the Desktop, then click Install.
How to generate PuTTY SSH Key pair in Windows 11
Before generating a PuTTY key pair, you must download the PuTTYgen (key generator) app. On the same download page above, click the puttygen.exe link to download the app.

Once the file is downloaded to your Downloads folder, browse and double-click to open the app.
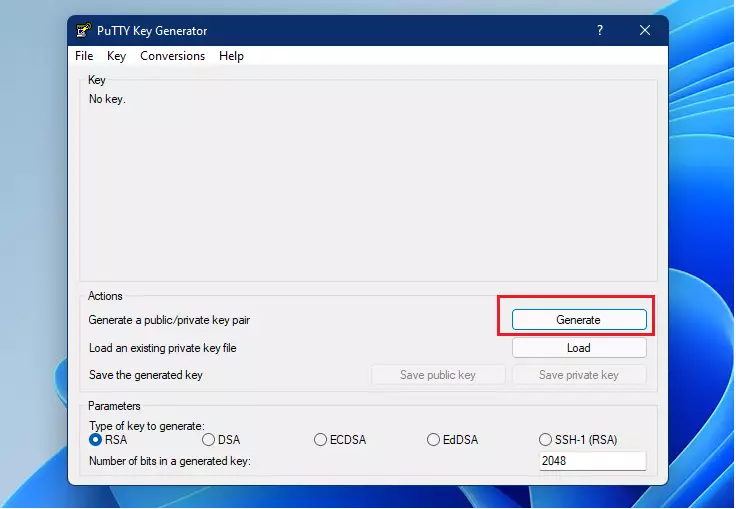
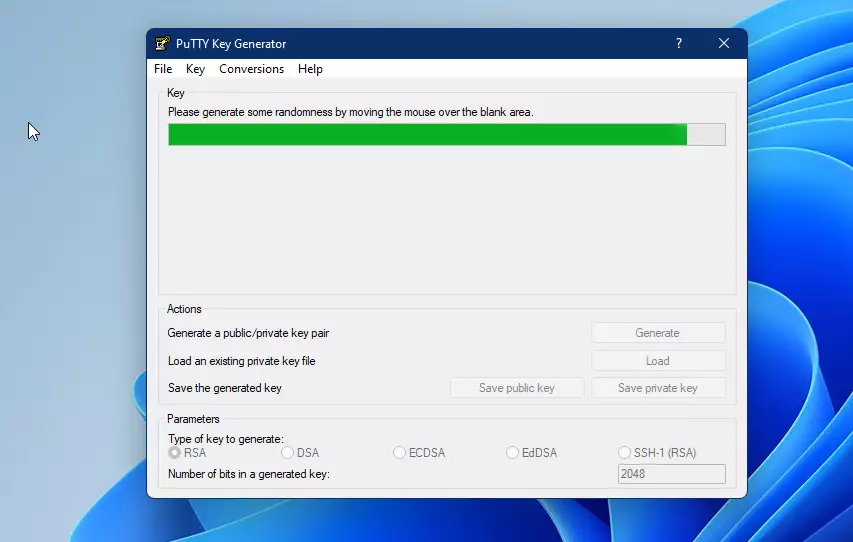
When the app opens, click the Generate button, then move the cursor randomly on the Putty Key Generator field window to begin generating the key pair. When you stop the cursor, the process will also stop. So, continue moving the cursor until the process is complete.
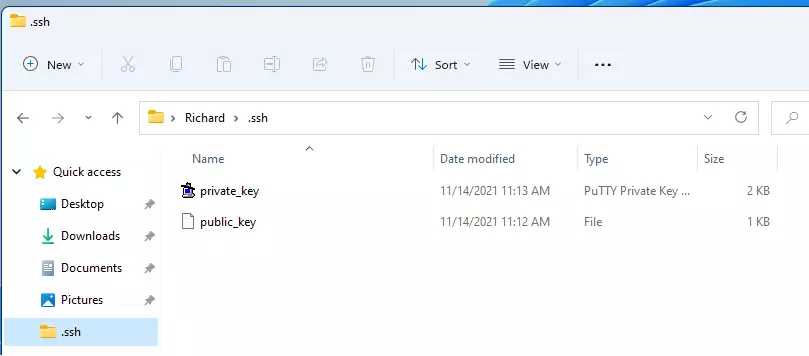
After the keys are generated, add a descriptive Key comment to help you easily identify your Key and Save both keys (Public and Private keys) to a secure location.
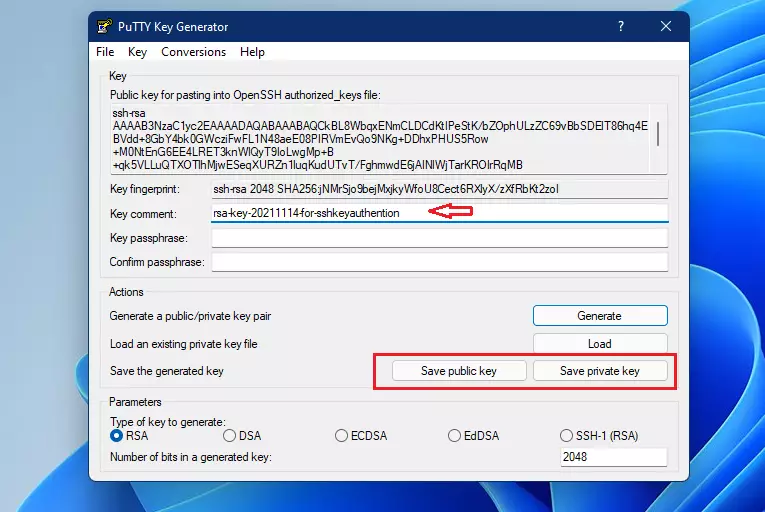
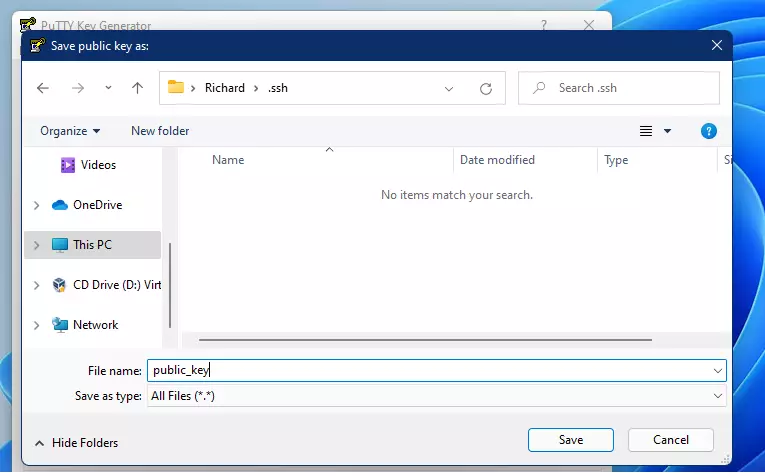
You’ll likely want to save your key pair in your home folder, usually at the path below.
C:\Users\<username>\.ssh
Replace <username> with your account name.
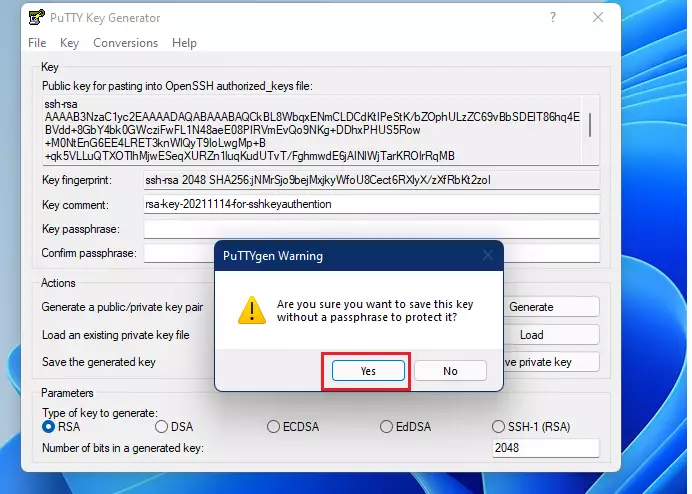
When saving the Private Key, you’ll be prompted with a message that you’re saving the private key without a passphrase. Click Yes.
Both the public_key and private_key files should be saved at the location specified.
How to copy your public Key to the SSH server with Windows 11
You will want to copy your public Key to the SSH server after you’ve generated your SSH key pair. On Unix-like systems, ssh-copy-id is a tool for copying SSH keys to the server.
However, Windows doesn’t have the ssh-copy-id tool installed. To get your public SSH to the server and enable password-less login, manually create an authorized_keys file on the remote server and paste the public Key into it.
In your home directory, create a .ssh folder and an authorized_keys file on the remote SSH server by running the commands below.
cd ~/
mkdir .ssh
nano ~/.ssh/authorized_keys
Then, copy the public Key displayed in the PuTTY Key generator app. If you close the app, simply reopen it and load the private Key to display its public Key.
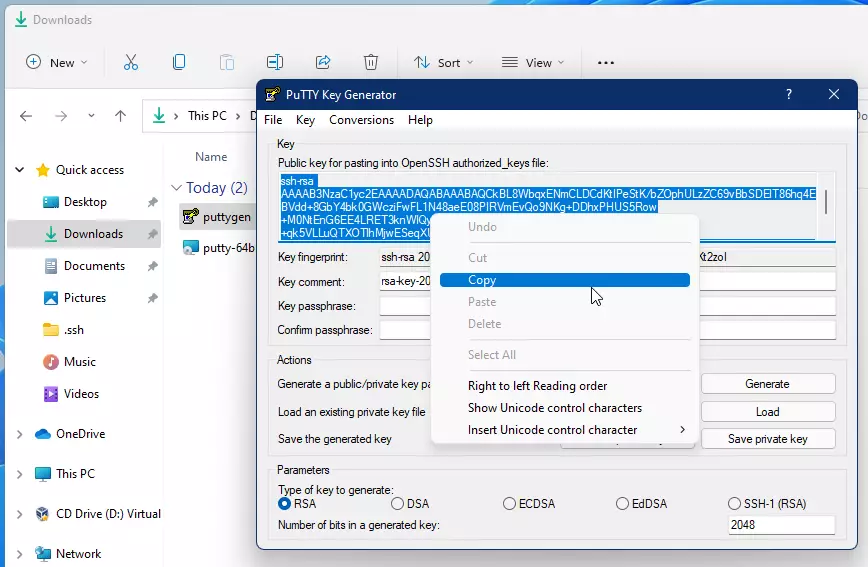
Then, paste the content into the file created on the remote SSH server after running the commands above.
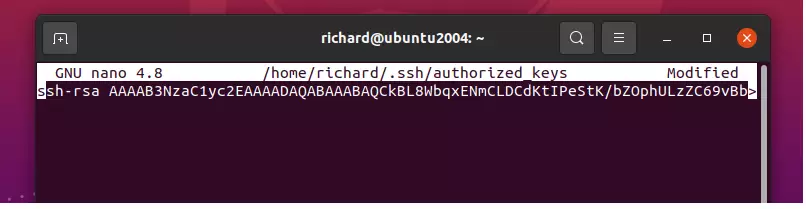
Save the file, and you’re done.
How to configure SSH for passwordless login
Now that you’ve copied over your public Key, the next step is to turn off password authentication.
Log on to the remote server with your password, then open the SSH configuration file by running the commands below.
sudo nano /etc/ssh/sshd_config
In the file, find the lines below and change the value to match these.
PasswordAuthentication no
ChallengeResponseAuthentication no
UsePAM no
Save the file and exit.
Restart the SSH server on the remote host.
sudo systemctl restart ssh
After that, password login should be disabled.
How to configure PuTTY client for password-less authentication with Windows 11
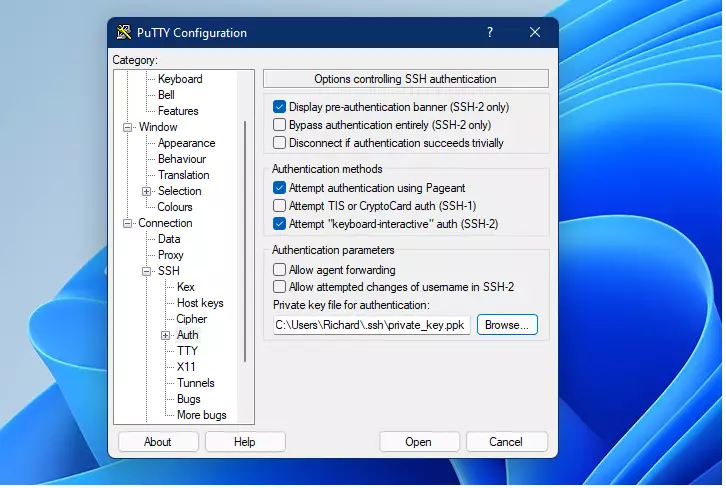
Finally, open the PuTTY client on your Desktop. Next, go to SSH –> Auth, and click the Browse button to browse for your private key (private_key) file saved above.
Finally, go to Session, type in the username and host IP or name (ex. username@10.0.2.19), provide a name for the Session, and click the Save button.
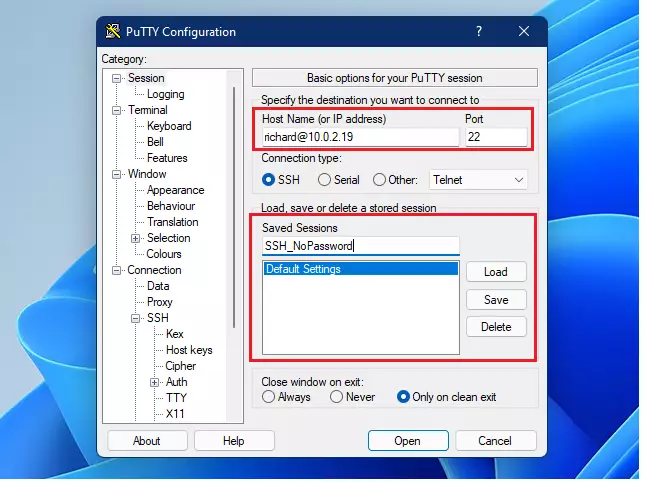
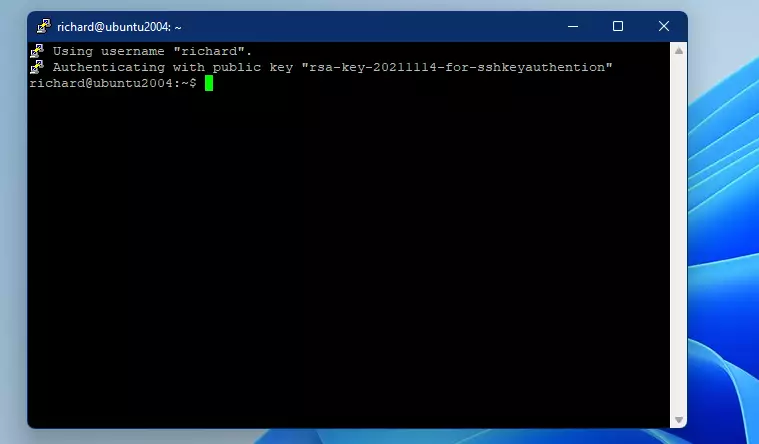
You can use the saved Session to log in to a remote SSH server without a password.
That should do it!
Conclusion:
- Configuring PuTTY for key-based SSH authentication enhances security by eliminating the need for passwords.
- The process involves downloading PuTTY, generating SSH keys, saving them securely, and copying the public key to the SSH server.
- Disabling password authentication on the server increases security, as it only allows login via SSH keys.
- By properly setting up PuTTY, users can easily connect to SSH servers without entering a password each time.
- This method not only streamlines the login process but also protects against unauthorized access.


Leave a Reply Cancel reply