This brief tutorial shows students and new users how to set up a proxy in Windows 10.
In some environments, you must use a proxy server before accessing the Internet or external services. A proxy server is a network device between your PC and the Internet or external resources. This server makes requests for websites and services on behalf of your PC.
A proxy server is usually installed to help save bandwidth since frequently used resources are cached to protect computers from ads, malware, and other harmful threats on the Internet.
By default, Windows 10 is set to detect proxy settings automatically. However, this may not work all the time.
By default, Windows 10 is set to detect proxy settings automatically. However, this may not work all the time.
There are multiple ways to set up a proxy on Windows. One way to set up a proxy is to specify a script address given to you by the network administrator.
Another way is to set it up in your browser manually.
Setup Proxy via Script
To set up a proxy script given to you by your IT administrator, follow the steps below:
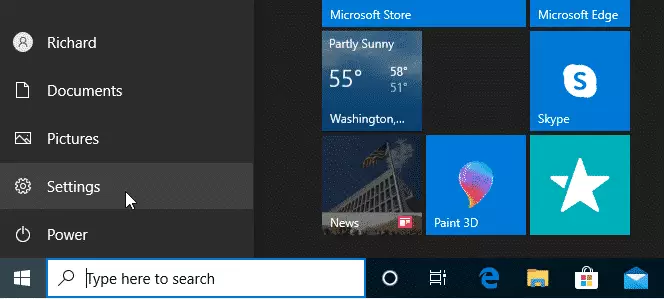
On Windows 10, click Start and select Settings.
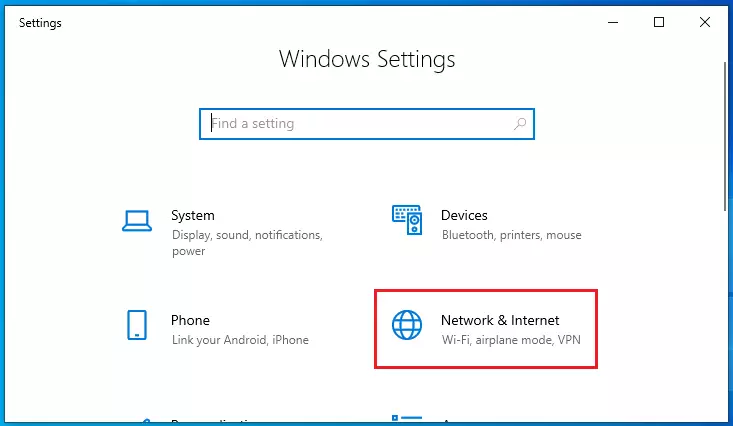
When the Settings page opens, click Network & Internet.
The list of the network- and Internet-related settings appears. Click Proxy.
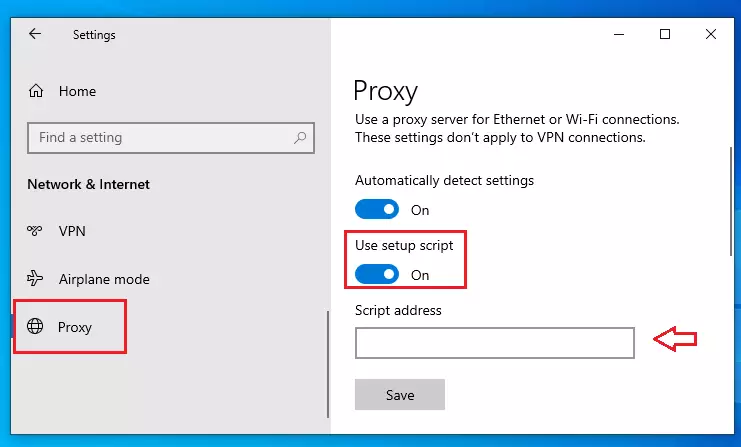
The list of available proxy settings appears. In the Automatic Proxy Setup section, set the Use Setup Script switch to On.
Enter the script address as it was given to you, then click Save.
Manually Setup Proxy
If you don’t have a script, follow the steps above and ensure the option to Use a setup script is not enabled.
Scroll down on the page and switch on the manual setup option.
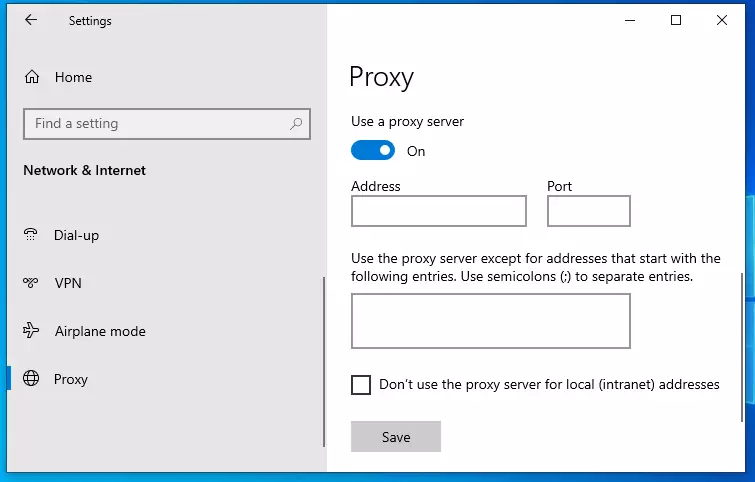
In the Address field, type the IP address of the proxy server given to you. In the Port field, type the port.
When you’re done, click Save and close the Settings window.
That should go it. Now, test your Internet connection to see if you can browse.
Conclusion:
This post showed you how to set up a proxy server in Windows 10. If you find any error above, please use the form below to report.
Leave a Reply Cancel reply