
This article describes how to configure the Date & Time and time zone settings in Windows 11.
Windows can automatically set the date and time if you select the correct time zone. When you allow Windows to manage the system date and time automatically by choosing the right time zone, daylight saving time will also be updated automatically.
Setting the time and time zone in Windows 11 correctly is crucial for optimal computer performance and can help avoid issues caused by incorrect time settings.
How to Change Time Zone in Windows 11
Windows 11 has a centralized location for the majority of its settings. Everything can be done, from system configurations to creating new users and updating Windows from its System Settings pane.
To get to System Settings, you can use the Windows key + I shortcut or click on Start ==> Settings.

Alternatively, you can use the search box on the taskbar to search for Settings. Then select to open it.
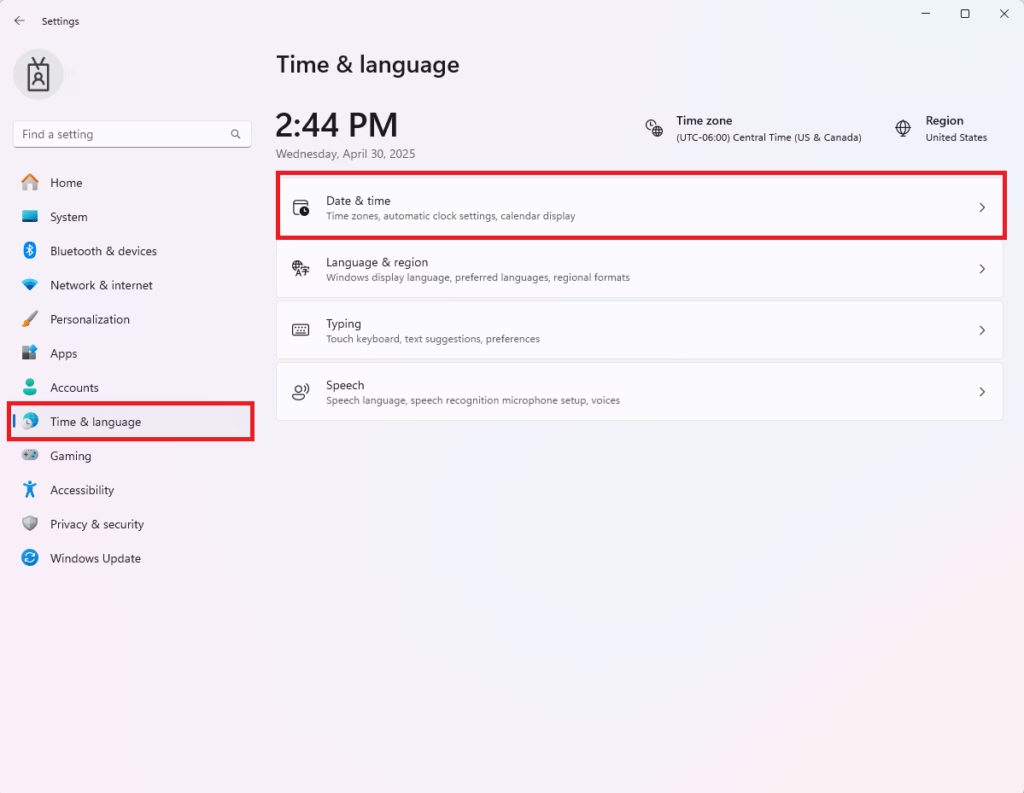
The Windows Settings pane should look similar to the image below. In Windows Settings, click Time & Language, and select Date & Time on the right pane of your screen, as shown in the image below.
Choose the correct time zone for your location in the Date & Time settings below the Time zone option.
Once selected, the Set Time and Adjust for Daylight Saving Time options will be automatically enabled.
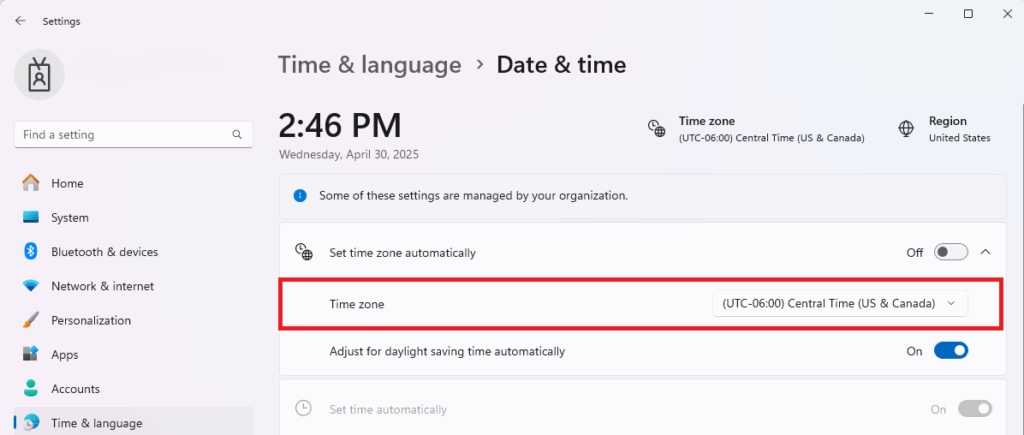
You can choose for Windows to set the time zone automatically, but this is not recommended. Windows 11 might be difficult in some locations, especially if connected to a worldwide VPN network.
After changing the time zone and the time not being adjusted to the correct date and time, scroll and click the Sync Now button as highlighted below.
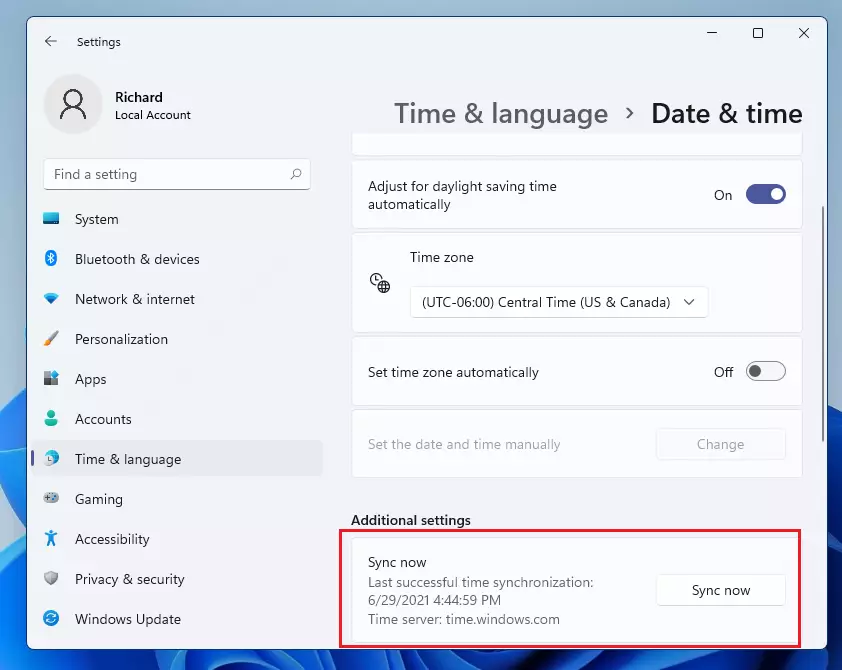
Doing that will sync your computer to time.windows.com and automatically adjust based on the time server configured.
That should do it! If you are syncing the time and still haven’t updated it, restart your computer and log back in. Doing that will allow Windows to update and apply the new settings.
How to set Data & Time Manually
If you’re not connected to the internet, you can manually set your computer’s date and Time. On the Date & Time settings page, toggle the Set time automatically and Adjust for Daylight Saving Time automatically buttons to Off, as highlighted below.
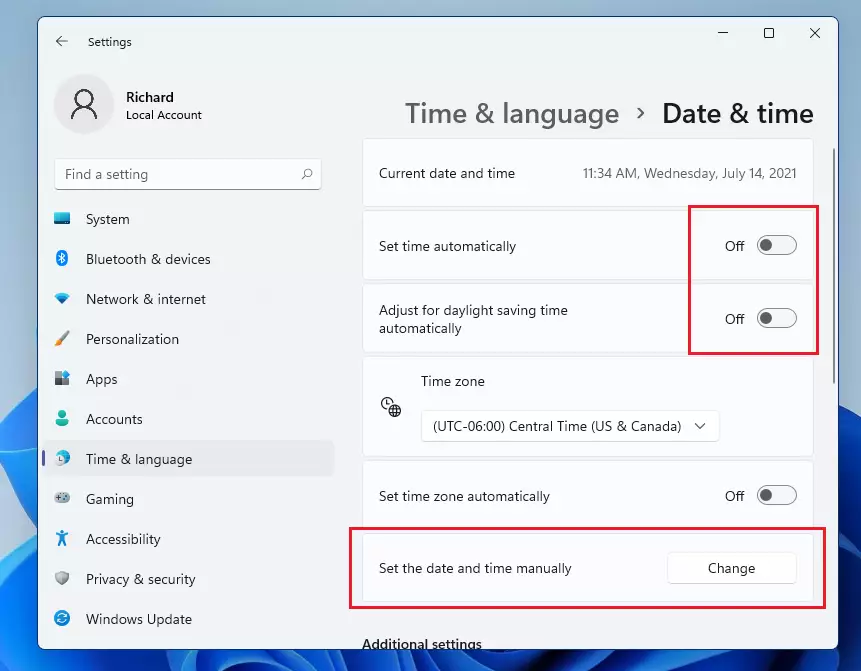
Then select the Change button to set the Date and Time manually. A new pop-up window pane will open where you can change the date and time for your computer not connected to the internet.
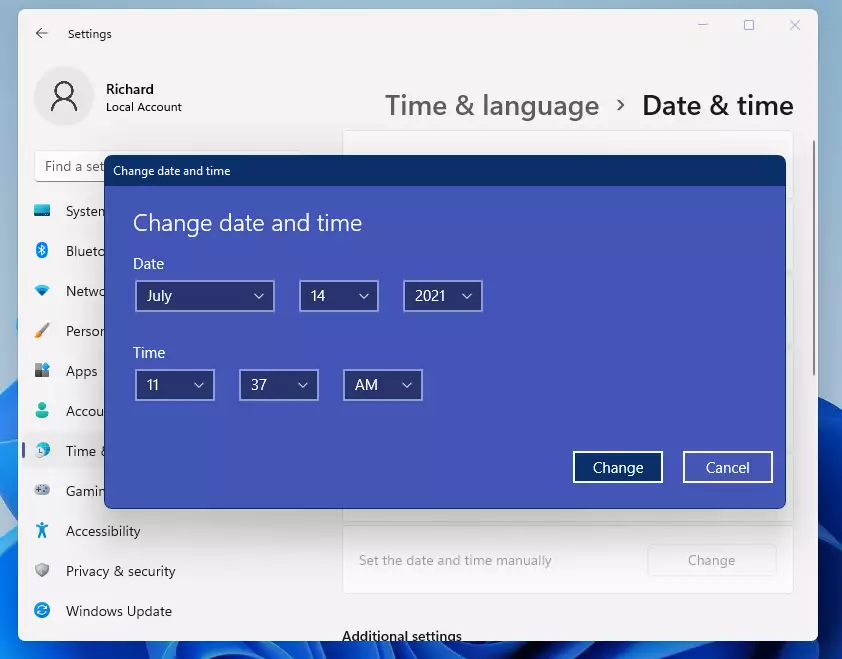
When you’re done, click Change to apply your changes.
The correct Date and Time will be shown at the bottom right taskbar, similar to the one below.

That should do it.
Conclusion:
In summary, setting the Date & Time and time zone in Windows 11 is an essential task for system accuracy and functionality. Here are the key points to remember:
- Ensures your computer’s clock is accurate, critical for appointments and tasks.
- Prevents issues related to daylight saving time adjustments.
- Allows manual time setting for offline use or if automatic syncing fails.
- Helps maintain optimal computer performance and functionality.
- Regularly check and sync your settings to avoid discrepancies.
By following these guidelines, you can ensure that your Windows 11 system operates seamlessly with the correct time settings.

Leave a Reply to Check Device Performance in Windows 11 – Geek Rewind Cancel reply