This brief tutorial shows students and new users how to reset Windows 10 local host files to the default settings.
When you think of a local computer host file, think of it as plain text, the human-readable File created for an operating system to map IP addresses to host names on an IP network. The host’s File has priority over domain name systems (DNS).
When you type a domain name in your browser to go to a website, there’s a file or system somewhere with the domain name mapped to an IP address that your computer can read. Your computer uses the mapped IP address to connect to the website.
While translating the name to IP, the local host’s file is the first file your operating system looks at. If the IP to domain mapping isn’t included in the host file, it looks up a DNS server online. This is how the process works.
When dealing with a host file, the IP address and the domain or hostname should be separated by at least one space or tab. The lines starting with # are comments and are ignored.
If you have edited your computer’s local hosts file and want to reset it to what was created, the steps below will show you how.
To get started, continue below:
Windows 10 Hosts File
The Windows local hosts file is located on the path below. You only need a text editor to open the File and copy/paste the default file content.
c:\Windows\System32\Drivers\etc\hosts
First, only the administrator or the administrator’s group members can change the local host’s File. If you’re not an admin, you won’t be able to save the File.
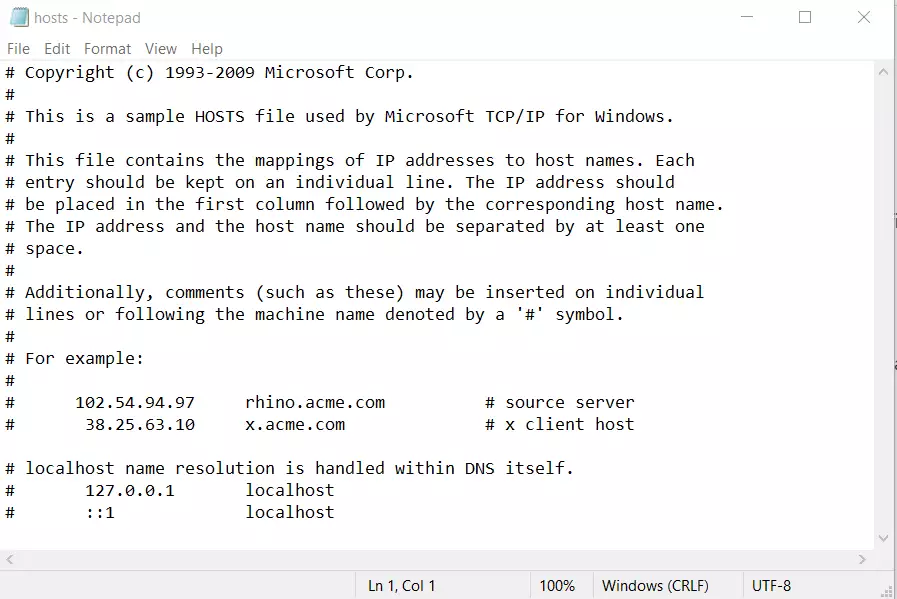
Below is the default content of the Windows local hosts file. This is content that comes with all Windows computers. Simply copy the lines below and paste them into the File. I will show you below.
# Copyright (c) 1993-2009 Microsoft Corp.
#
# This is a sample HOSTS file used by Microsoft TCP/IP for Windows.
#
# This file contains the mappings of IP addresses to host names. Each
# entry should be kept on an individual line. The IP address should
# be placed in the first column followed by the corresponding host name.
# The IP address and the host name should be separated by at least one
# space.
#
# Additionally, comments (such as these) may be inserted on individual
# lines or following the machine name denoted by a '#' symbol.
#
# For example:
#
#      102.54.94.97     rhino.acme.com          # source server
#       38.25.63.10     x.acme.com              # x client host

# localhost name resolution is handled within DNS itself.
#	127.0.0.1       localhost
#	::1             localhost
Reset Windows Hosts file.
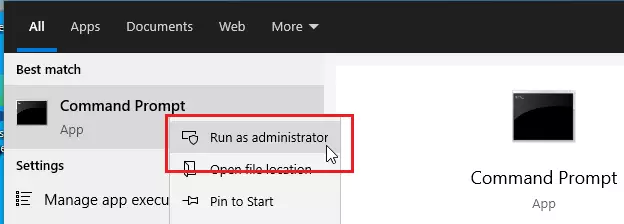
Since only the administrator can edit the host file, search for and open the Windows Command Prompt app as administrator, as shown in the image below.
When the Command Prompt opens, type in the commands below, then press Enter to open the host’s File in Notepad.
notepad.exe c:\Windows\System32\Drivers\etc\hosts
This will open the local host file as administrator. Now, simply copy the default host file content above and paste it into Notepad.
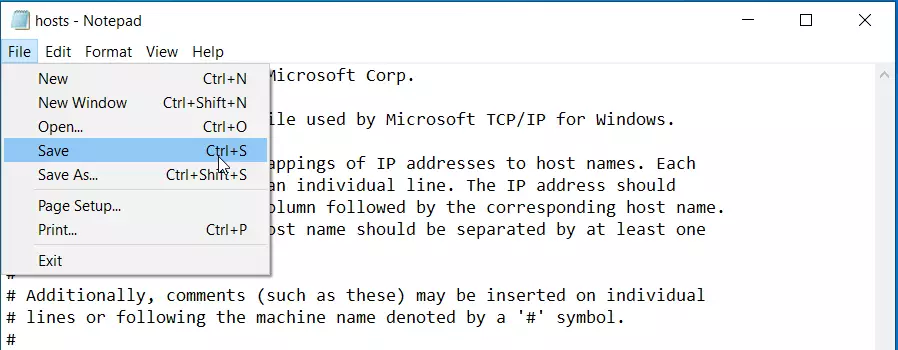
After copying the content, click File –> Save from the top menu, as shown below. Then, save and replace the existing File in the exact location.
That should do it!
Conclusion:
- Resetting the Windows local hosts file is a straightforward process that can help resolve various network issues.
- Always remember that only an administrator can make changes to the hosts file, ensuring the security of the system.
- Keeping a backup of your hosts file before making edits can prevent potential errors.
- Following the provided steps carefully will restore your hosts file to its default state.
- Regularly checking your hosts file can help maintain proper network functionality.
Leave a Reply