
This article guides how to reset, reload, and repair network adapters in Windows 11.
In Windows 11, users can easily reset their network adapters directly from the main System settings with just a few clicks.
Resetting a network adapter in Windows 11 can resolve network issues, such as limited or no internet connection, slow speeds, or difficulties connecting to a network.
When you reset a network adapter, it removes corrupted or outdated settings, restoring it to its original state and potentially resolving connectivity issues.
Reset and repair Windows 11 network adapters
Resetting network adapters in Windows 11 is simple and quick. You can do it through the System settings in the network section.
Windows 11 provides a centralized location for most settings. Users can easily manage system configurations, create new users, and update Windows through the System Settings pane.
To get to System Settings, you can use the Windows key + I shortcut or click on Start ==> Settings, as shown in the image below:

Alternatively, you can use the search box on the taskbar and search for Settings. Then select to open it.
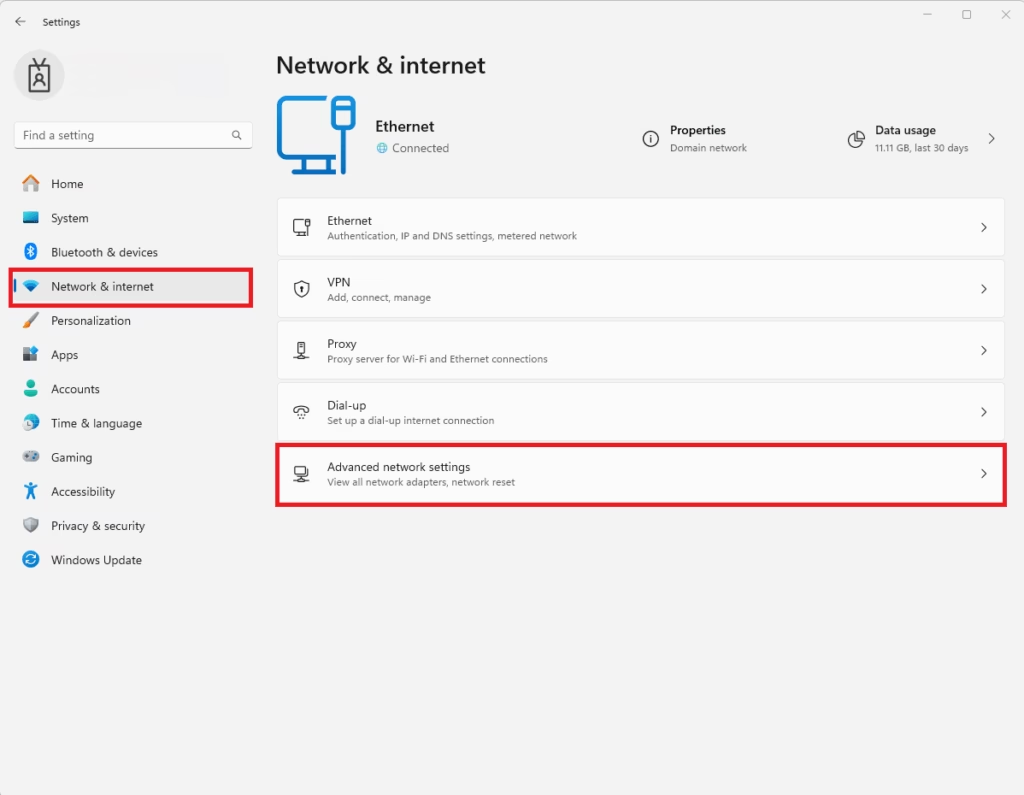
The Windows Settings pane should resemble the image below. In Windows Settings, click on Network & Internet, then select “Advanced network settings” tile on the right.
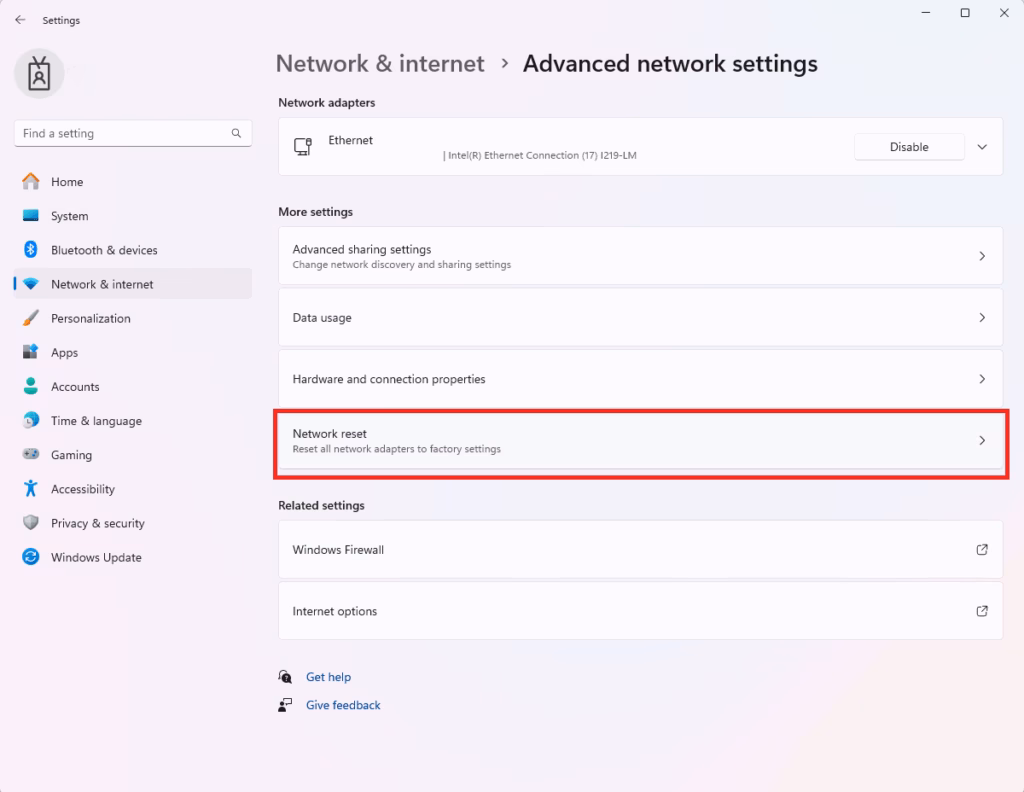
In the Advanced Network settings pane, select Network Reset under More settings. The Network Reset feature will restore all network adapters to their original factory settings.
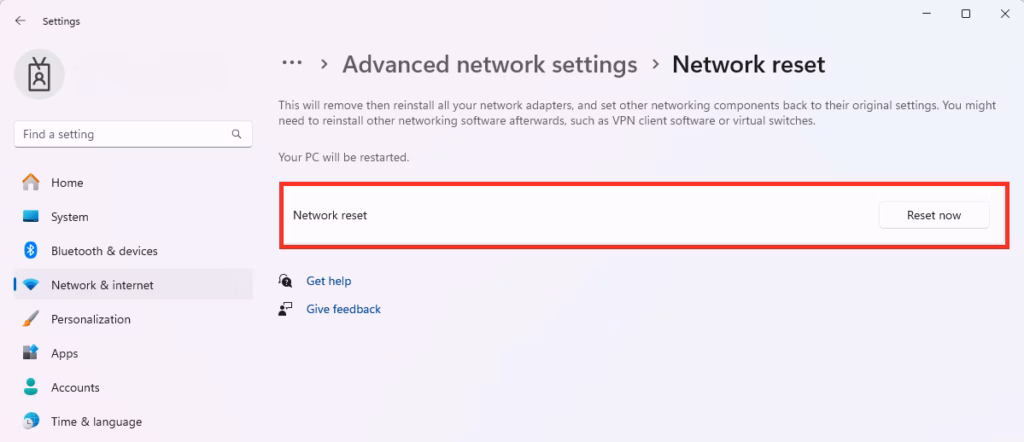
Next, click the Reset Now button to reset the Network and all adapters.
You will need to reconnect to your Wi-Fi network and re-enter the password to access a wireless connection.
That should do it!
Conclusion:
- Resetting network adapters in Windows 11 is a straightforward process that can resolve common network issues.
- By following a few simple steps, users can restore their network settings without needing advanced troubleshooting.
- It is important to reconnect to Wi-Fi networks after a reset and reenter any necessary passwords or IP information.
- Regularly resetting network adapters can help maintain optimal internet performance and connectivity.
- If issues persist after resetting, further troubleshooting may be necessary to identify other underlying problems.


Leave a Reply