
This article explains how to restore Microsoft Defender Firewall to its Default settings in Windows 11.
The Windows Firewall helps safeguard your device by filtering network traffic and blocking unauthorized access.
On Windows 11, you can use the Windows Security app to view and manage the status of Windows Firewall. You can turn the firewall on or off at any time using the Windows Security app.
If someone or something has altered your Windows Firewall settings, causing issues with your computer, you can easily restore the original settings.
Restore Windows Firewall settings using the Windows Security app
There are multiple ways one can reset or restore the Windows Firewall settings in Windows 11.
One way is to use the Windows Security app.
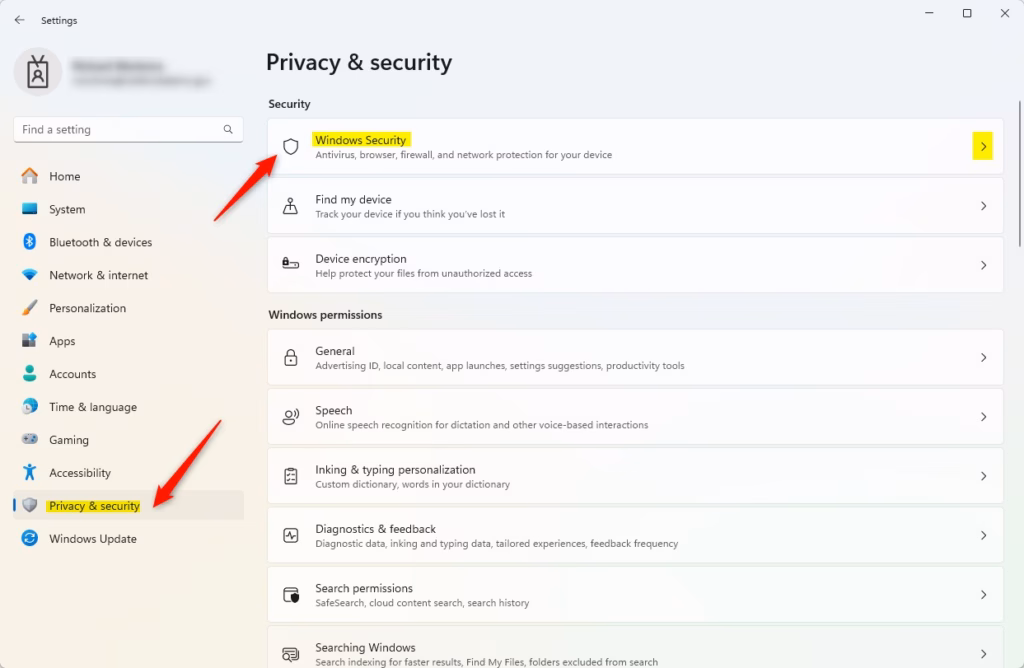
To do that, click on Start and select Settings on the Start menu.

In Settings app, click Privacy & security > Windows Security tile.
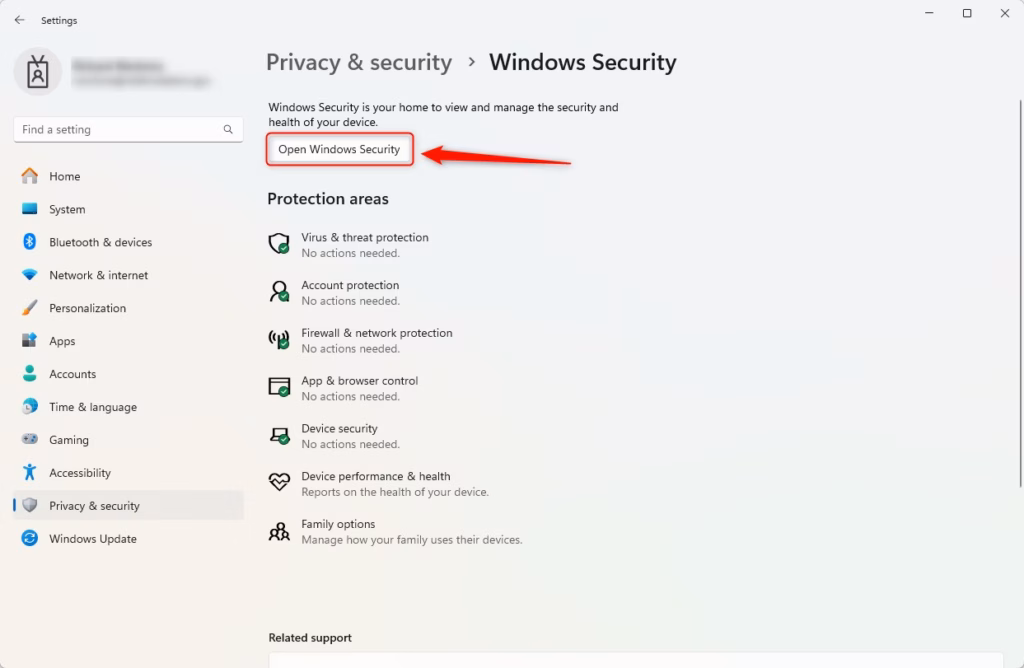
Next, click Open Windows Security button.
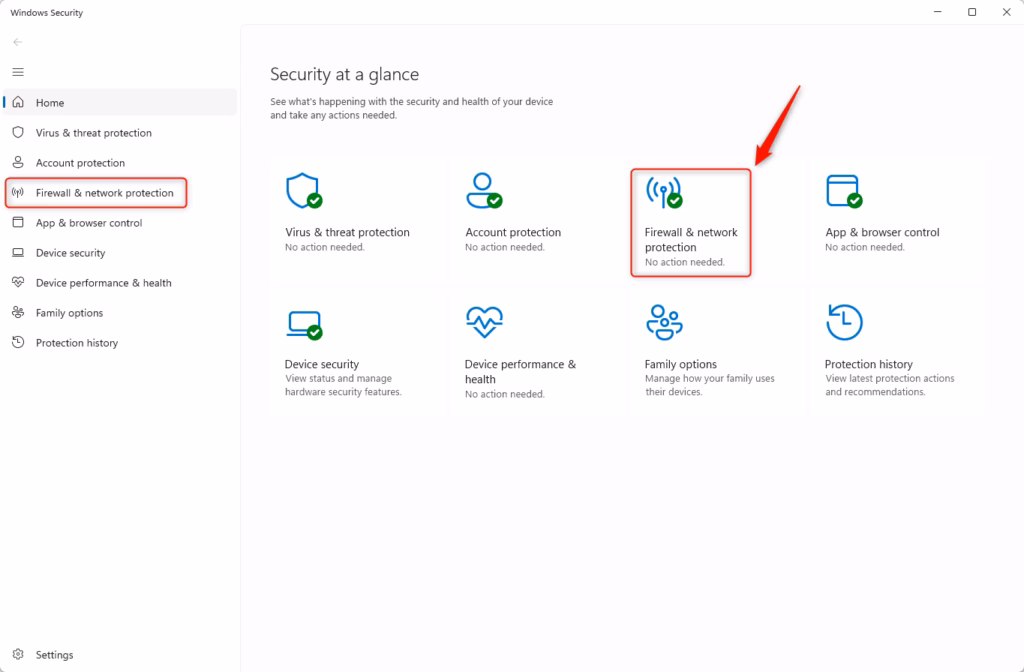
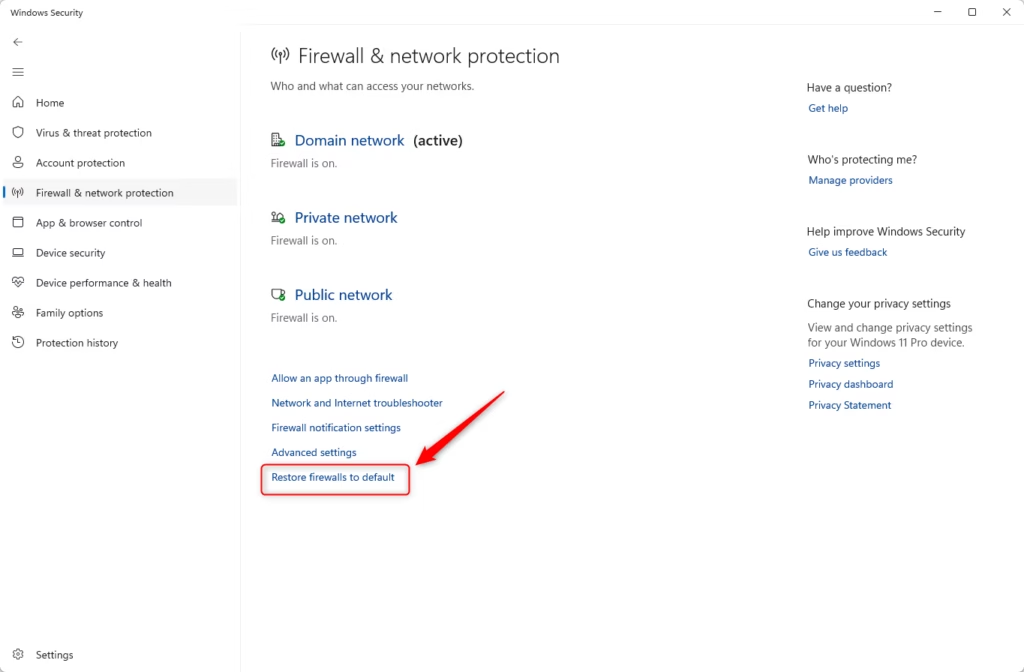
In the Windows Security app on your PC, select Firewall & network protection or use the following shortcut: Firewall & network protection.
Next, click on the Restore firewalls to default link at the bottom.
On the pop-up window, click on Restore defaults to restore the firewall settings to the defaults.
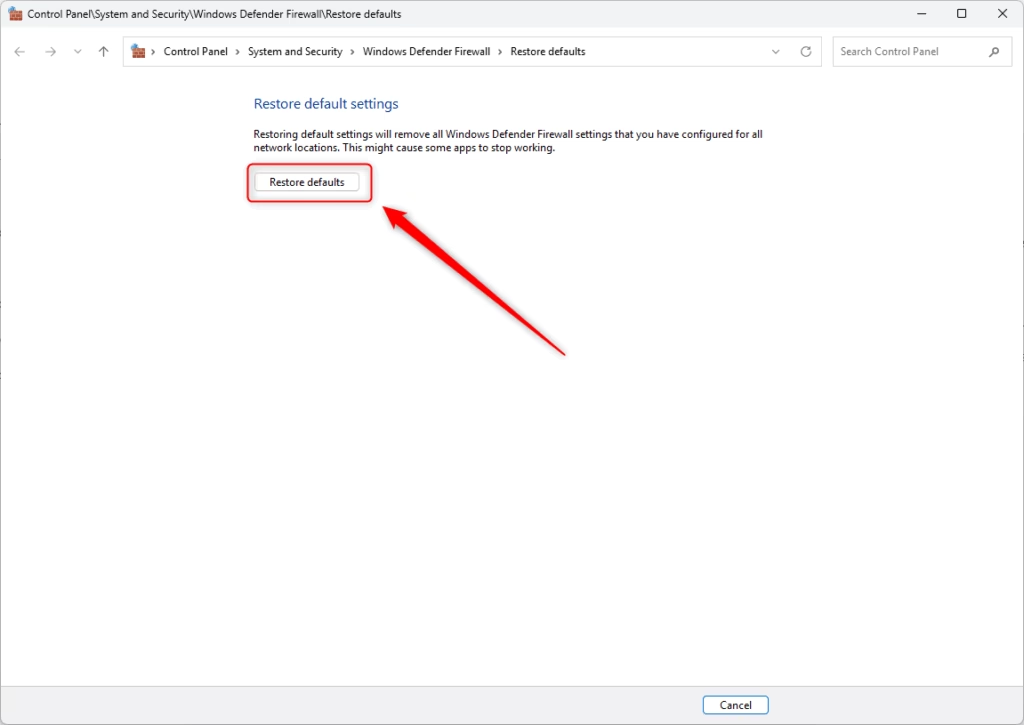
Click Yes when prompted if you want to reset the firewall default.
Restore Firewall Settings to Defaults in Advanced Security
You can also use the Advanced Security app to restore the Windows Defender Firewall settings to defaults.
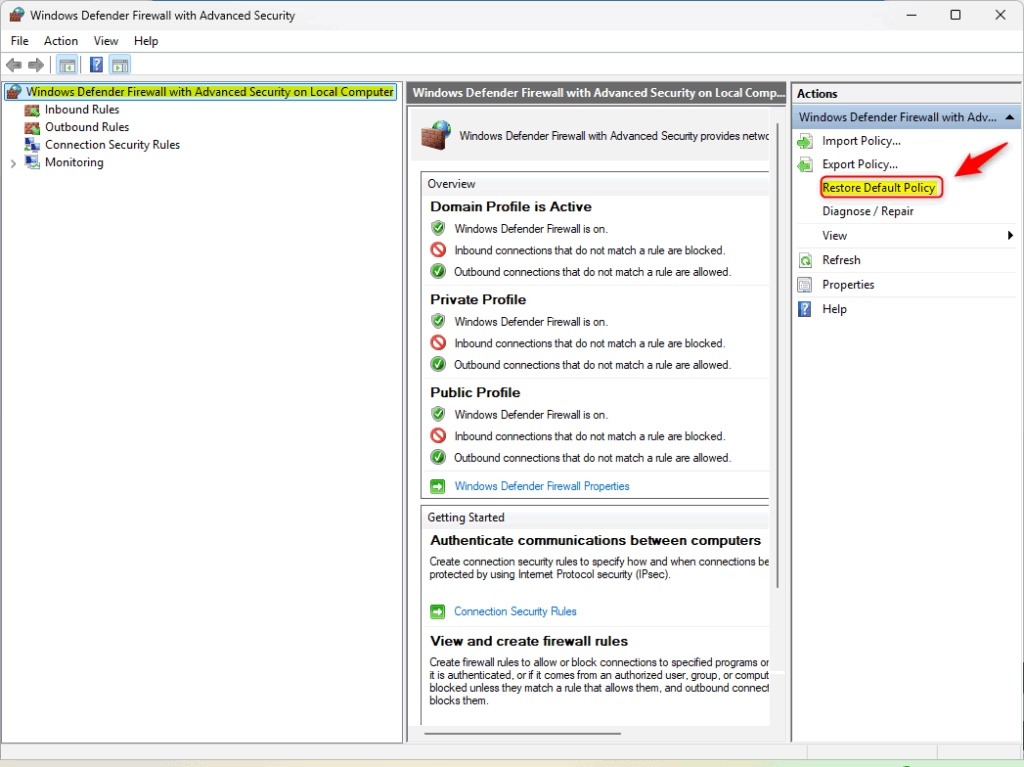
First, open Windows Defender Firewall with Advanced Security (wf.msc).
Then, select “Windows Defender Firewall with Advanced Seucirty on Local Computer” on the left pane.
On the right pane, under “Actions,” click the “Restore Default Policy” to retore the firewall to its defaults.
Reset Defender Firewall Settings to Defaultd in Command Prompt
Using the Command Prompt, you can also restore the default settings in the Microsoft Defender Firewall.
First, open the Windows Terminal app as adminstrator and select the “Command Prompt” tab.
Then, run the command below to reset the firewall to its defaults.
netsh advfirewall reset
Restore Defender Firewall Settings to Defaults in PowerShell
Yet another way to reset to restore the Defender Firewall to its default settings is to use Windows PowerShell.
First, open the Windows Terminal app as administrator and select the “PowerShell” tab.
Then, run the command below.
(New-Object -ComObject HNetCfg.FwPolicy2).RestoreLocalFirewallDefaults()
That should do it!
Conclusion:
Restoring Microsoft Defender Firewall settings to default in Windows 11 is a straightforward process that can be achieved through various methods. Here’s a summary of the key points:
- Multiple Methods: You can restore firewall settings using the Windows Security app, Advanced Security, Command Prompt, or PowerShell.
- Easy Interface: The Windows Security app provides a user-friendly way to reset settings with just a few clicks.
- Advanced Options: The Advanced Security approach offers more detailed configurations for users who need them.
- Command Line Flexibility: Using Command Prompt or PowerShell is a powerful alternative for advanced users comfortable with scripting.
- Quick Restorations: These methods allow you to quickly revert any unwanted changes and enhance your device’s security.
By following these steps, you can ensure your Windows Firewall is configured correctly, helping to keep your system safe from unauthorized access and threats.
Leave a Reply Cancel reply