

This post shows students and new users how to perform a clean boot in Windows 11.
A clean boot starts Windows with a minimal set of drivers and startup programs so you can rule out other third-party programs and services that are conflicting and making your computer unstable.
A clean boot is similar to starting Windows in Safe Mode but gives you more control over which services and programs run at startup to help you isolate the cause of a problem.
The best way to troubleshoot issues in Windows is to isolate and contain the program or service that is making your computer behave this way, and one way to do that is to boot Windows with only its critical services. If a Windows critical service is causing the problem, you may have to reset your Windows computer.
The process and steps may look complicated, but when you follow them below, you may be able to get your computer back in working condition.
How to perform a clean boot in Windows 11
As mentioned above, a clean boot will start up Windows 11 with a minimal set of drivers and startup programs so you can rule out other third-party programs and services that are conflicting and making your computer unstable.
You can then identify which programs or services are causing your computer to be unstable. Boot Windows 11 in a clean state can help you identify these programs and services.
It would be best if you were signed in as an administrator to perform a clean boot in Windows 11.
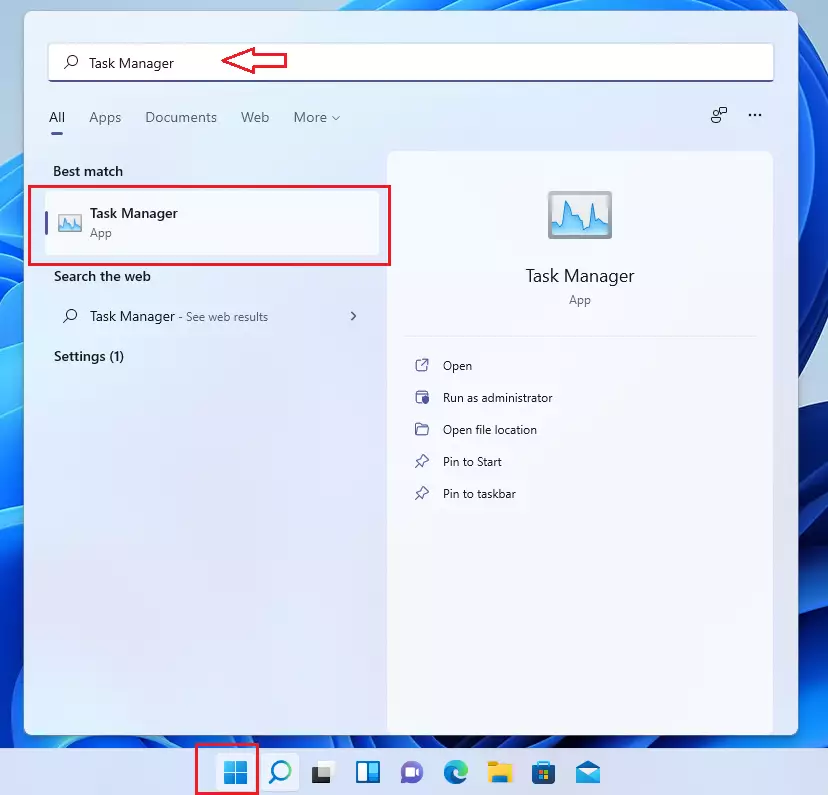
When ready, click the Start Menu, search for Task Manager, and select the Task Manager app under Best match.
Alternatively, press Ctrl + Shift + Esc on your keyboard to open Task Manager.
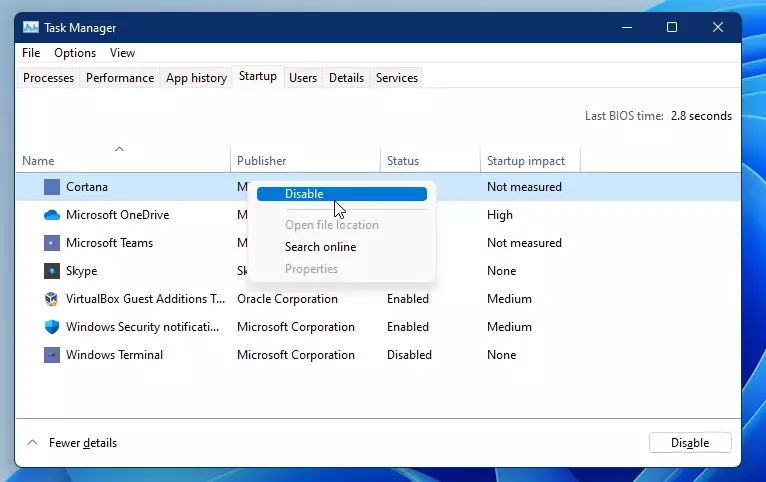
Then select More details if it is displayed. Under the Startup tab, for each startup item, select the item and then select Disable.
When you’re done, your Startup tab should look similar to the one below.
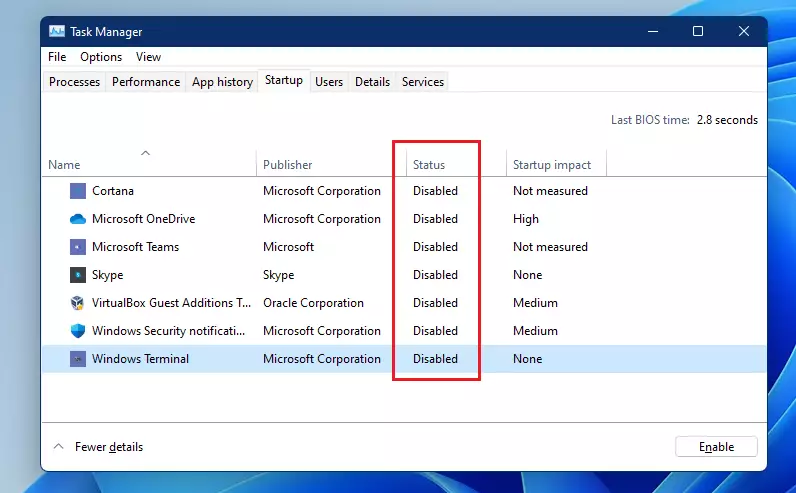
Closeout Task Manager.
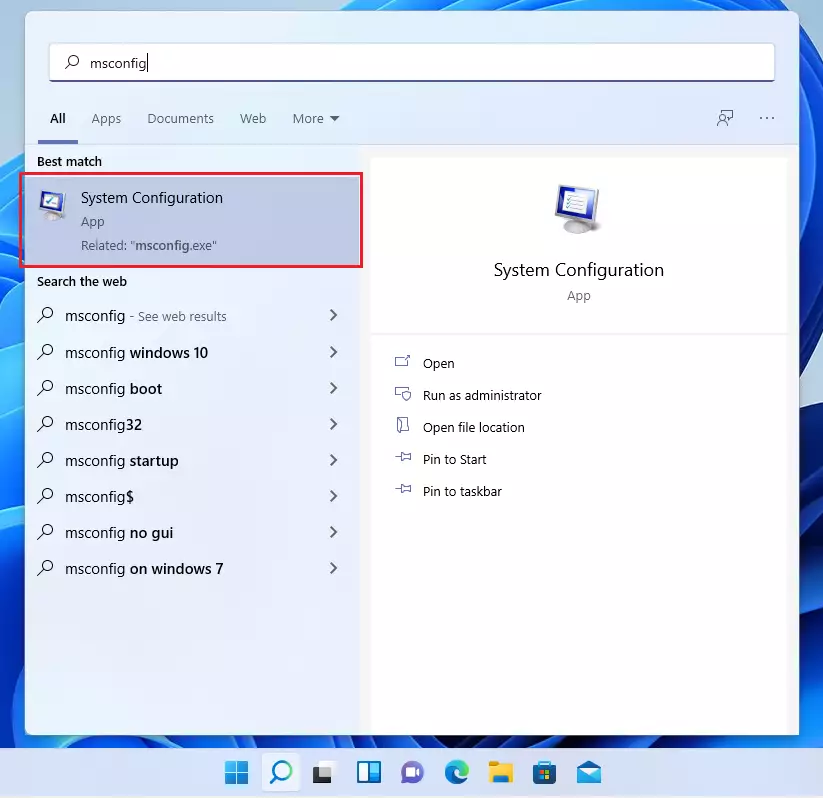
Next, click the Start button again, type msconfig, and select System Configuration from the results.
Once the System Configuration app opens, select Hide all Microsoft services on the Services tab of System Configuration, and then select Disable all.
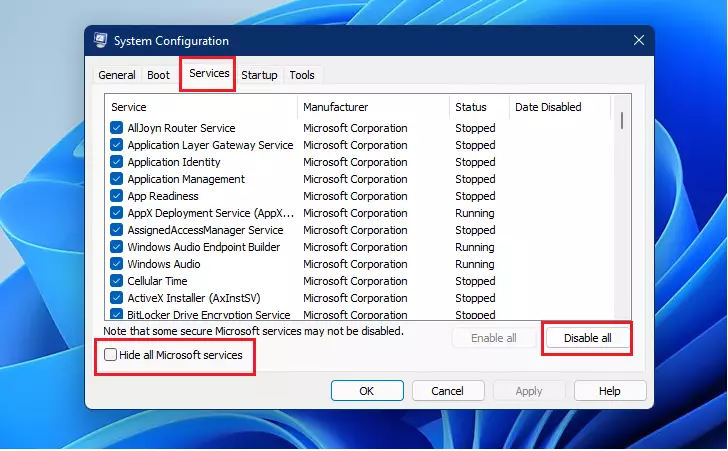
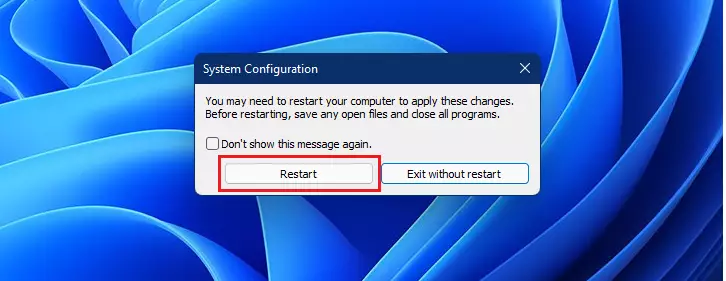
When you’re done, select OK. When you restart the computer, it’s in a clean boot environment.
That is how one performs a clean boot in Windows 11.
Suppose your problem does not occur while the computer is in a clean boot environment. In that case, you can determine which startup application or service is causing the problem by systematically turning them on or off and restarting the computer.
Conclusion:
- A clean boot in Windows 11 can help diagnose and troubleshoot stability issues by starting the system with minimal drivers and services.
- By systematically disabling and enabling startup programs and services, you can identify the cause of system instability.
- Following the steps outlined ensures a more reliable troubleshooting process.
- If issues persist beyond the clean boot, consider further actions, such as resetting Windows or seeking professional assistance.
- Regular maintenance and monitoring of startup services can help prevent future instability.


Leave a Reply