
This article explains how to install or upgrade the printer driver to the latest version in Windows 11.
If you buy an older printer, you might need to download the latest drivers from the manufacturer for optimal performance. Updating printer drivers can enhance functionality and resolve bugs in Windows printer software, so it’s essential to check for updates regularly.
Installing the latest printer driver in Windows 11 is crucial for ensuring that your printer is compatible with the most recent version of Windows and can take advantage of all the latest features.
Additionally, updating the driver can resolve any bugs or issues that may have existed in the previous version.
Update printer drivers from Windows Update
There are several methods to upgrade your printer drivers in Windows 11, and all of them are effective. One way to obtain the latest drivers for your printer is by using Windows Update.
This feature may locate and install an updated version of your printer driver automatically.
The steps below show you how to update a printer driver.
Windows 11 has a centralized location for the majority of its settings. Everything can be done, from system configurations to creating new users and updating Windows from its System Settings pane.
To get to System Settings, you can use the Windows key + I shortcut or click on Start ==> Settings, as shown in the image below:

Alternatively, you can use the search box on the taskbar to search for Settings. Then select to open it.
In Windows Settings, click Windows Update and select Check for updates in the right pane of your screen, as shown in the image below.
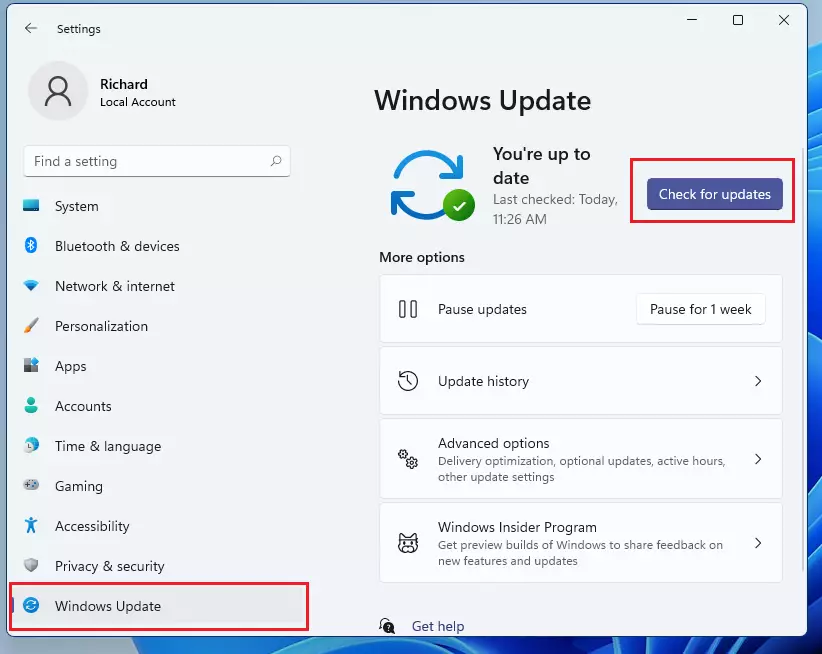
If Windows Update finds an updated driver, it will download and install it, and your Printer will automatically use it. Sometimes, Windows will find the latest drivers but not install them.
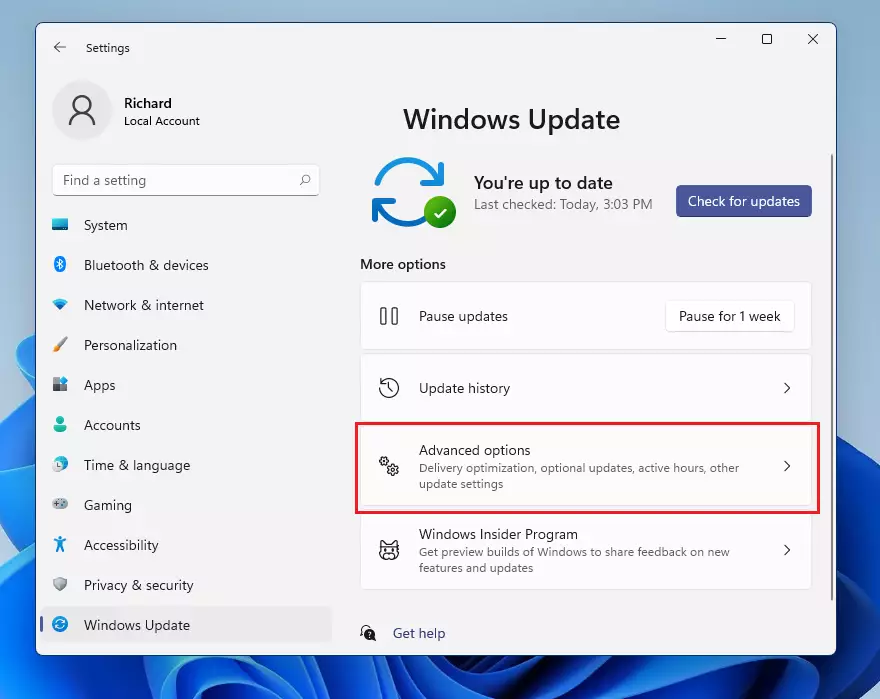
Click on Advanced options as highlighted below.
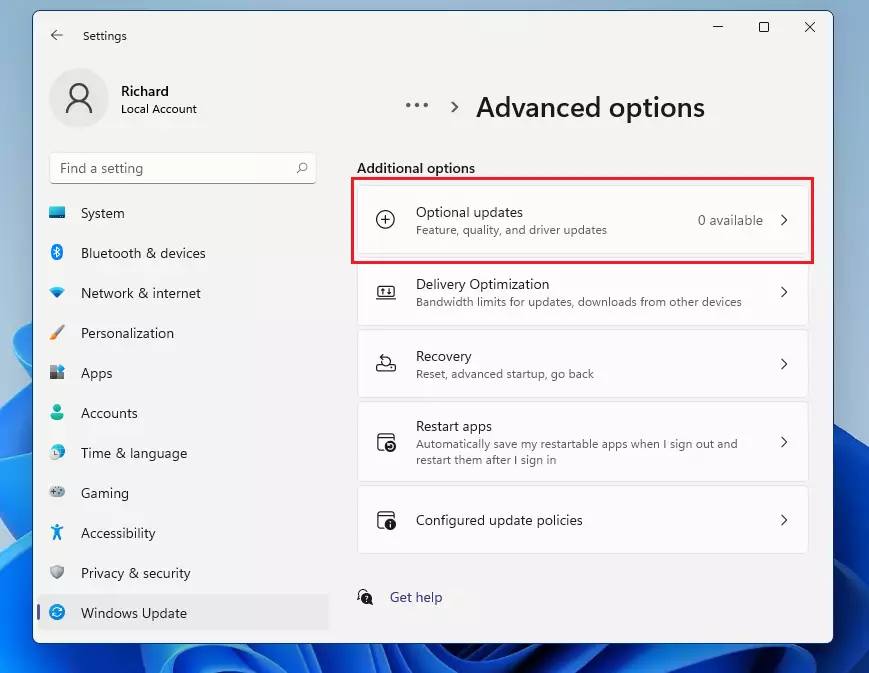
Then select Optional updates. If there are optional updates, they will be listed there. Select the update for your printers and install it.
Download new printer drivers from online.
Printer manufacturers usually release the latest versions of their products on their websites. Check your printer manufacturer’s support site. Search the web for your Printer’s manufacturer product page to find that. Then, look in the driver’s section and download your printer version.
Most drivers you download online are self-installing, allowing you to download their executables and run the installer. After downloading them, double-click (or double-tap) the file to install it.
Once the driver is installed, remove and reinstall the Printer with the latest drivers.
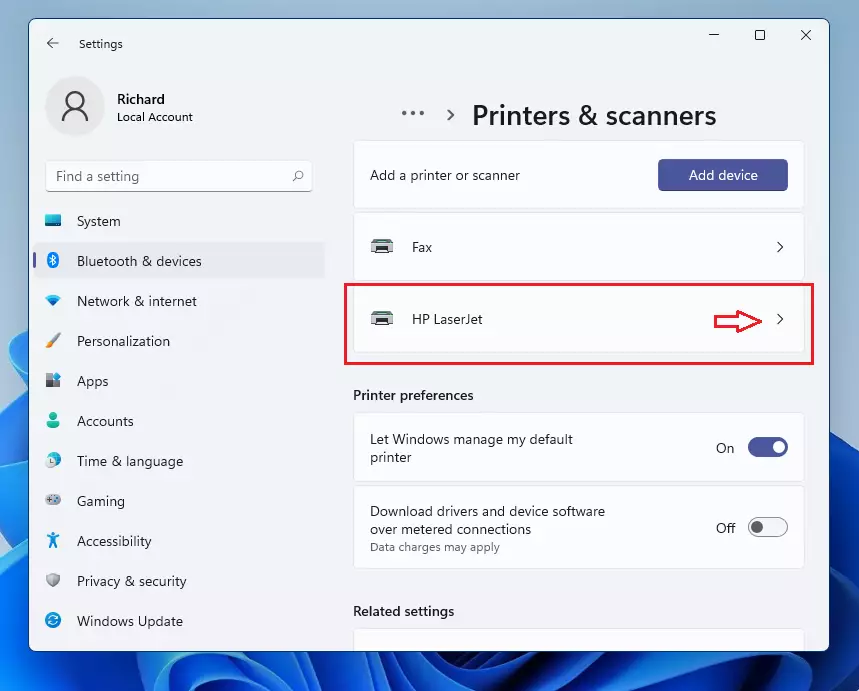
Select the Start button, then Settings > Bluetooth & devices > Printers & scanners.
Under Printers & scanners, find the Printer, and select it.
On the printer properties pane, click Remove to remove the current Printer.

Once the Printer is removed, go back to Start, then select Settings > Bluetooth & devices > Printers & scanners. Under Printer & scanner, click Add a printer or scanner. Wait for your Device to find nearby printers, choose the one you want, and then select Add Device.
This will install the Printer with the newest drivers.
Manually install the Printer’s latest drivers.
If the drivers you downloaded are not self-installing, you will have to update the drivers manually. To manually update your Printer’s drivers, do the steps below:
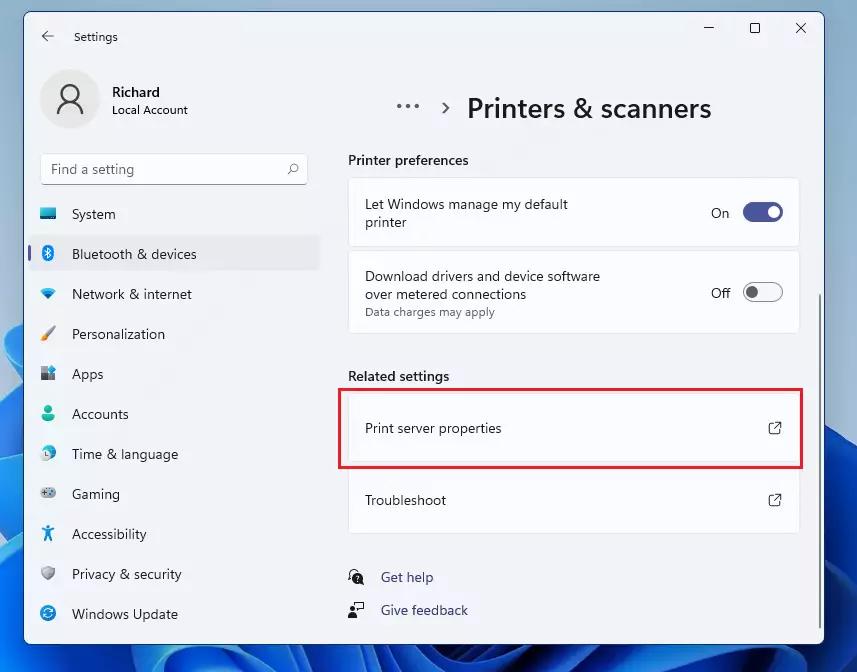
Return to Start, then select Settings > Bluetooth & devices > Printers & scanners. On the right, under Related Settings, select Print Server properties.
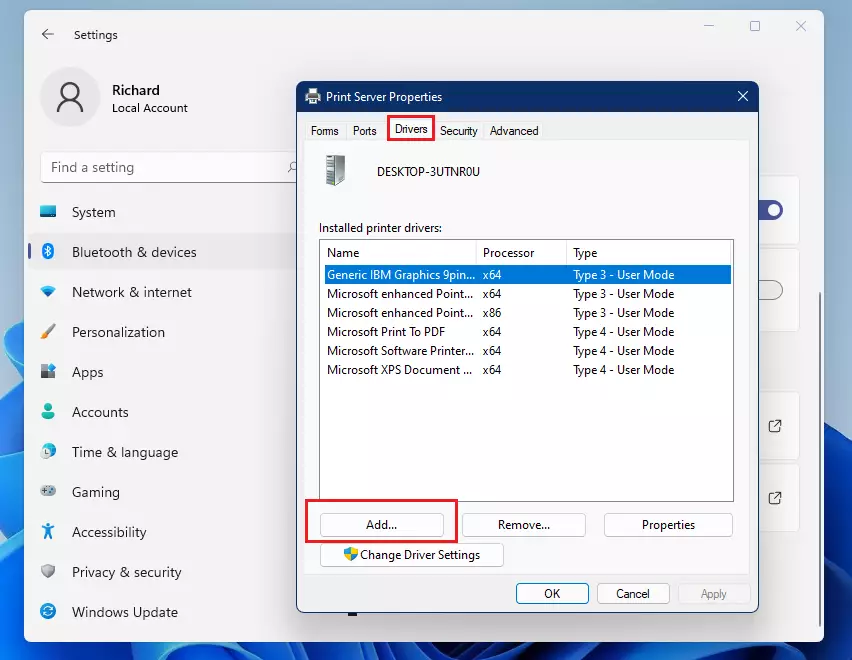
On the Drivers tab, see if your Printer is listed. If it is, you’re all set. If you don’t see your Printer listed, select Add.
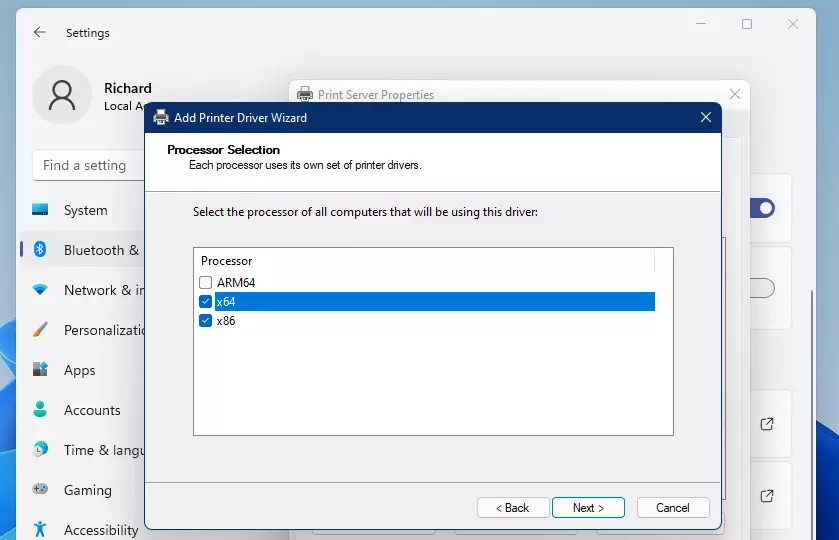
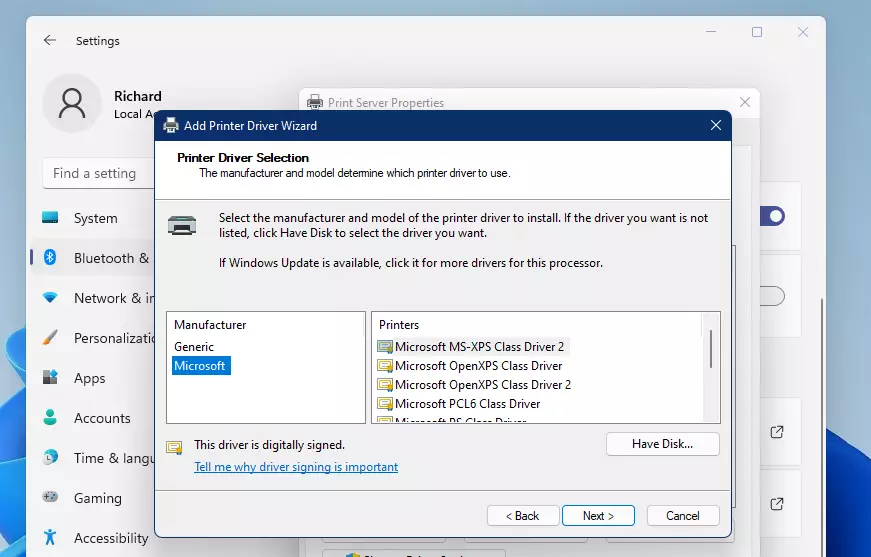
On the Welcome to the Add Printer Driver Wizard, select Next. Follow the wizard and choose these settings: both x64 and x86 process support.
In the Printer Driver Selection dialog box, select your printer manufacturer; on the right, select your printer driver, select Next, and select Finish.
This should get the newly downloaded drivers installed and ready to use.
Conclusion:
- Keeping your printer driver updated is essential for optimal performance and compatibility with Windows 11.
- Regularly check for updates using Windows Update to ensure you have the latest drivers.
- Download drivers directly from the manufacturer’s website for the most recent versions.
- If manual installation is necessary, follow the outlined steps to ensure successful installation.
- Up-to-date drivers can enhance features, fix bugs, and improve overall printer efficiency.
Leave a Reply