This article explains how to install TinyCP on Ubuntu Linux.
TinyCP is a lightweight and user-friendly control panel designed for managing web servers. It provides an intuitive interface that simplifies various server administration tasks, including managing domains, databases, and email accounts.
Once installed, it allows server administrators to manage Linux servers easily from a web browser, which reduces the complexity of managing them.
Installing TinyCP on Ubuntu can streamline your web server management tasks, saving time and effort while providing essential features for effective server control.
Install TinyCP
Before installing TinyCP on your Ubuntu server, make sure you’ve updated it. To update Ubuntu, run the commands below.
sudo apt update && sudo apt dist-upgrade && sudo apt autoremove
After that, run the commands below to download the TinyCP installation script. This script will do all the hard work for you. First, it will install the required packages and configure them. Then, install TinyCP.
cd /tmp
wget http://tinycp.com/download/tinycp-install.sh
Finally, run the commands below to install TinyCP.
chmod +x tinycp-install.sh
sudo ./tinycp-install.sh
That should install TinyCP. When the installation is done, you should receive something like this:
______________________________________________
|                                              |
|        TinyCP successfully installed         |
|______________________________________________|

  URL: http://10.0.2.8:8080
  LOGIN: admin
  PASSWORD: eYd7Q7CN

richard@ubuntu1804:/tmp$
After installing TinyCP, run the commands below to start it.
sudo /etc/init.d/tinycp startAccessing TinyCP
Now that TinyCP is installed, you can access the interface by opening your web browser and browsing the server hostname or IP address, followed by port 8080.
ex. https://localhost:8080
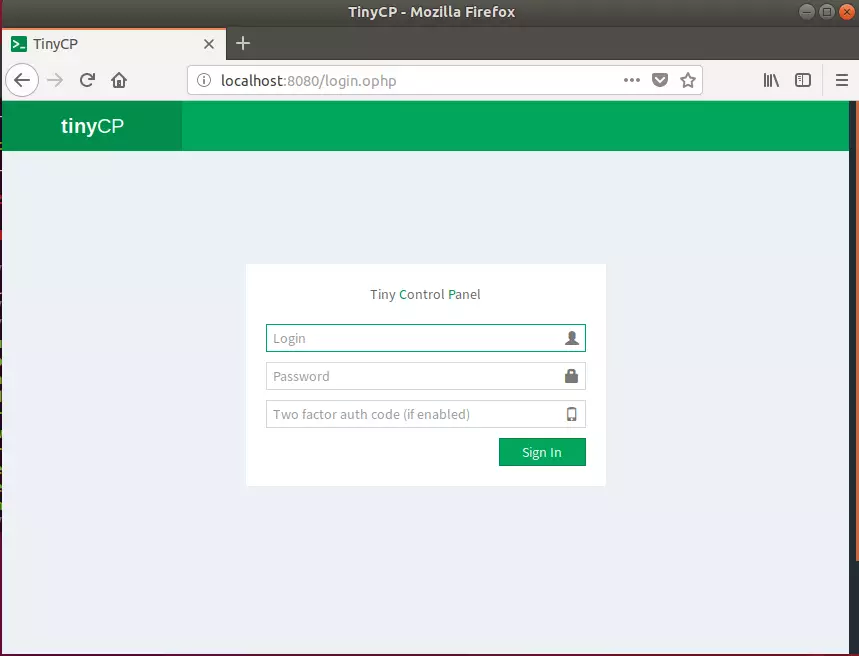
The username and password on the screen should allow you to log on. However, you may want to reset the password after logging in the first time.
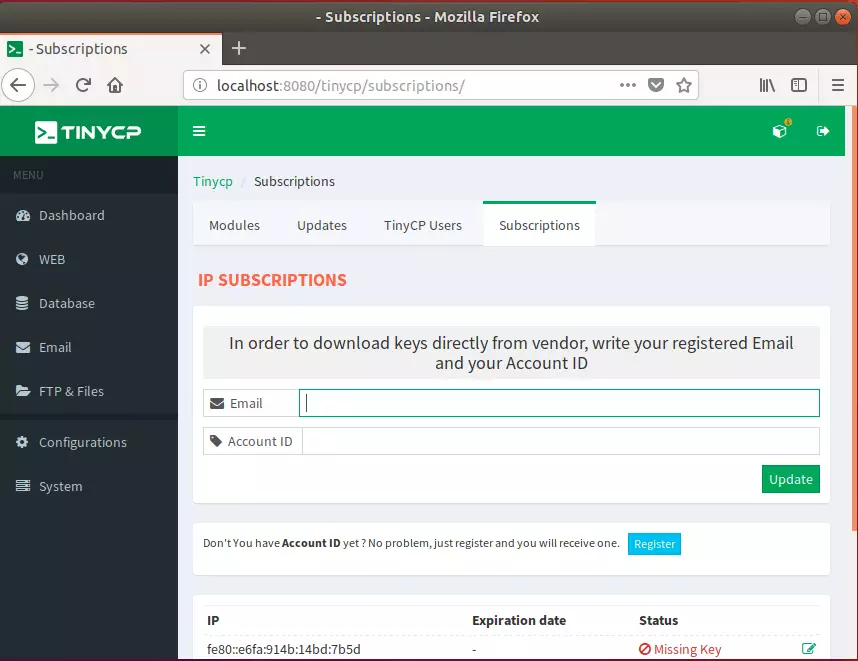
You must register for a free account to register your server. Without an Account ID, you won’t be able to navigate to other modules and parts of the page.

TinyCP does not install system packages by default to keep your system clean and healthy. Therefore, you’ll have to manually install additional packages from the portal to use a particular function and module. If you need this functionality, install the required packages.
Conclusion:
Installing TinyCP on your Ubuntu server can significantly enhance your web server management experience. Here are the key takeaways:
- User-Friendly Interface: TinyCP provides an intuitive dashboard for easier server administration.
- Time-Saving: The streamlined installation and management processes save both time and effort.
- Enhanced Control: Effectively manage domains, databases, and email accounts from a single platform.
- Lightweight Solution: TinyCP is designed to keep your system clean by not installing unnecessary packages.
- Initial Setup Required: A free account is necessary to access all features and modules after installation.
With TinyCP, managing your server becomes simpler, allowing you to focus more on your core activities.


Leave a Reply Cancel reply