This brief tutorial shows students and new users how to install and configure OTRS Ticketing Systems on Ubuntu 18.04 | 16.04.
Installing OTRS Ticketing Systems on Ubuntu Linux can be a great alternative to other commercial support platforms. OTRS is a modern and flexible ticket and support software that can help you organize your internal and external communication efficiently and optimally.
With OTRS, you can avoid errors and complete tasks quickly, and it comes with intuitive mechanisms that allow you to migrate from popular solutions easily.
In addition, Ubuntu Linux is a free and open-source operating system that is widely used and supported, making it excellent for installing OTRS.
For more about OTRS, please check its homepage.
To get started with installing OTRS systems on Ubuntu, follow the steps below:
Install Apache2
Apache2 HTTP Server is the most popular web server in ay. Since OTRS works with a web server, go and install Apache2.
To install the Apache2 HTTP server, run the commands below.
sudo apt update
sudo apt install apache2
After installing Apache2, the commands below can stop, start, and enable the Apache2 service to always start up with the server boots.
sudo systemctl stop apache2.service
sudo systemctl start apache2.service
sudo systemctl enable apache2.service
To determine if the Apache2 HTTP server is installed, open your web browser and type in the server’s Iserver’stname.
http://localhost
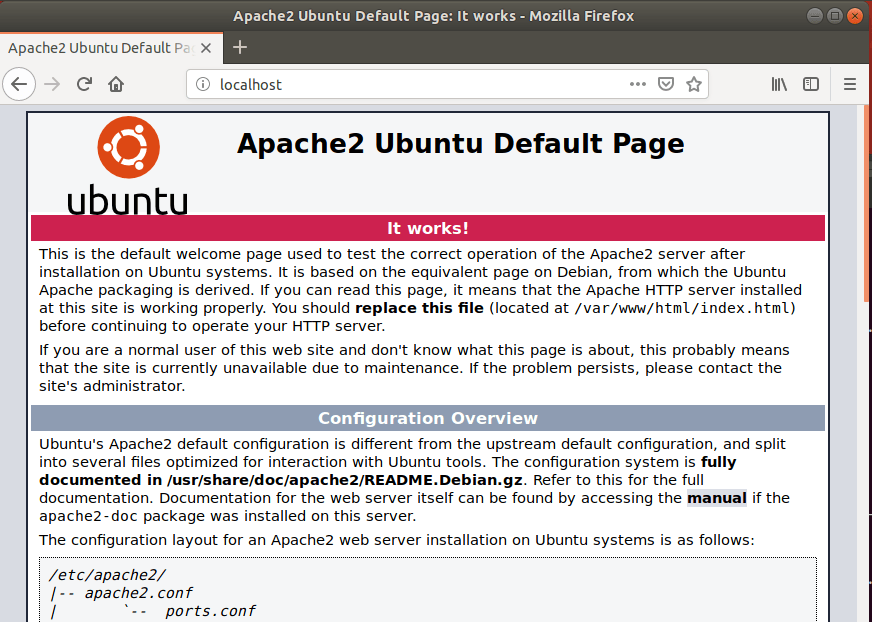
When you see a page similar to the one above, Apache2 is installed and working.
Install Perl and Related Modules
OTRS uses Perl as one of its main components. To get Perl and related modules installed, run the commands below:
sudo apt install libapache2-mod-perl2 libdatetime-perl libcrypt-eksblowfish-perl libcrypt-ssleay-perl libgd-graph-perl libapache-dbi-perl libsoap-lite-perl libarchive-zip-perl libgd-text-perl libnet-dns-perl libpdf-api2-perl libauthen-ntlm-perl libdbd-odbc-perl libjson-xs-perl libyaml-libyaml-perl libxml-libxml-perl libencode-hanextra-perl libxml-libxslt-perl libpdf-api2-simple-perl libmail-imapclient-perl libtemplate-perl libtext-csv-xs-perl libdbd-pg-perl libapache2-mod-perl2 libtemplate-perl libnet-dns-perl libnet-ldap-perl libio-socket-ssl-perl
That should get Perl installed and ready to use.
Install MariaDB Database Server
OTRS also needs a database server to store its content. The MariaDB database server is a great place to start when looking at open-source servers to use with OTRS.
To install MariaDB, run the commands below:
sudo apt update
sudo apt install mariadb-server mariadb-client
After installing MariaDB, the commands below can stop, start, and enable the service to start when the server boots.
sudo systemctl stop mariadb.service
sudo systemctl start mariadb.service
sudo systemctl enable mariadb.service
The commands below secure the MariaDB server by creating a root password and disallowing remote root access.
sudo mysql_secure_installation
When prompted, answer the questions below by following the guide.
- Enter current password for root (enter for none): Just press the Enter
- Set root password? [Y/n]: Y
- New password: Enter password
- Re-enter new password: Repeat password
- Remove anonymous users? [Y/n]: Y
- Disallow root login remotely? [Y/n]: Y
- Remove test database and access to it? [Y/n]: Y
- Reload privilege tables now? [Y/n]: Y
Restart MariaDB server
To test if MariaDB is installed and working, run the commands below:
sudo systemctl status mariadb
That should display MariaDB’s status.
● mariadb.service - MariaDB 10.1.44 database server
Loaded: loaded (/lib/systemd/system/mariadb.service; enabled; vendor preset: enabled)
Active: active (running) since Wed 2020-04-08 17:08:17 CDT; 1min 54s ago
Docs: man:mysqld(8)
https://mariadb.com/kb/en/library/systemd/
Main PID: 22363 (mysqld)
Status: "Taking your SQL requests now…"
Tasks: 27 (limit: 4666)
CGroup: /system.slice/mariadb.service
└─22363 /usr/sbin/mysqld
Apr 08 17:08:17 ubuntu1804 /etc/mysql/debian-start[22396]: mysql
After installing the server, run the commands below to open its configuration file.
sudo nano /etc/mysql/mariadb.conf.d/50-server.cnf
Then, add the highlighted lines to the file and save.
# this is only for the mysqld standalone daemon
[mysqld]

#
# * Basic Settings
#
user            = mysql
pid-file        = /var/run/mysqld/mysqld.pid
socket          = /var/run/mysqld/mysqld.sock
port            = 3306
basedir         = /usr
datadir         = /var/lib/mysql
tmpdir          = /tmp
lc-messages-dir = /usr/share/mysql
skip-external-locking

max_allowed_packet=64M
query_cache_size=36M
innodb_log_file_size=256M
character_set_server=utf8
.
Save the file and exit, then restart MariaDB:
sudo systemctl restart mariadb.service
Create OTRS Database
Now that you’ve all the required packages, continue below to start configuring the servers. First, create a blank database for OTRS to use.
To do that, run the commands below to log on to MariaDB. When prompted for a password, type the root password you created above.
sudo mysql -u root -p
Then create a database called otrs
CREATE DATABASE otrs CHARACTER SET utf8 COLLATE utf8_general_ci;
Create a database user called otrsuser with a new password
CREATE USER 'otrsuser'@'localhost' IDENTIFIED BY 'new_password_here';
Next, grant the user full access to the otrsuser database.
GRANT ALL ON otrs.* TO 'otrsuser'@'localhost' WITH GRANT OPTION;
Finally, save your changes and exit.
FLUSH PRIVILEGES;
EXIT;
Now that the MariaDB server is installed and a database created, go and install OTRS.
Create OTRS User
It is recommended to run OTRS services, not as root. So run the commands below to create a user called others and add the account to the Apache2 group.
sudo useradd -d /opt/otrs -c 'OTRS user' otrs
sudo usermod -aG www-data otrs
When you don’t, continue below to download OTRS
Download and Configure OTRS
Now that your system is prepared and the user for OTRS has been created, run the commands below to download the latest OTRS package.
Then, move the download files to the OTRS home directory.
cd /tmp
wget http://ftp.otrs.org/pub/otrs/otrs-latest.tar.gz
tar xvf otrs-latest.tar.gz
mv otrs-6.0.27/ otrs
sudo mv otrs /opt
sudo /opt/otrs/bin/otrs.CheckModules.pl
When you’re done, the commands below create an OTRS configuration file.
sudo cp /opt/otrs/Kernel/Config.pm.dist /opt/otrs/Kernel/Config.pm
sudo nano /opt/otrs/Kernel/Config.pm
The second command should open the configuration file where you’ll add the name, username, and password created above.
sub Load {
    my $Self = shift;

    # ---------------------------------------------------- #
    # database settings                                    #
    # ---------------------------------------------------- #

    # The database host
    $Self->{DatabaseHost} = '127.0.0.1';

    # The database name
    $Self->{Database} = 'otrs';

    # The database user
    $Self->{DatabaseUser} = 'otrsuser';

    # The password of database user. You also can use bin/otrs.Console.pl Maint::Database::PasswordCrypt
    # for crypted passwords
    $Self->{DatabasePw} = 'type_database_user_password';

    # The database DSN for MySQL ==> more: "perldoc DBD::mysql"
    $Self->{DatabaseDSN} = "DBI:mysql:database=$Self->{Database};host=$Self->{DatabaseHost};";

    # The database DSN for PostgreSQL ==> more: "perldoc DBD::Pg"
    # if you want to use a local socket connection
#    $Self->{DatabaseDSN} = "DBI:Pg:dbname=$Self->{Database};";
    # if you want to use a TCP/IP connection
Next, run the commands below to open and enable the Apache Perl configuration.
sudo nano /opt/otrs/scripts/apache2-perl-startup.pl
Edit the file, update the highlighted line, and then save.
# Preload frequently used modules to speed up client spawning.
use CGI ();
CGI->compile(':cgi');
use CGI::Carp ();

use Apache::DBI ();

# enable this if you use mysql
use DBD::mysql ();
use Kernel::System::DB::mysql;

# enable this if you use postgresql
#use DBD::Pg ();
#use Kernel::System::DB::postgresql;
When you don’t, you use the commands below to configure Apache2 permissions for the directory and create a VirtualHost file.
sudo /opt/otrs/bin/otrs.SetPermissions.pl --web-group=www-data
sudo ln -s /opt/otrs/scripts/apache2-httpd.include.conf /etc/apache2/sites-enabled/otrs.conf
When you don’t, do the above, run the commands below to install other Perl packages, and validate that all packages are installed.
perl -MCPAN -e shell

install Crypt::Random::Source::Weak::devurandom
install Exporter::Tiny
install Math::Random::ISAAC
install Math::Random::Secure
install Module::Find
install Moo
install Type::Tiny
install namespace::clean
Then, exit from the terminal and validate that all packages are installed.
perl -cw /opt/otrs/bin/cgi-bin/index.pl
perl -cw /opt/otrs/bin/cgi-bin/customer.pl
perl -cw /opt/otrs/bin/otrs.Console.pl
After that, restart Apache2 and Perl by running the commands below:
sudo systemctl restart apache2
sudo a2enmod perl
Finally, open your web browser and browse to the server’s IP address.
http://localhost/otrs/installer.pl
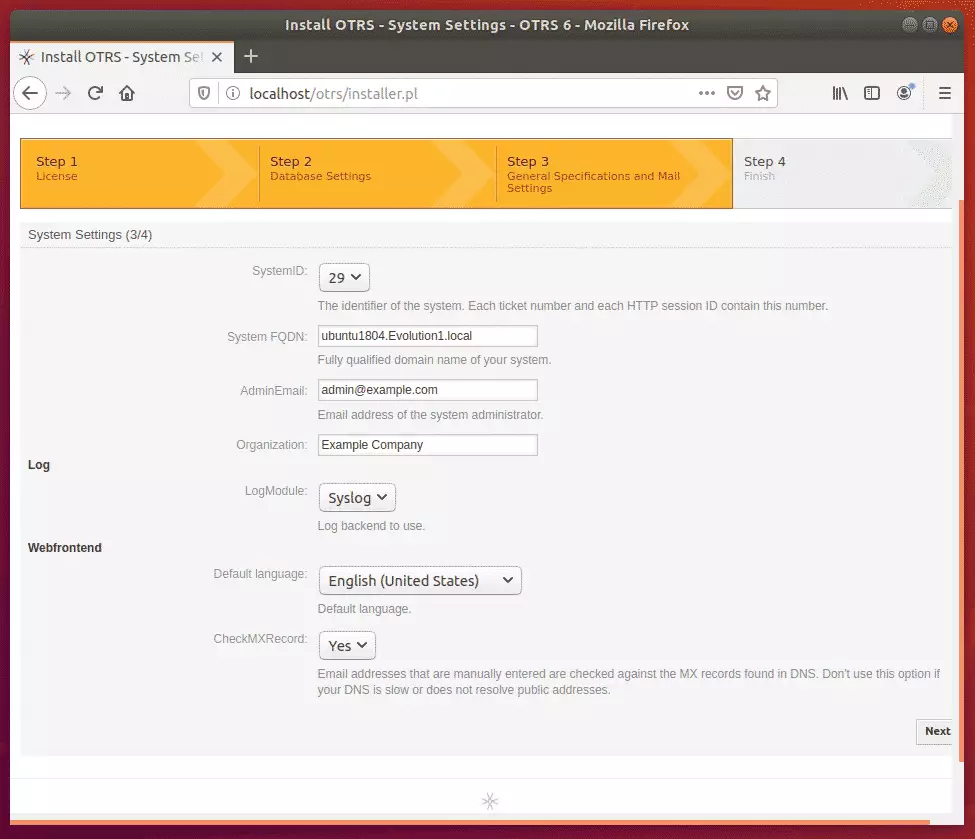
That should open the installation wizard. Follow the setup wizard until you’re done.
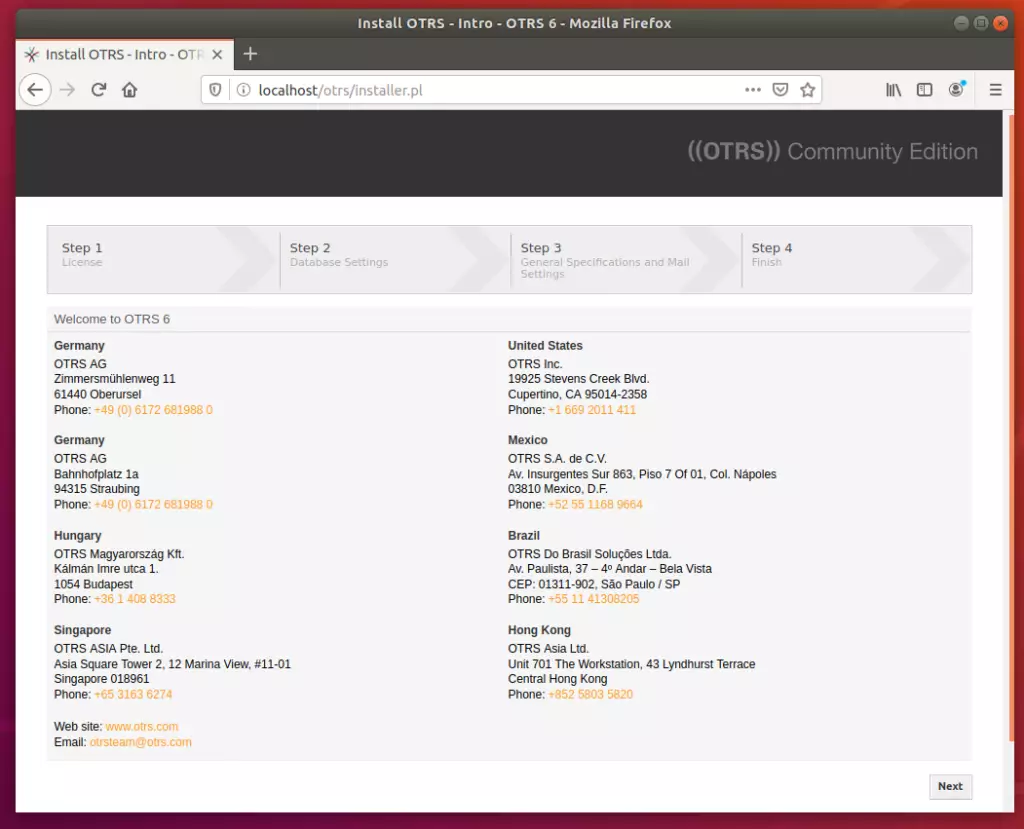
On the screen below, choose MySQL and select the option to use an existing database for OTRS.
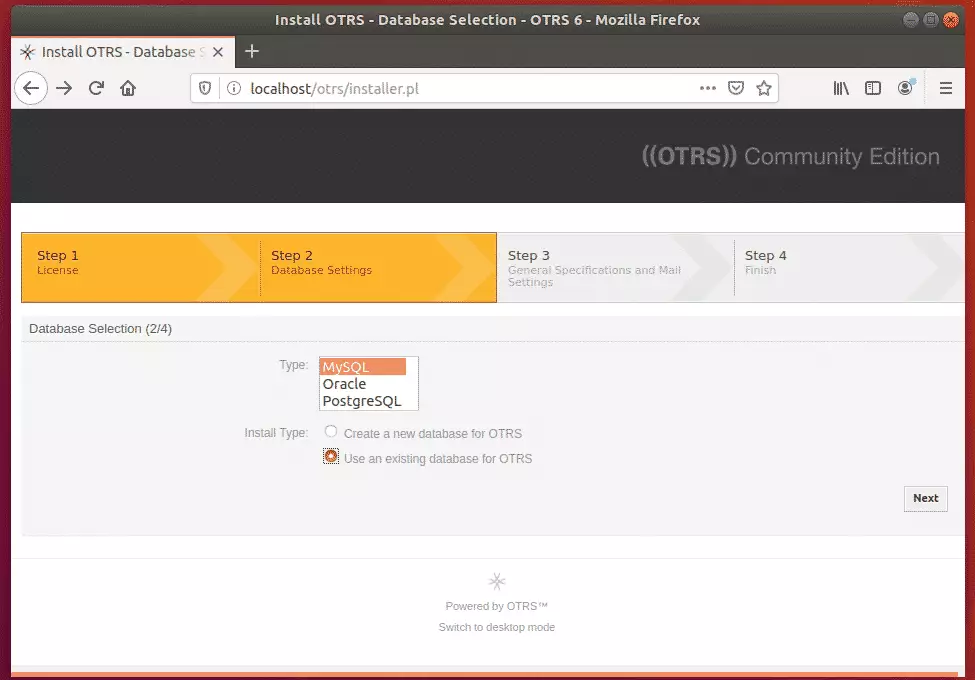
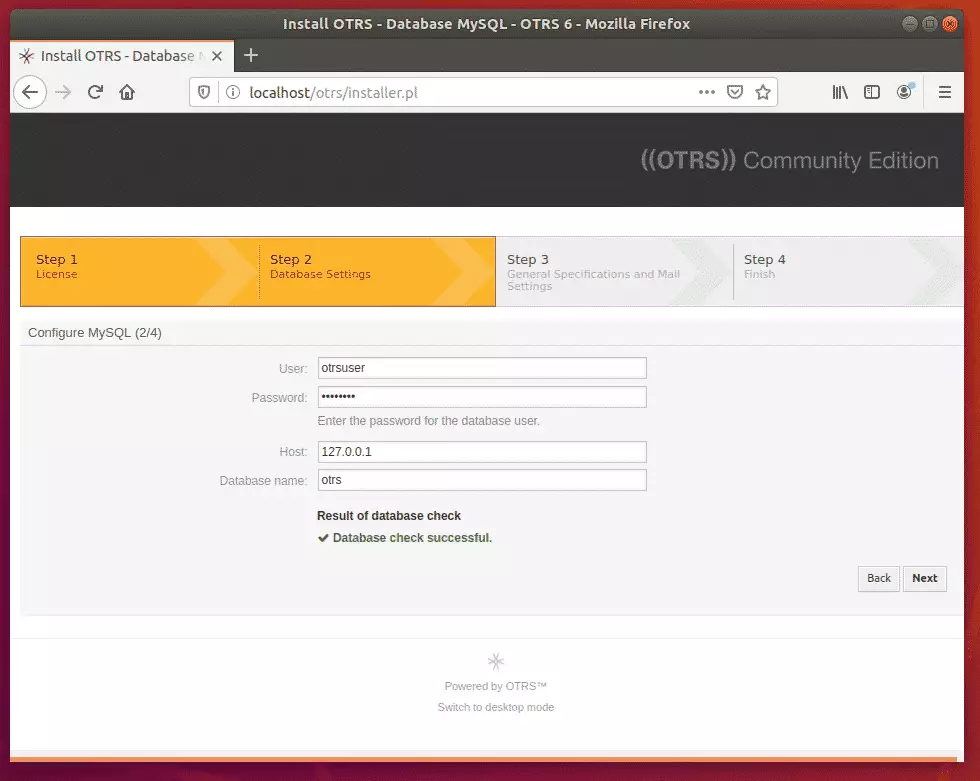
Then, type in the database information you created above and continue.
After that, enter information for your environment and continue
When you don’t do the setup, log in with the credentials provided.
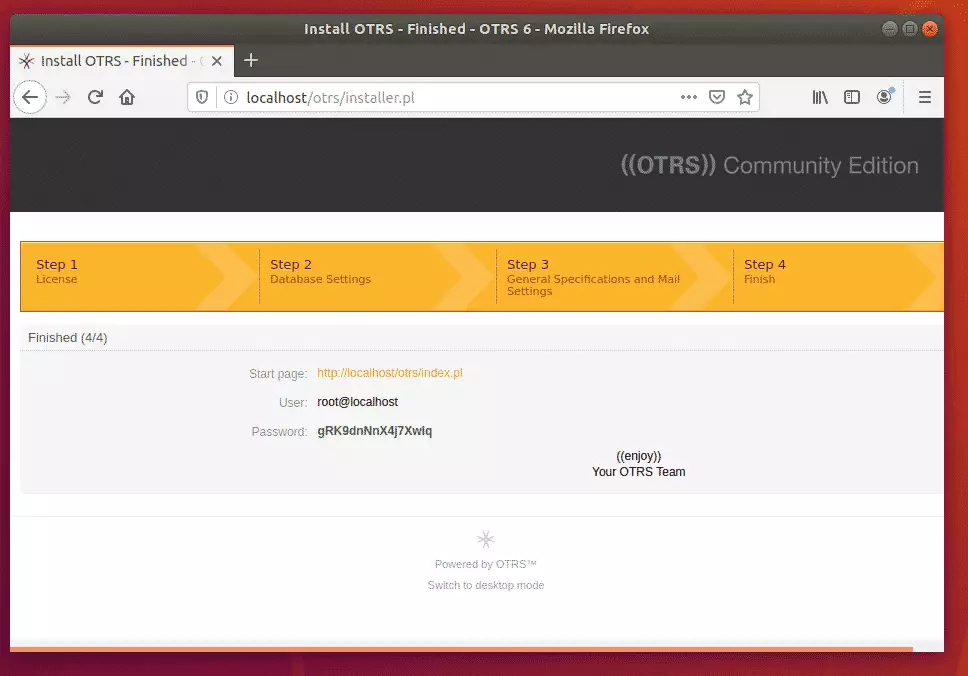
Enjoy!
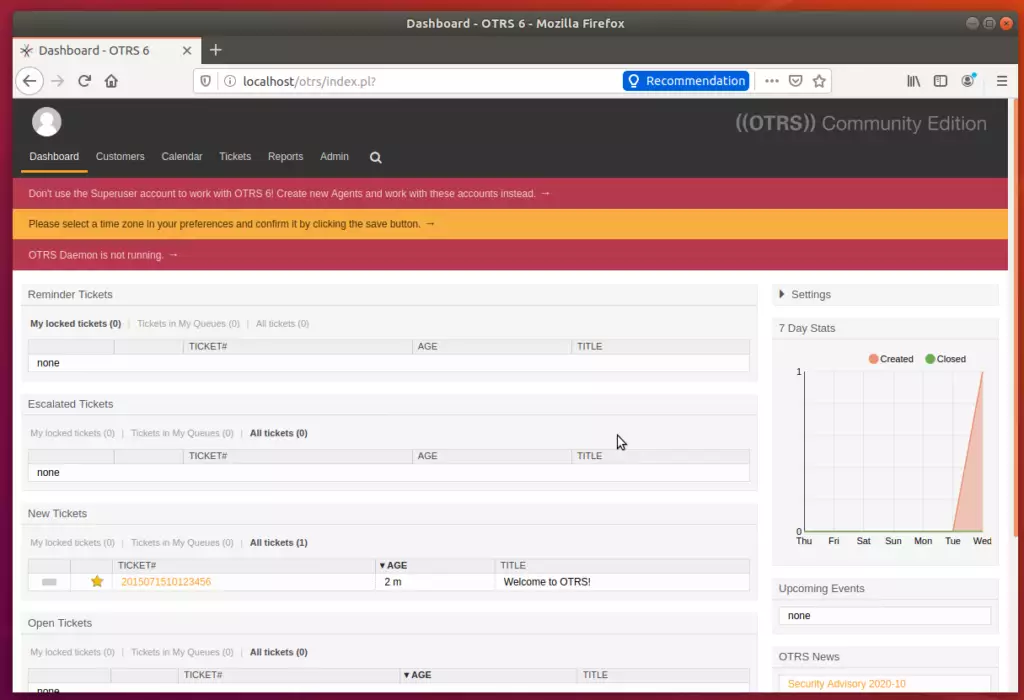
OTRS daemon can be started and activated using the commands below:
sudo su - otrs -c "/opt/otrs/bin/otrs.Daemon.pl start"
sudo su - otrs -c "/opt/otrs/bin/Cron.sh start"
That’s it! Begin configuring your environment.
Conclusion:
This post showed you how to install and configure OTRS ticket systems on Ubuntu 18.04 | 16.04. If you find any error above, please use the comment form below to report.
Thanks,
You may also like the post below:

Leave a Reply