
This article explains how to install Gogs, a self-hosted Git service on Ubuntu 24.04.
Gogs is a self-hosted Git service that provides a simple and efficient way to manage your Git repositories. It provides a smooth experience for hosting your version control system without relying on cloud services.
Gogs integrates with development workflow tools and services, including webhooks and CI/CD systems. As an open-source platform, Gogs allows code modifications and supports community contributions.
The steps below walk you through installing Gogs on Ubuntu 24.04.
Set up Ubuntu
Gogs requires a Git service, so you need Git installed. Additionally, you must create an account to run Gogs services on your machine.
To get all these done, run the command below to install Git.
sudo apt update
sudo apt install git
Next, create a Git account to run Gogs by executing the command below.
sudo adduser --system --group --disabled-password --shell /bin/bash --home /home/git --gecos 'Git Version Control' git
If the command above was successful, you should see a similar output.
info: Selecting GID from range 100 to 999 ...
info: Adding system user `git' (UID 122) ...
info: Adding new group `git' (GID 124) ...
info: Adding new user `git' (UID 122) with group `git' ...
info: Creating home directory `/home/git' ...
Install MariaDB
Gogs needs a database server to store its content. A good open-source database server to use is MariaDB.
Run the command below to install MariaDB.
sudo apt install mariadb-server
After installing MariaDB, create an empty database for Gogs.
Run the command below to log on the the MariaDB database server.
sudo mariadb
Then, run the command below to change the [GLOBAL innodeb_file_per_table] to On.
SET GLOBAL innodb_file_per_table = ON;
Next, create a Gogs database called gogsdb
CREATE DATABASE gogsdb;
Then, create a database user called gogsuser with a new password
CREATE USER 'gogsuser'@'localhost' IDENTIFIED BY 'Type_new_password_here';
After that run the command below to grant the user full access to the database.
GRANT ALL ON gogsdb.* TO 'gogsuser'@'localhost' WITH GRANT OPTION;
Next, run the commands below to update the database character set.
ALTER DATABASE gogsdb CHARACTER SET = utf8mb4 COLLATE utf8mb4_unicode_ci;
Finally, save your changes and exit.
FLUSH PRIVILEGES;
EXIT;
Download and install Gogs
After setting up Ubuntu and installing MariaDB with a database, you can proceed to download the Gogs file for installation.
To download the latest files, use the link below.
https://github.com/gogs/gogs/releases
Run the commands below to download the Gogs file. Replace the version number with the latest.
cd /tmp
wget https://github.com/gogs/gogs/releases/download/v0.13.2/gogs_0.13.2_linux_amd64.tar.gz
Then extract the downloaded file into the Git user’s home directory created above by running the commands below:
sudo tar xvf gogs_0.13.2_linux_amd64.tar.gz
 -C /home/git
After that, give the Git user ownership of the Gogs folder.
sudo chown -R git: /home/git/gogs
Next, create Gogs service scripts by transferring them from the user directory to the system directory.
sudo cp /home/git/gogs/scripts/systemd/gogs.service /etc/systemd/system/
When all is done, reload the systemd and start Gogs services.
sudo systemctl daemon-reload
sudo systemctl enable gogs
sudo systemctl start gogs
To check Gogs’ status, run the commands below:
sudo systemctl status gogs
You should see a similar message below:
gogs.service - Gogs
     Loaded: loaded (/etc/systemd/system/gogs.service; enabled; preset: enabled)
     Active: active (running) since Wed 2025-03-19 10:33:58 CDT; 6s ago
   Main PID: 4839 (gogs)
      Tasks: 6 (limit: 4551)
     Memory: 34.2M (peak: 34.5M)
        CPU: 109ms
     CGroup: /system.slice/gogs.service
             └─4839 /home/git/gogs/gogs web
Gogs should be installed and ready to configure.
Open your browser and browse to the server hostname or IP address followed by port 3000.
http://localhost:3000/install
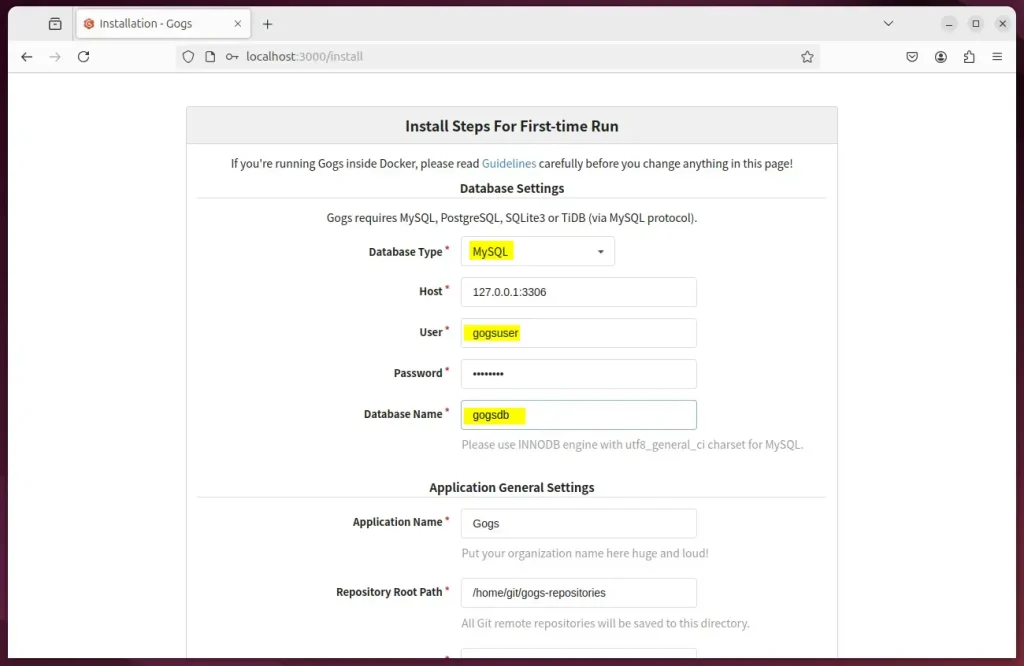
You should see Gogs set up initial web portal.
On the page, select the database type, enter the database name, and provide the user account and password.
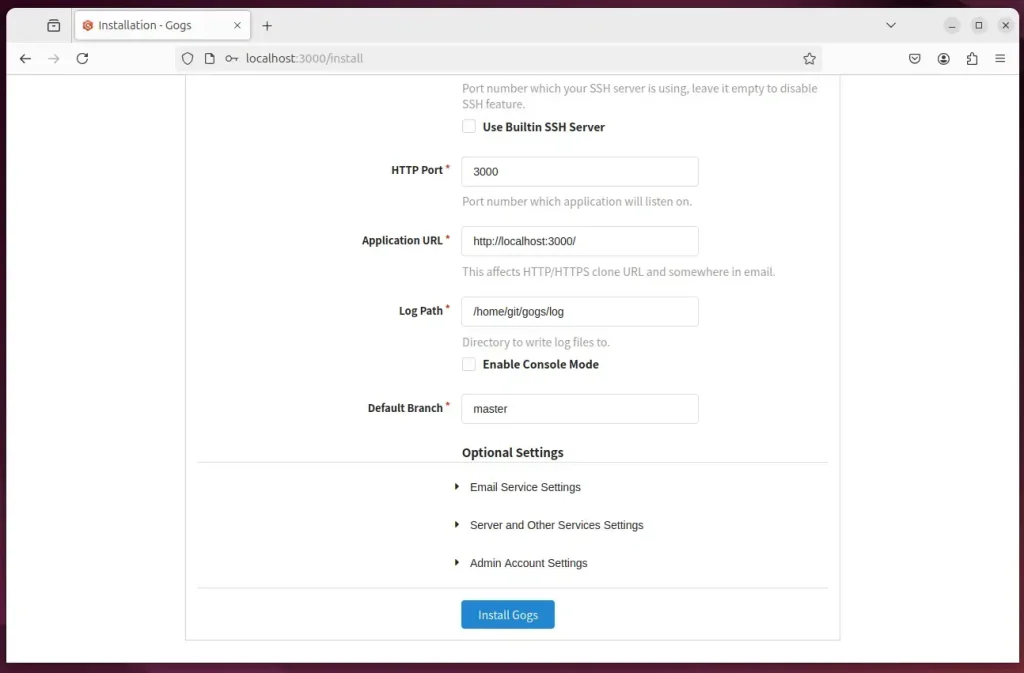
Then, expand the admin account settings and create an admin account. Then, click ‘Install Gogs.’
Gogs should be ready to use. Login.
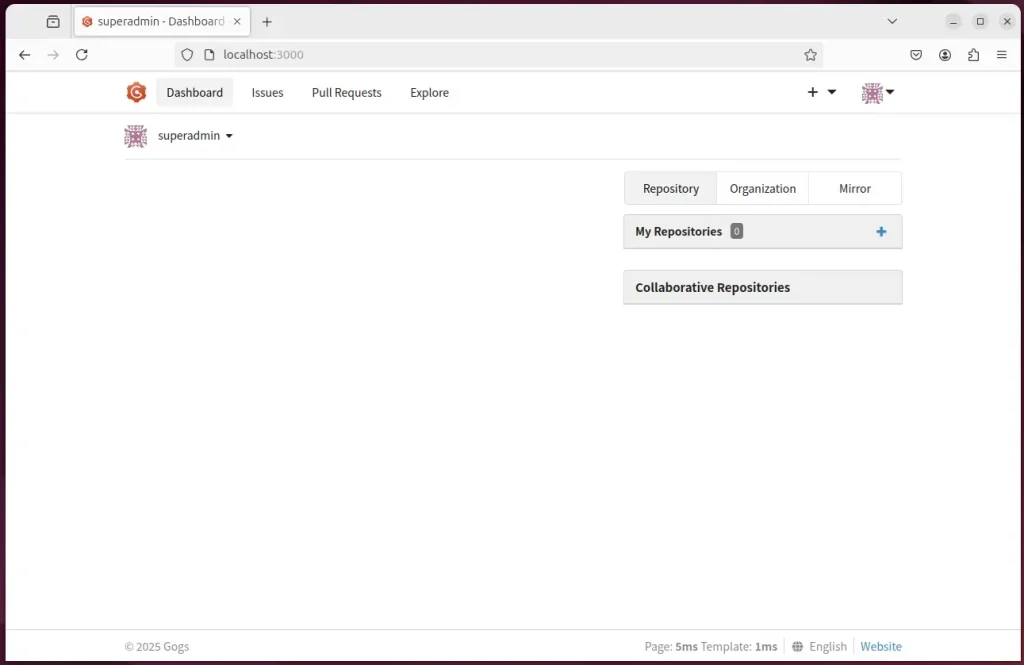
That should do it!
Conclusion:
In summary, Gogs is a powerful self-hosted Git service that simplifies repository management. By following the steps outlined in this article, you can successfully install and configure Gogs on your Ubuntu 24.04 machine. Here are the key points to remember:
- Gogs provides a user-friendly interface for managing Git repositories.
- Installation involves setting up Git, MariaDB, and the Gogs application itself.
- Ensure database setup includes creating a dedicated user and granting proper access rights.
- Access the Gogs installation portal through your web browser to complete the configuration.
- Regularly check the service status to ensure everything is running smoothly.
Gogs is now ready for you to use, enhancing your development workflow efficiently!


Leave a Reply Cancel reply