This brief tutorial shows students and new users how to install GNS3 on Ubuntu 20.04 | 18.04.
Graphical Network Simulator-3 (GNS3) is a network software emulator that helps network professionals design and build better networks, share ideas, and make connections.
GNS3 can configure, test, and troubleshoot virtualized networks to emulate real-world hardware devices. It has helped thousands of network professionals network pass network exams and can be used in training sessions without purchasing real hardware, which may cost a lot.
GNS3 works with multiple vendors’ hardware devices, including Cisco virtual switches, Cisco ASAs, Brocade voters, Cumulus Linux switches, Docker instances, and HPE VSRs.
Instead of purchasing individual hardware devices from these many vendors, GNS3 can be used to test interoperability and real-world experiences.
To get started with installing GNS3 on Ubuntu, follow the steps below:
Install GNS3 via APT Repository
There are multiple ways to install GNS3 on Ubuntu. The quickest way is to install it from its official PPA repository. To do that, run the commands below to add its PPA.
sudo add-apt-repository ppa:gns3/ppa
sudo apt update
sudo apt install gns3-gui gns3-server
When prompted whether non-root users should be allowed to use Wireshark and ubridge, select ‘Yes‘ both times.
 ┌──────────────────────────┤ Configuring ubridge ├──────────────────────────┐
 │                                                                           │
 │ Ubridge can be installed in a way that allows members of the "ubridge"    │
 │ system group to capture packets. This is recommended over the             │
 │ alternative of running GNS3 directly as root, because less of the code    │
 │ will run with elevated privileges.                                        │
 │                                                                           │
 │ All users members of "sudo" or "admin" group will be added to this group  │
 │ by default.                                                               │
 │                                                                           │
 │ Without that most GNS3 features will not work.                            │
 │                                                                           │
 │ Should non-superusers be able to run GNS3?                                │
 │                                                                           │
 │                    <Yes>                       <No>                       │
 │                                                                           │
 └───────────────────────────────────────────────────────────────────────────┘
It would be best if you also accepted the Yes below:
 ┌─────────────────────┤ Configuring wireshark-common ├──────────────────────┐
 │                                                                           │
 │ Dumpcap can be installed in a way that allows members of the "wireshark"  │
 │ system group to capture packets. This is recommended over the             │
 │ alternative of running Wireshark/Tshark directly as root, because less    │
 │ of the code will run with elevated privileges.                            │
 │                                                                           │
 │ For more detailed information please see                                  │
 │ /usr/share/doc/wireshark-common/README.Debian.gz once the package is      │
 │ installed.                                                                │
 │                                                                           │
 │ Enabling this feature may be a security risk, so it is disabled by        │
 │ default. If in doubt, it is suggested to leave it disabled.               │
 │                                                                           │
 │ Should non-superusers be able to capture packets?                         │
 │                                                                           │
 │                    <Yes>                       <No>                       │
 │                                                                           │
 └───────────────────────────────────────────────────────────────────────────┘
Install IOU Support
After running the commands above, run the commands below to install IOU support.
sudo dpkg --add-architecture i386
sudo apt update
sudo apt install gns3-iou
The commands above allow GNS3 support for IOS on Unix (IOU).
Install Docker CE
By default, GNS3 uses Docker containers when building networking labs. Since Docker isn’t installed in Ubuntu, follow the steps below to install Docker.
First, install the following packages below:
sudo apt install apt-transport-https ca-certificates curl software-properties-common
Then, add the official Docker GPG key.
curl -fsSL https://download.docker.com/linux/ubuntu/gpg | sudo apt-key add -
After that, run the commands below to add the Docker repository
sudo add-apt-repository "deb [arch=amd64] https://download.docker.com/linux/ubuntu $(lsb_release -cs) stable"
Finally, run the commands below to install Docker CE.
sudo apt update
sudo apt install docker-ce
You should always add your user account to the Docker group.
sudo usermod -a -G docker $USER
Add this point, and all is good. However, to properly use GNS3, you must add your user account to the following groups: ubridge libvirt KVM Wireshark.
sudo usermod -aG ubridge $USER
sudo usermod -aG libvirt $USER
sudo usermod -aG kvm $USER
sudo usermod -aG wireshark $USER
Restart your user session by logging out and back in or restarting the system.
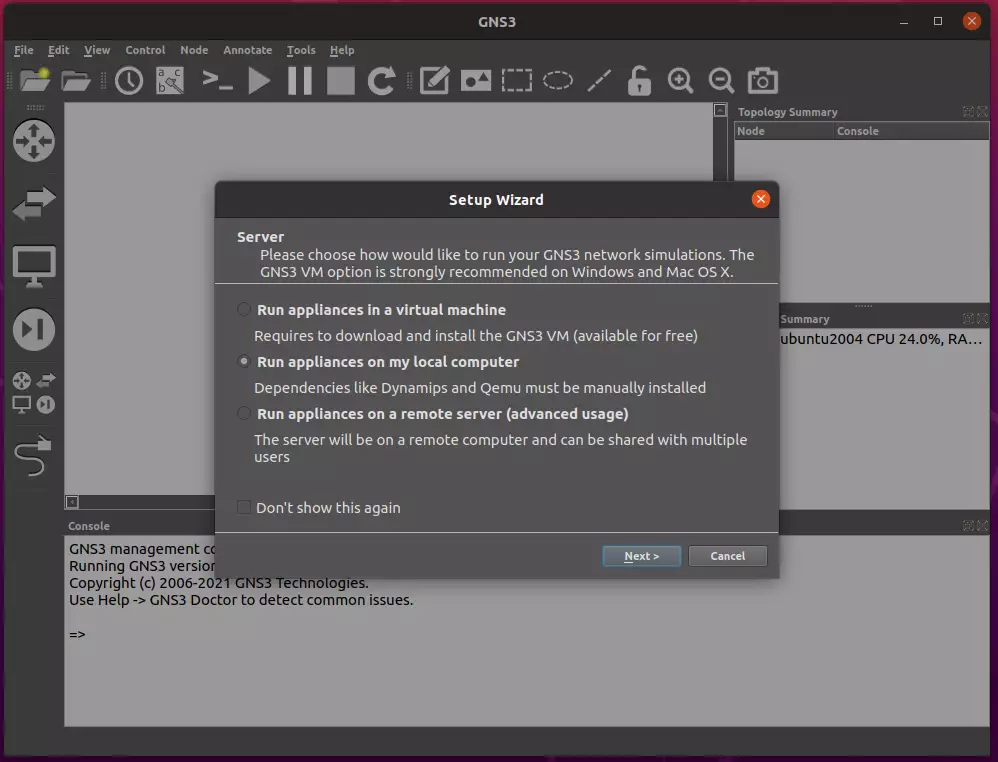
GNS3 should be installed, configured, and ready to use. Go to the Activities Overview –> Dashboard, search for GNS3, and launch.
That’s it!
Conclusion:
This post showed you how to install GNS3 on Ubuntu 20.04 | 18.04. If you find any error above, please use the form below to report.


Leave a Reply Cancel reply