

This simple guide will help you hide one or more drives (like your D: or E: drive) from showing up in File Explorer on your Windows 11 computer. This works for all users on your PC.
Important: Even if a drive is hidden, you can still open and use it like normal. It just won’t show up in the usual places.
What Does Hiding a Drive Do?
- The drive won’t appear in This PC or the sidebar in File Explorer.
- The drive keeps its letter (like D: or E:).
- You can still open the drive by typing its letter in the File Explorer’s address bar or other ways.
How Can You Access Hidden Drives?
If you want to open a hidden drive, here are a few easy ways:
- Type the drive letter (for example, F:) in the File Explorer address bar and press Enter.
- Open Disk Management by typing
diskmgmt.mscin the Start menu search, right-click the drive, and select Open. - Use a command prompt or Windows Terminal and type the drive letter followed by Enter.
Note: You need to be signed in as an administrator (the person who can make changes to your computer) to hide or unhide drives.
Follow These Easy Steps to Hide Drives
Step 1: Open the Registry Editor
- Press Windows key + R, type
regedit, and press Enter.
⚠️ Admin Required
Step 2: Go to the Explorer Folder in Registry
In Registry Editor, use the left sidebar to find this folder:
HKEY_LOCAL_MACHINE\SOFTWARE\Microsoft\Windows\CurrentVersion\Policies\ExplorerHere’s what it looks like:
Step 3: Choose to Hide or Unhide Drives
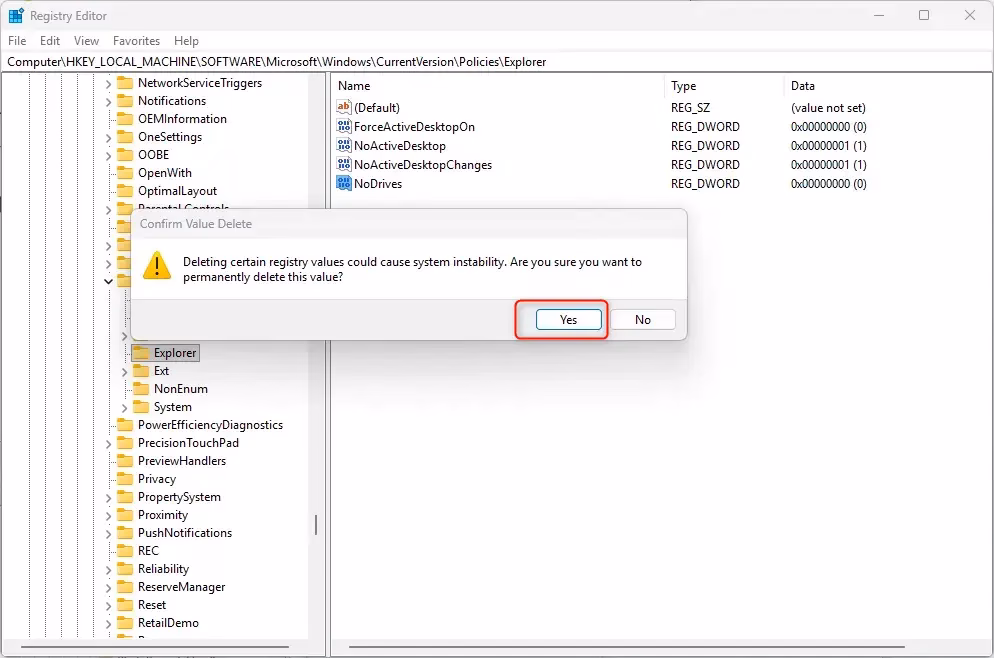
To Unhide All Drives
- Look for a setting called
NoDriveson the right side. - If you see
NoDrives, right-click it and select Delete. - Confirm by clicking Yes.
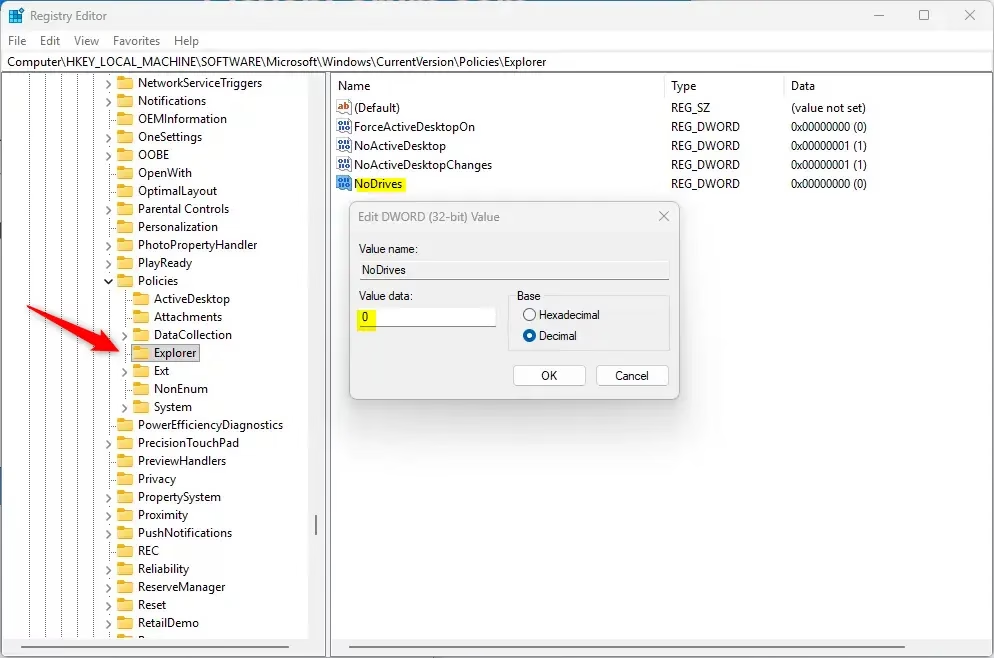
To Hide Specific Drives
- If you don’t see
NoDrives, right-click on a blank space on the right pane, choose New → DWORD (32-bit) Value. - Name it
NoDrives. - Double-click
NoDrivesto edit it. - Select Decimal and enter the number that matches the drive(s) you want to hide (see the table below for the numbers).
- Click OK.
Drive Letter Numbers Table
| Drive Letter | Number to Enter |
|---|---|
| A | 1 |
| B | 2 |
| C | 4 |
| D | 8 |
| E | 16 |
| F | 32 |
| G | 64 |
| H | 128 |
| I | 256 |
| J | 512 |
| K | 1024 |
| L | 2048 |
| M | 4096 |
| N | 8192 |
| O | 16384 |
| P | 32768 |
| Q | 65536 |
| R | 131072 |
| S | 262144 |
| T | 524288 |
| U | 1048576 |
| V | 2097152 |
| W | 4194304 |
| X | 8388608 |
| Y | 16777216 |
| Z | 33554432 |
Tip: To hide more than one drive at a time, add the numbers together. For example, to hide E (16) and F (32), enter 48 (16 + 32).
Step 4: Finish Up
- Close the Registry Editor.
- You need to restart your File Explorer or your computer for the change to work:
- Press Ctrl + Shift + Esc to open Task Manager.
- Find Windows Explorer under Processes.
- Right-click it and choose Restart.
- Or simply sign out and sign back in or restart your PC.
Summary
- You can hide one or many drives from showing in File Explorer.
- The drives keep their letters and can still be accessed by typing their letter or using Disk Management.
- You need admin rights to change these settings.
- Use the Registry Editor carefully — follow the steps exactly.
- Restart File Explorer or your PC to see the changes.
By following these steps, you can keep your File Explorer tidy and protect your drives from being easily seen by others who use your computer.


Leave a Reply Cancel reply