

This post shows students and new users the steps to always show the File Explorer menu bar in Windows 11.
Computers enrolled in the Microsoft Insider Program will see new features that are unavailable. For example, file Explorer includes a new tab browsing feature that helps users work with multiple locations simultaneously.
Another feature recently introduced is the menu bar previously found in previous versions of Windows. Of course, you can always have the menu bar in File Explorer.
The menu bar includes File, Edit, View, and Tools. These menu items will vary depending on what is open and selected in File Explorer.
The steps below show you how always to show the menu bar in File Explorer in Windows 11.
How to always show the menu bar in File Explorer in Windows 11
As mentioned above, File Explorer in Windows 11 now has the old-style menu bar that varies based on what is open or selected.
Below is how to always show the menu bar in File Explorer.
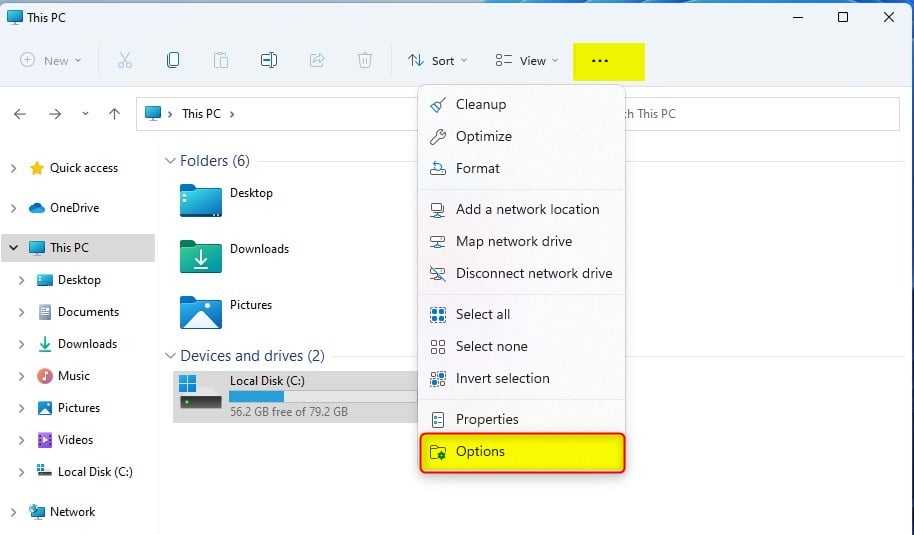
To do that, open File Explorer and select Options (ellipse or 3-dots) on the menu.
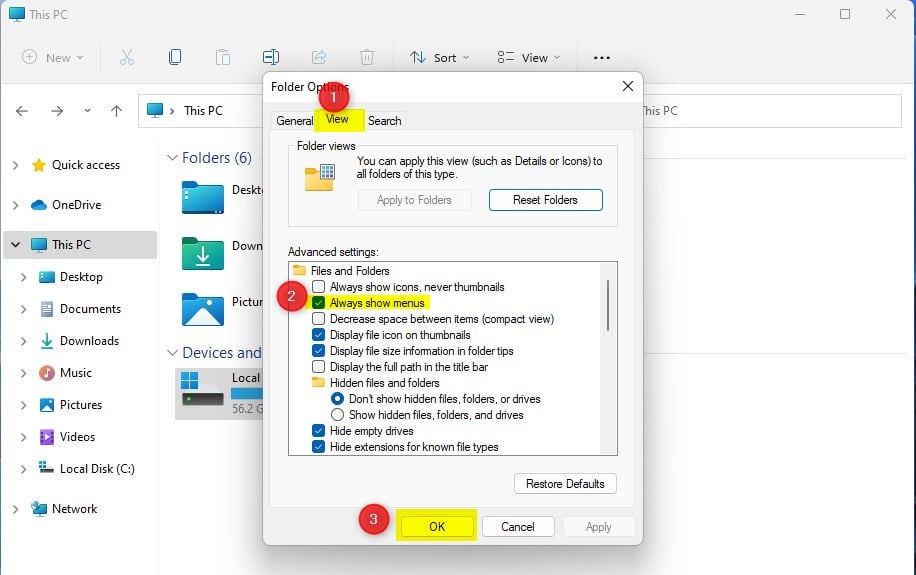
On the Folder Options window, under the View tab, select or unselect Always show menus and click OK to hide or unhide the menu bar in Windows 11.
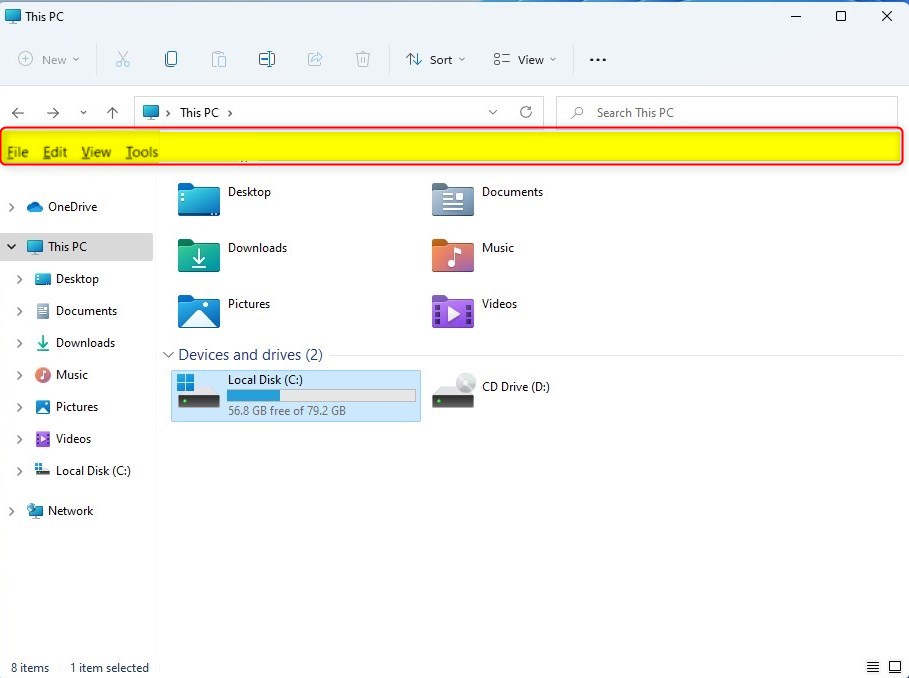
Once you do that, you should see a menu bar similar to the one below.
That should do it!
Conclusion:
- Windows 11 includes new features for File Explorer, such as the reintroduction of the classic menu bar.- Microsoft Insider Program users may have access to additional features not yet available to everyone.
- Following the provided steps, users can easily show or hide the menu bar in File Explorer.
- The menu bar contains familiar options like File, Edit, View, and Tools, which adapt based on File Explorer’s open or selected items.
- Users can customize their File Explorer experience to suit their preferences by following the steps.


Leave a Reply Cancel reply