How to Downgrade from Windows 11 to Windows 10

Downgrading from Windows 11 to Windows 10 reverses the upgrade process and restores your previous operating system. You can use a built-in rollback feature to revert to Windows 10 within 10 days of upgrading, keeping your personal files and apps intact.
When this 10-day window expires, Windows deletes the old system files, which means you must perform a clean install of Windows 10 and back up your data beforehand.
To downgrade from Windows 11 to Windows 10 within 10 days of upgrading, go to Settings System Recovery and click “Go back”. If the 10-day window has passed, a clean install of Windows 10 is required, which will erase your data.
Why downgrade 🪟 Windows 11?
You might want to return to Windows 10 if you experience performance issues, have hardware that doesn’t work correctly with the new system, or if you simply prefer the older interface. Some users find that specific apps are not yet optimized for the new operating system.
What happens when done?
Your computer will revert to the version of Windows 10 you had before the upgrade. You will keep your files, but you may need to reinstall some apps or adjust settings that were changed during the time you used Windows 11. Note: You must have administrative access to perform these steps.
Important: The 10-Day Limit and Windows.old
Windows stores your old system files in a folder named 📁C:\
Data Backup Requirements
While the rollback process is designed to keep your data, technical errors can occur. Ensure you have your BitLocker recovery key saved if your drive is encrypted.
Step-by-step: How to go back
- Open your Settings menu. You can do this by pressing the Windows key + I on your keyboard or by clicking Start then Settings. %%LNK0%%

- In the System menu, look for the Recovery option on the right side of the screen. %%LNK1%%
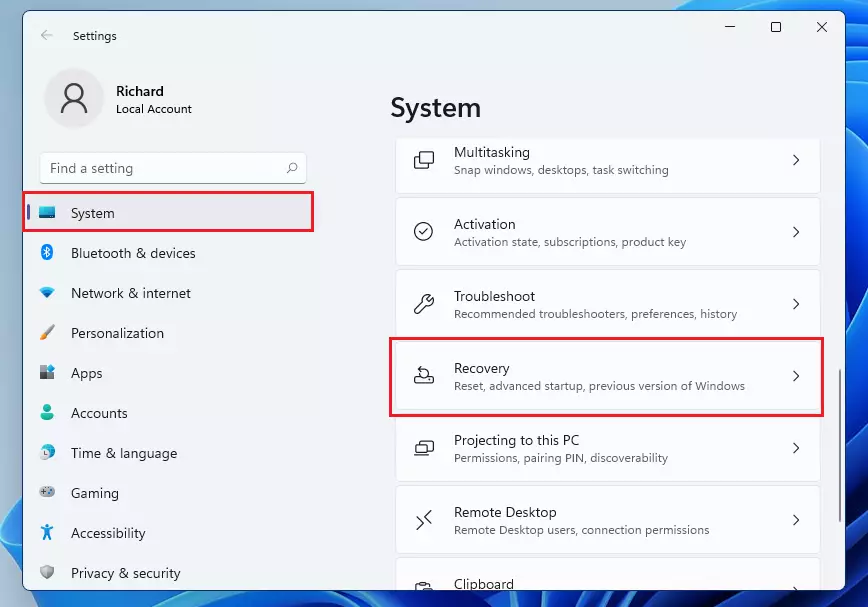
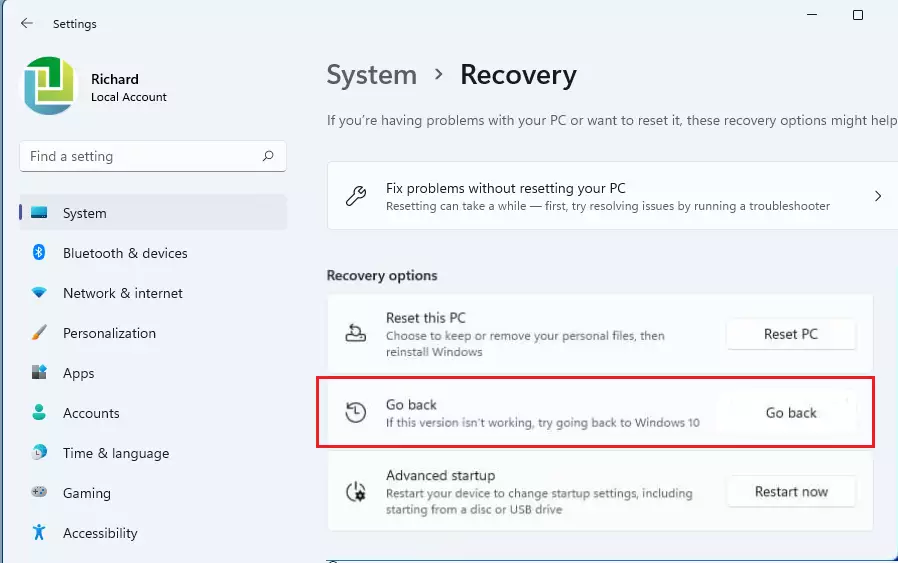
- Find the Recovery options section and click the Go back button.
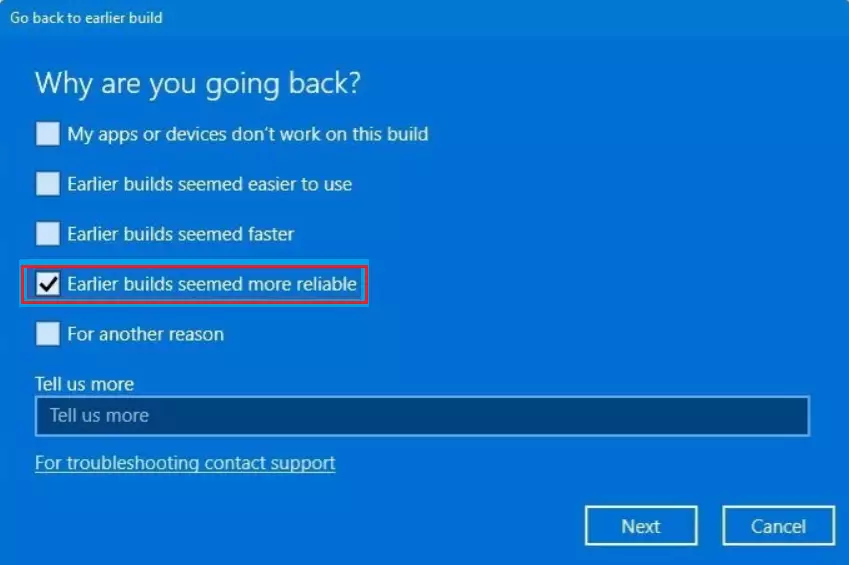
- A window will pop up asking why you are going back. Select the reason that fits best, such as "Earlier builds seemed more reliable," then click Next.
- When asked to check for updates, choose No, thanks.
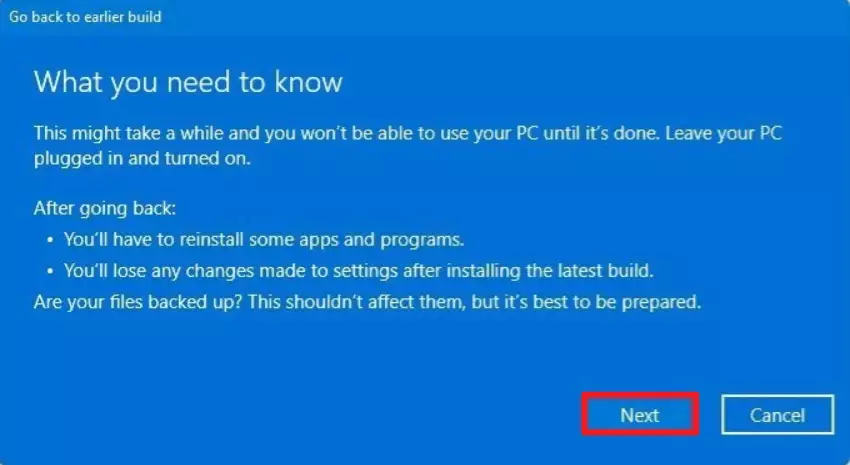
- Read through the information about the changes that will occur, then click Next.
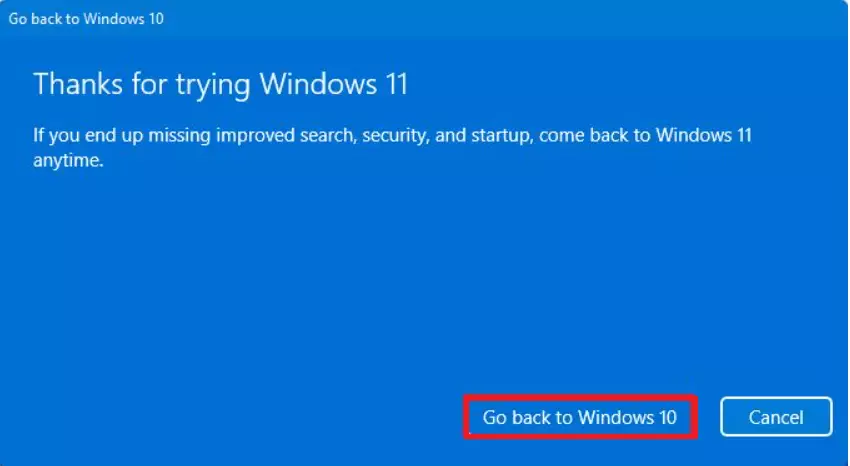
- Finally, click the Go back to Windows 10 button.
To downgrade Windows 11 back to your previous operating system, open the Settings app by pressing the Windows key plus I on your keyboard. From there, head to the System menu, click on Recovery, and select the Go back button to start the process.
What if the 10-day window has passed?
If it's been longer than 10 days since you upgraded, the simple 'Go back' option won't work to downgrade Windows 11 to Windows 10.
Summary
If you miss this 10-day window, a clean install is required, so back up everything first. Always make sure you have admin rights before you begin.
Was this guide helpful?

About the Author
Richard
Tech Writer, IT Professional
Richard is a writer at Geek Rewind who turns complex IT tasks into clear, step-by-step guides. He draws on years of hands-on experience in system administration and enterprise IT operations, focusing on Windows, Linux and WordPress: the problems people actually run into, and the fixes that work. His server and WordPress guides come from systems he runs himself. Richard builds and maintains the platform behind Geek Rewind, from its Ubuntu servers and Nginx configuration to its custom WordPress plugins. Many new tutorials start with readers' questions, and he's always glad to answer them in the comments.

No comments yet — be the first to share your thoughts!