
This brief tutorial shows students and new users how to format external USBs and other portable drives on Ubuntu Linux.
Ubuntu is an open-source Linux operating system that runs on desktops, laptops, servers, and other devices.
Below, you can format external drives that erase everything on the Disk and leave the Disk empty. You’ll want to be very sure before you proceed.
After you format the Disk, you can store new information on it. If you will be using the Disk on Windows, Mac OS, and Linux computers, then you should use FAT to format the disk partitions on all systems.
If you only use it on a Windows computer, use the NTFS partition.
Formatting a disk is not a secure way of wiping all its data. A formatted disk will not appear to have files on it, but it is still possible that special recovery software could retrieve the files.
If you need to delete the files securely, you must use a command-line utility, such as shred.
How to format the external drive with GUI app in Ubuntu Linux
Below are steps that show you how to use the Disk app to format USB drives in Ubuntu Linux.
The first step is to insert or plug the Disk into your Ubuntu machine. After that, open the Activities Overview and search for Disk.
When the disk app opens, select the Disk you wish to format.
Make sure that you have selected the correct Disk! If you choose the wrong Disk, all the files on the other Disk will be deleted!

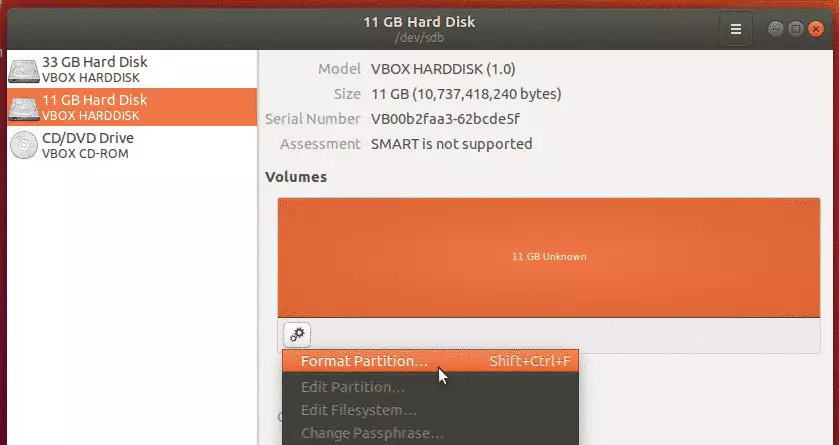
In the toolbar underneath the Volumes section, click the menu button. Then click Format Partition.
On the next page, give the drive a new name after formatting. Again, if you use the Disk on Windows, Mac OS, and Linux computers, you should format it with a FAT filesystem. If you only use it on Windows computers, select NTFS.
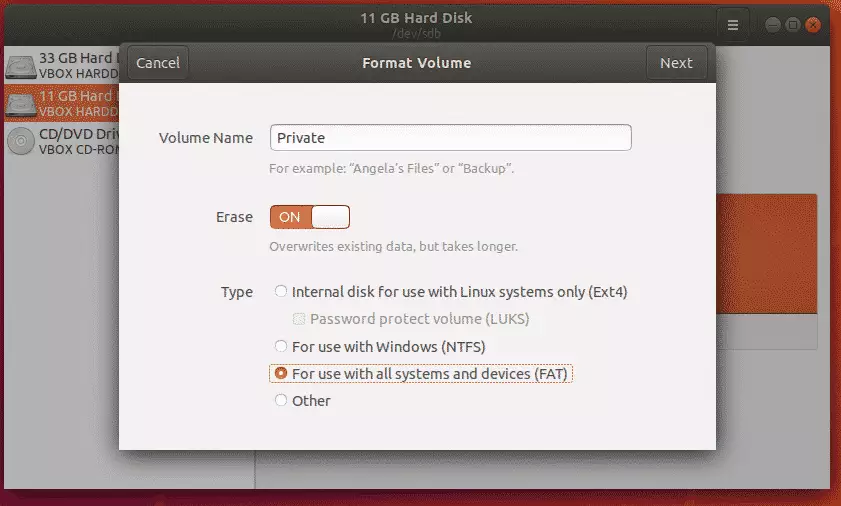
Click Next and continue. When you’re
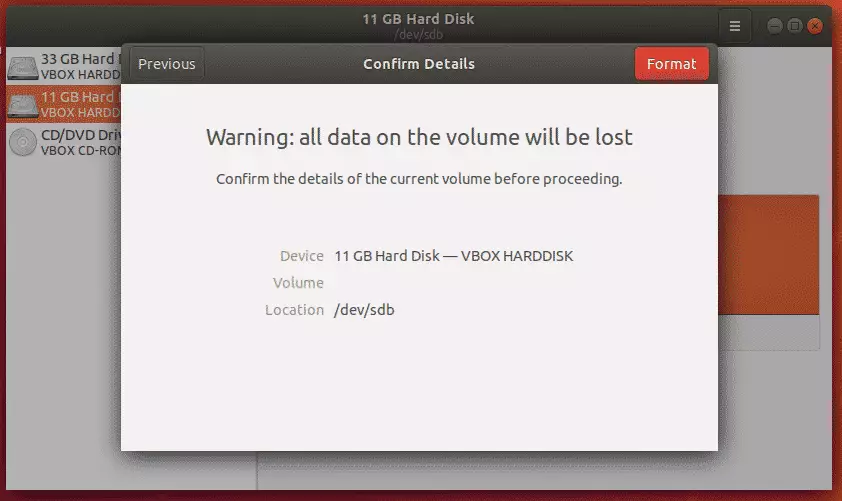
When you know the drive you selected is correct and ready to format, click the red Format button to complete the process.
This should be too long, depending on the machine’s speed and the Disk’s size; when the formatting has finished, click the eject icon to remove the Disk safely. It should now be blank and ready to use again.
How to format USB drive using command terminal console in Ubuntu Linux
As above, you can use the command line to accomplish the same.
When the Disk is in, run the command below to print or show attached block devices.
lsblk
That should output similar lines as shown below:
Output:
.
loop14   7:14   0  42.8M  1 loop /snap/gtk-common-themes/1313
loop15   7:15   0  34.6M  1 loop /snap/gtk-common-themes/818
loop16   7:16   0   956K  1 loop /snap/gnome-logs/73
loop17   7:17   0     4M  1 loop /snap/gnome-calculator/406
sda      8:0    0  30.4G  0 disk
└─sda1   8:1    0  30.4G  0 part /
sdb      8:16   0    10G  0 disk /media/richard/Private
sr0     11:0    1  1024M  0 rom
The highlighted line shows the Disk I inserted and where it’s mounted.
Again, formatting a disk will wipe the Disk of all content. So, you must be sure you want to format the correct Disk.
Now that you know where the Disk is named and where it’s mounted, run the below commands to format and erase it.
sudo dd if=/dev/zero of=/dev/sdb bs=4096 status=progress
Depending on the size and speed of your computer, this could take some time. When the process is done, you should see similar lines as below:
10712887296 bytes (11 GB, 10 GiB) copied, 11 s, 974 MB/s
dd: error writing '/dev/sdb': No space left on device
2621441+0 records in
2621440+0 records out
10737418240 bytes (11 GB, 10 GiB) copied, 11.0205 s, 974 MB/s
After that, you can begin the format with the appropriate partition table.
To use the Disk everywhere, you’ll want to format it with the FAT32 filesystem. These are the common filesystems on Windows: exFAT and NTFS.
Run the commands below to create an MS-DOS (FAT32) table on the Disk.
sudo parted /dev/sdb --script -- mklabel msdos
Then, create a FAT32 partition table on the entire Disk
sudo parted /dev/sdb --script -- mkpart primary fat32 1MiB 100%
Finally, format the Disk with Fat32
sudo mkfs.vfat -F32 /dev/sdb1
That’s it! This is how one formats an external drive on Ubuntu Linux.
Leave a Reply