
This article provides instructions on how to format external USB drives in Windows 11.
Before using an external or internal drive for backups or file storage in Windows 11, it may be necessary to format or reformat it. This is due to the differences in filesystems among operating systems.
A new thumb drive typically works immediately on Windows machines, unless it is formatted for a different operating system or is a secondhand drive. Formatting your external or portal drive is simple.
The steps below will guide you through the process.
Format a hard drive in Windows 11
Formatting drives in Windows is quite straightforward. This process prepares a drive for use in Windows, whether for backup purposes or for storing data.
Windows 11 has a centralized location for the majority of its settings. Everything can be done, from system configurations to creating new users and updating Windows from its System Settings pane.
To get to System Settings, you can use the Windows key + I shortcut or click on Start ==> Settings, as shown in the image below:

Alternatively, you can use the search box on the taskbar to search for Settings. Then select to open it.
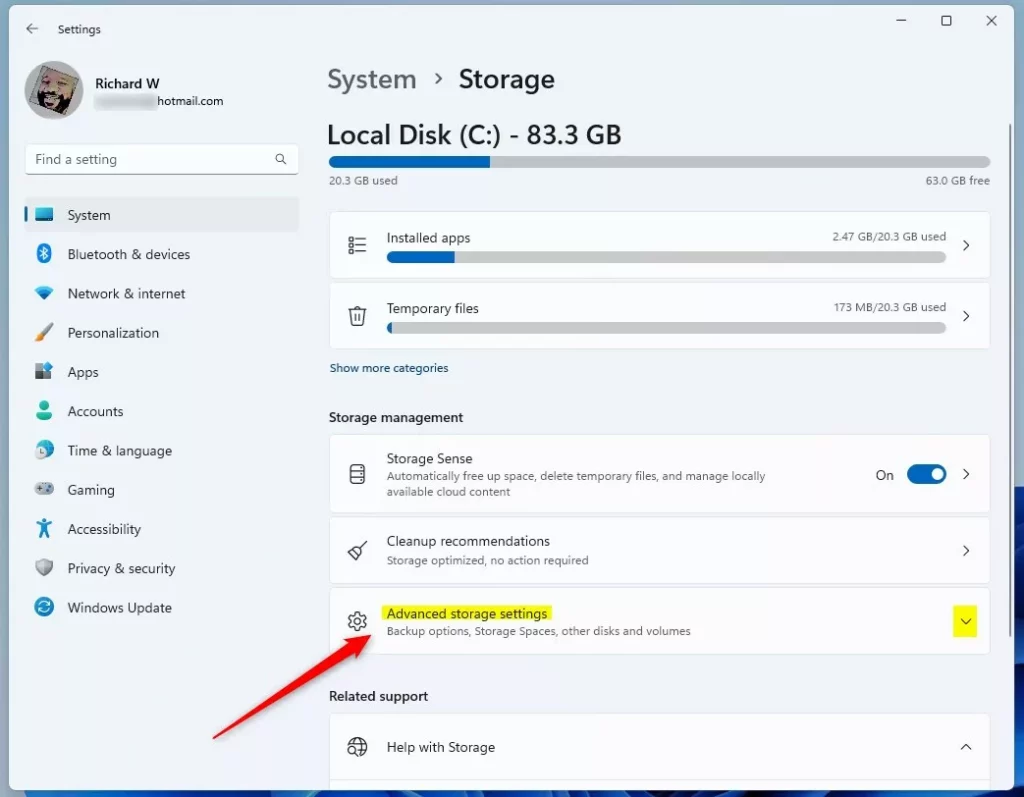
In the Windows Settings, click on System and select Storage from the right pane.

On the Storage settings pane, click on Advanced storage settings to expand additional settings.
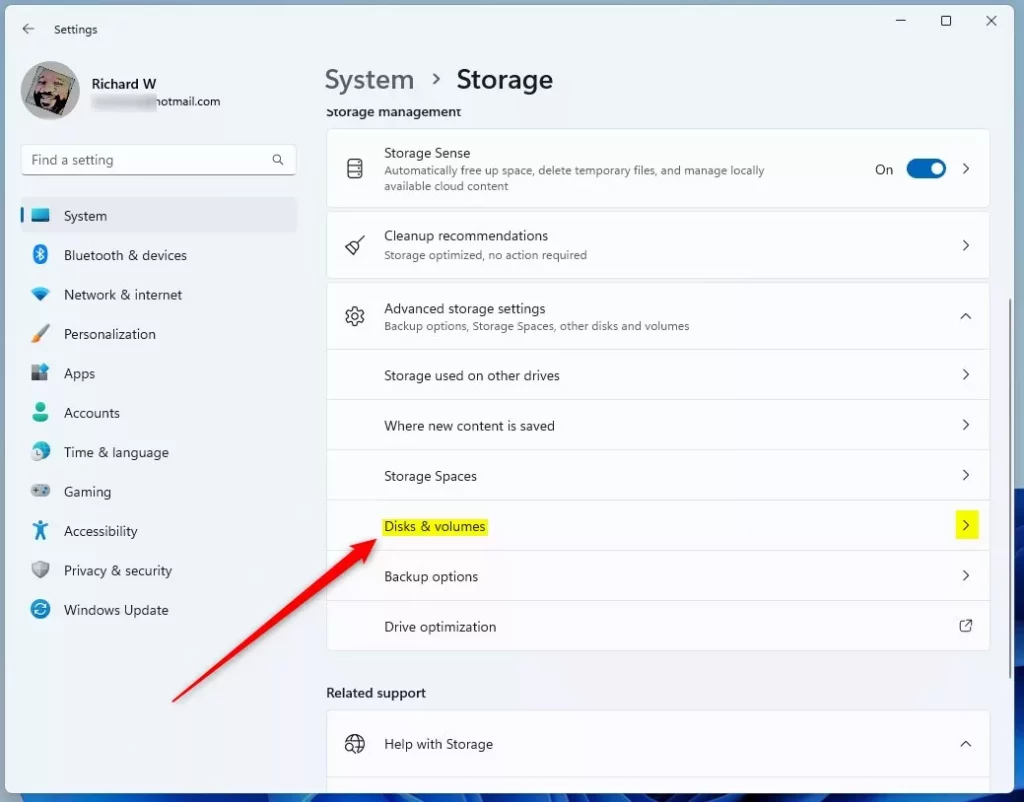
On the expanded settings pane, select Disk & volume, as highlighted below.
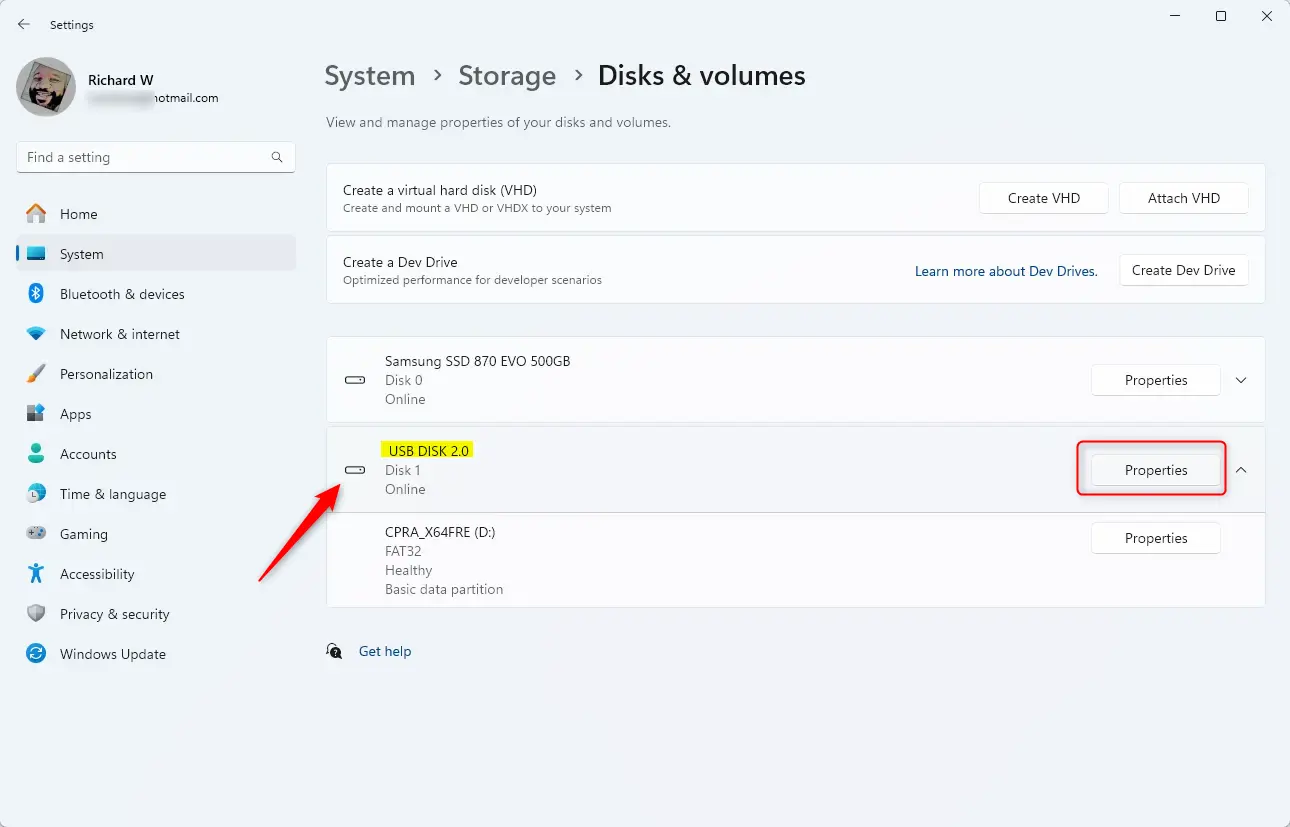
That will bring up disks and volumes on the computer. Select the correct external Disk or drive attached to Windows 11, then select Properties as highlighted below.
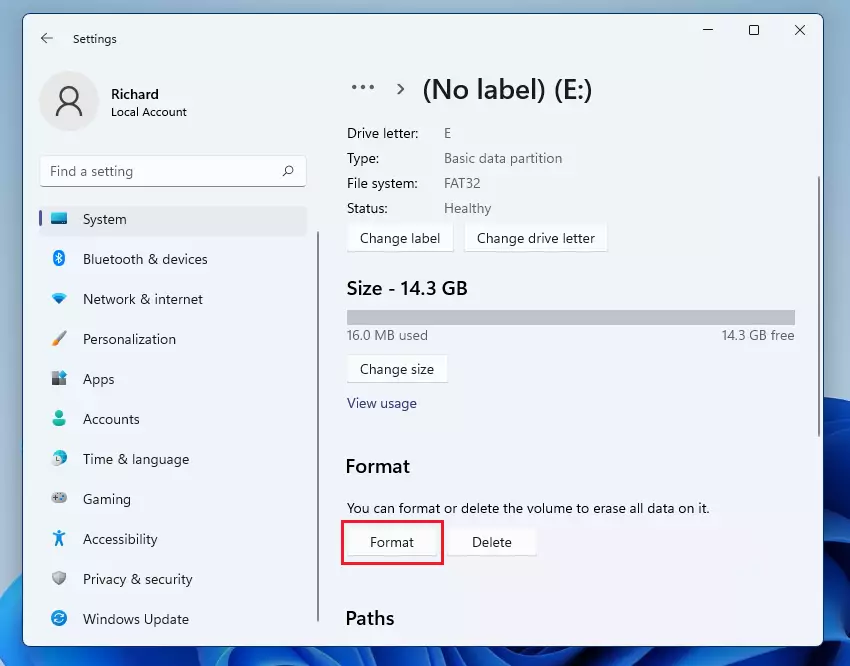
When the drive properties window opens, find the “Format” button located under the “Format” section, as highlighted below.
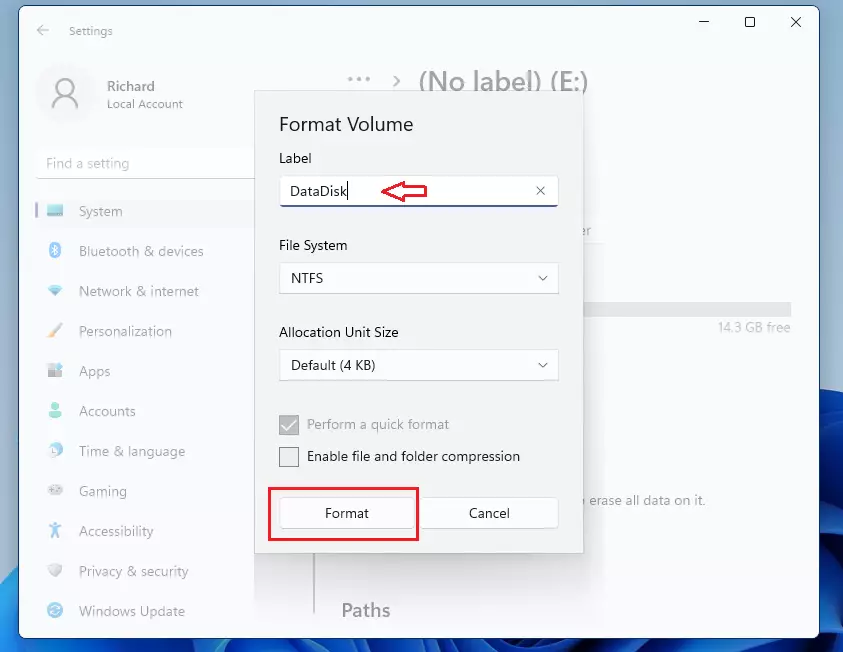
When you click Format, a new dialog box will appear, where you can label and format the drive. When ready, click Format to begin formatting the drive.
After a brief moment, depending on the size of the drive and the speed of your computer, the drive should be formatted and ready for use.
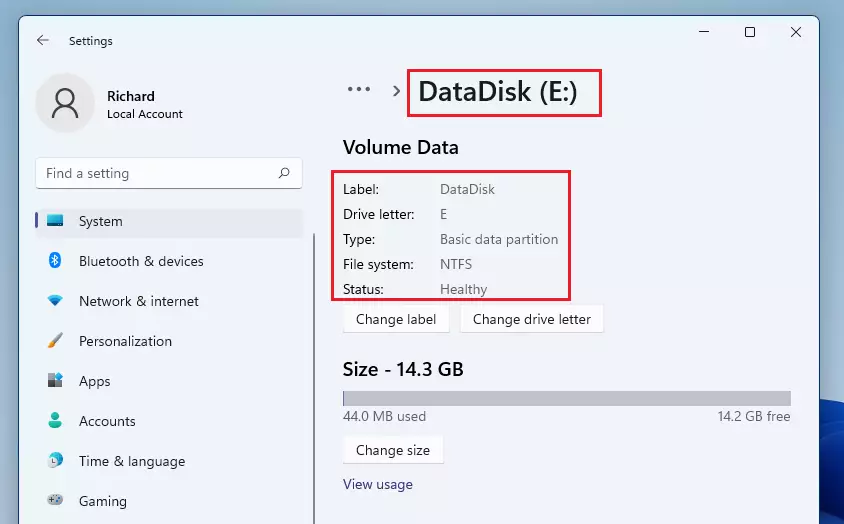
Once done, eject the drive from your computer, and you’re done.
Again, formatting a disk will wipe the Disk of all content, so you must be sure you want to format and want to select the correct Disk.
Conclusion:
- Formatting an external USB drive in Windows 11 is a straightforward process that prepares the drive for use.
- Ensure you select the correct drive to avoid data loss, as formatting will erase all contents on the disk.
- Utilize the Windows Settings app to access storage options and initiate formatting.
- After completing the formatting process, safely eject the drive to ensure it’s ready for use.
- Regularly formatting and organizing your drives can help maintain optimal performance and file management.

Leave a Reply