How to Forget WiFi Networks on Windows 11
You forget a WiFi network on Windows 11 to remove its saved credentials and prevent your PC from automatically reconnecting to it.
Forgetting a network deletes the stored profile, including the network name (SSID) and password, for that specific WiFi connection. This action ensures your Windows 11 PC no longer tries to join that network automatically.
This process is essential when a WiFi password changes, you stop using a particular network, or you need to troubleshoot stubborn connection issues. For example, Windows 11 stores these network profiles in a dedicated section within the Settings app.
Clearing outdated network profiles helps maintain an organized network list and ensures your device connects only to the networks you intend to use.
Click the WiFi icon in the Taskbar, select the network, right-click, and choose Forget. Alternatively, go to Settings > Network & internet > WiFi > Manage known networks, find the network, and click Forget.
What happens when you forget a network?
Forgetting a WiFi network on Windows 11 removes its saved password and connection details, so your computer won’t connect automatically anymore.
| Action | Result |
|---|---|
| Disconnecting | Stops the current session but keeps the password saved. |
| Forgetting | Deletes the password and removes the network profile entirely. |
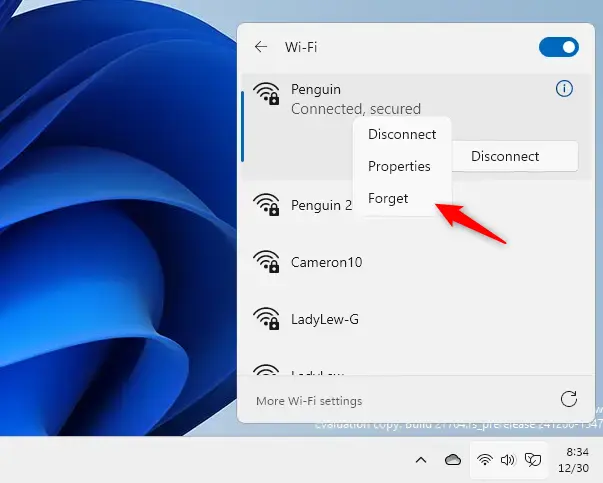
Method 1Using the Taskbar (For nearby networks)
This is the quickest way to remove a network that is currently in range.
- Click the WiFi icon in the bottom right corner of your Taskbar.
- Click the arrow next to the WiFi icon to see available networks.
- Right-click the network you want to remove.
- Select Forget.
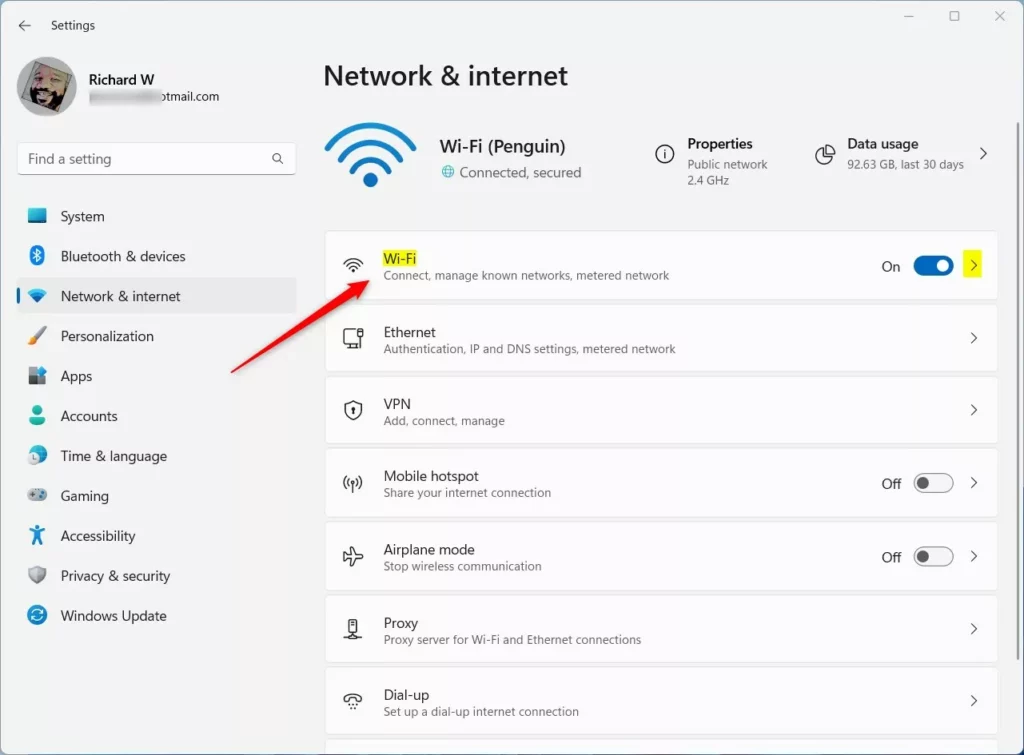
Method 2Using System Settings (For all saved networks)
You can easily forget any WiFi network you’ve previously saved on Windows 11 using the Settings app, which helps you manage your list of known connections.
- Open Settings by pressing the Windows key + I on your keyboard.

- Click on Network & internet in the left menu.
- Select WiFi on the right side of the screen.
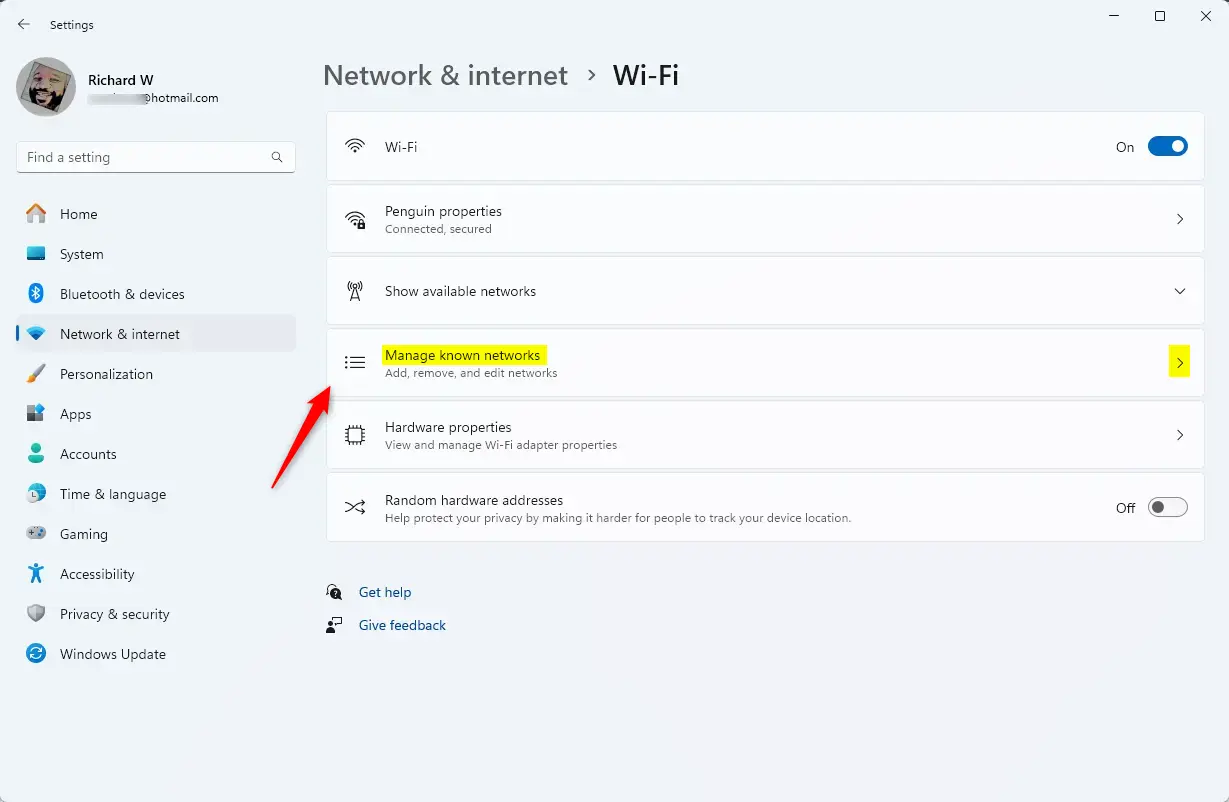
- Click on Manage known networks.
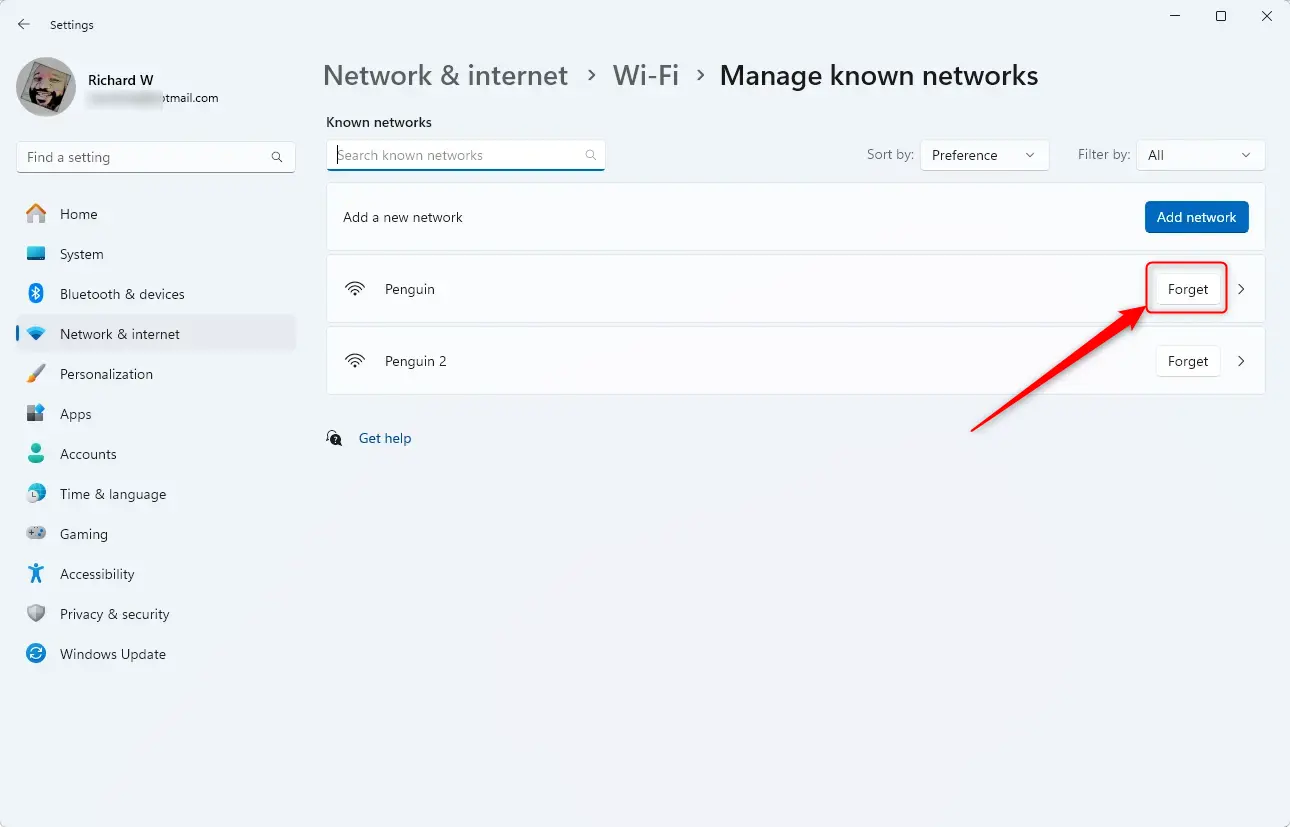
- Find the network you want to remove in the list.
- Click the Forget button next to that network name.
Advanced Tip: Using Command Prompt
If you’re comfortable using commands, you can forget WiFi networks on Windows 11 through the Command Prompt by typing a couple of specific commands.
Open the Command Prompt as an administrator and type the following command to see your saved networks:
netsh wlan show profilesTo delete a specific network, use this command (replace “NetworkName” with the actual name of the network):
netsh wlan delete profile name="NetworkName"Troubleshooting Connectivity Issues
If your computer keeps reconnecting to a WiFi network you’ve forgotten, it might be a setting issue, but a full network reset in Windows 11 can often fix persistent connection problems.
Summary
Forgetting WiFi networks on Windows 11 is a simple way to keep your computer secure and organized, ensuring it only connects to trusted networks.
Why does 🪟 Windows 11 keep reconnecting to a forgotten network?
If Windows 11 keeps reconnecting, you may have multiple network profiles with similar names or a sync setting enabled. Ensure you have forgotten the network in the ‘Manage known networks’ list. If the issue persists, check if your device is syncing settings from another computer via your Microsoft account.
Can I forget a network using PowerShell?
Yes, you can use PowerShell to manage networks. Open PowerShell as an administrator and use the command ‘netsh wlan delete profile name=”NetworkName”‘ to remove a specific saved network. This is an effective way to clear network profiles if the standard graphical interface is not responding correctly.
Was this guide helpful?

About the Author
Richard
Tech Writer, IT Professional
Richard, a writer for Geek Rewind, is a tech enthusiast who loves breaking down complex IT topics into simple, easy-to-understand ideas. With years of hands-on experience in system administration and enterprise IT operations, he’s developed a knack for offering practical tips and solutions. Richard aims to make technology more accessible and actionable. He's deeply committed to the Geek Rewind community, always ready to answer questions and engage in discussions.


No comments yet — be the first to share your thoughts!