
This article explains how to enable or disable Advanced networking with Windows Subsystem for Android in Windows 11.
Windows Subsystem for Android (WSA) creates a virtual machine that provides the environment to install and run Android applications as natively installed on Windows.
The Advanced networking settings in WSA allow Android apps to connect to other devices on the same network as your Windows PC. When this setting is turned on, you can play content wirelessly.
If you are having network issues with your mobile apps, turning off the Advanced networking feature might help resolve the issues. Howerver, if off or disabled, you won’t be able to access other devices on your network.
Turn on or off advanced networking in Windows Subsystem for Android
As described above, advanced networking settings allow Android apps to connect to other devices on the same network as your Windows PC. When this setting is turned on, you can play content wirelessly.
Here’s how to turn it on or off in Windows 11.
First, you must install Windows Subsystem for Android (WSA) on Windows 11. If you haven’t already done so, follow the post below to learn how to install it.
How to install Windows Subsystem for Android on Windows 11
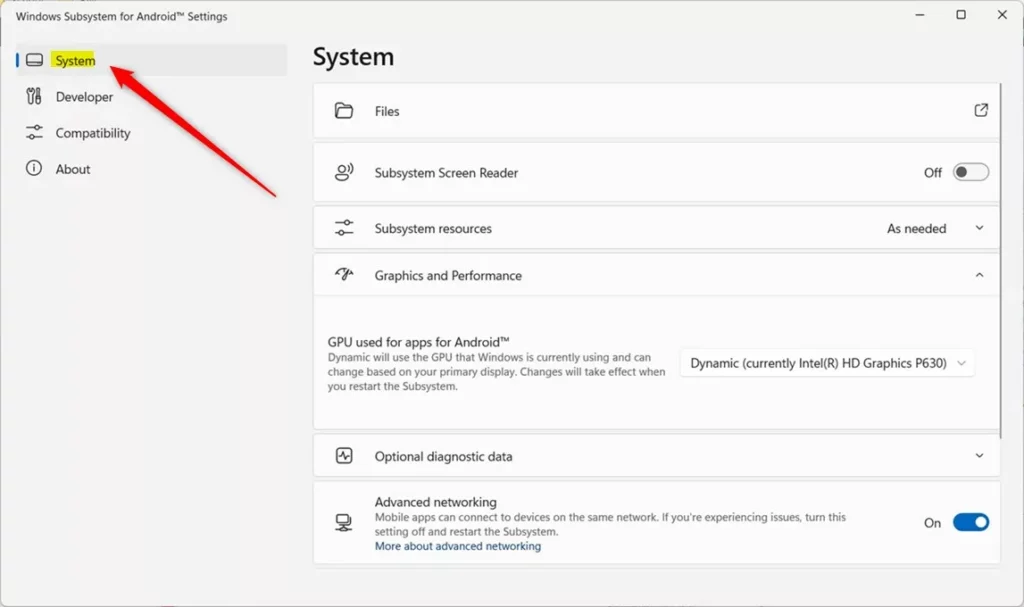
Once installed, go to the Start menu, and search for Windows Subsystem for Android. Then, select and open Windows Subsystem for Android app under Best match.
When the app opens, go to its Settings pane.
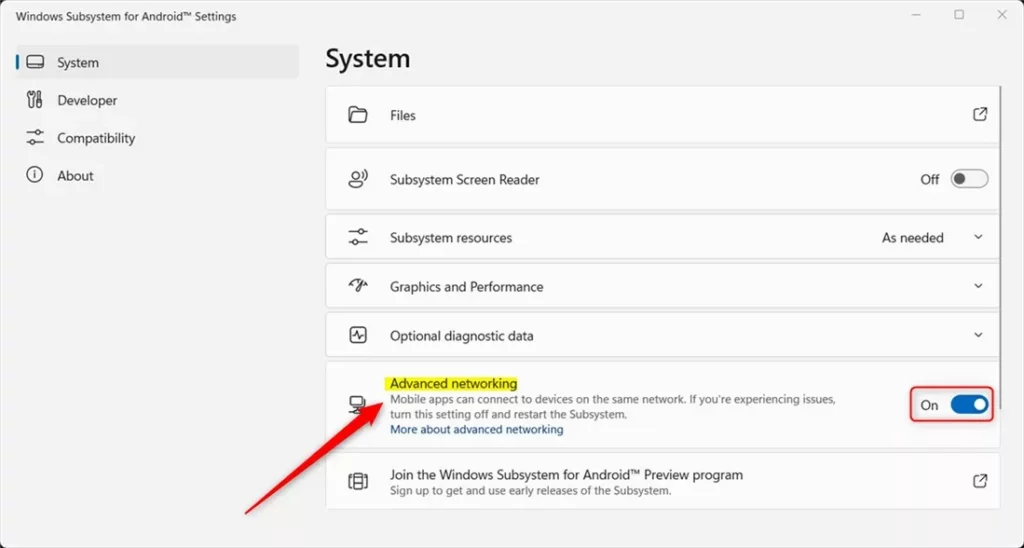
On the right, select the Advanced networking tile. Next, toggle the button On or Off to enable or disable the advanced networking feature.
After enabling or disabling the advanced networking feature, scroll down and click the ” Turn off ” button, as highlighted below.
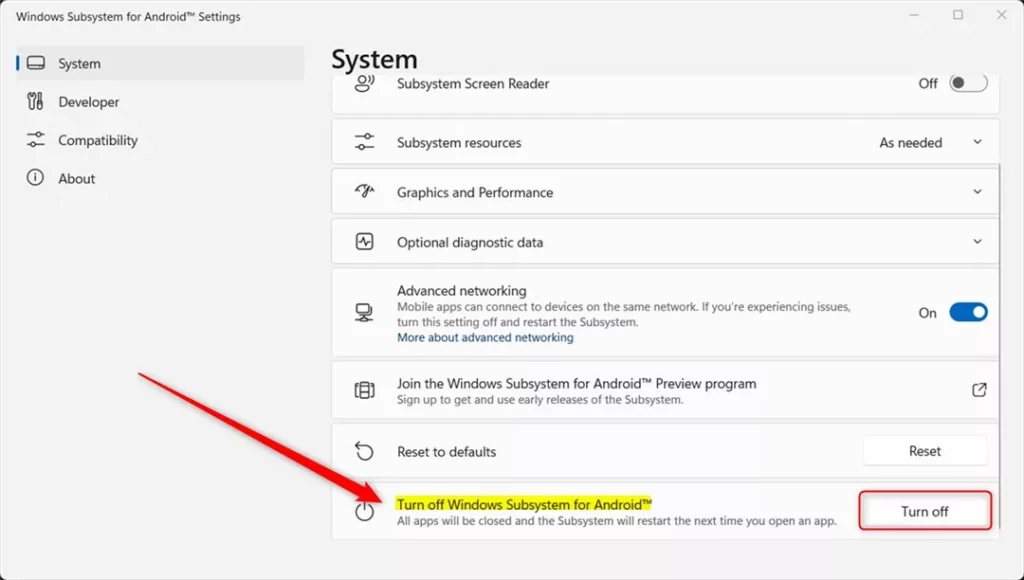
Windows Subsystem for Android™️ will restart to apply the next time you open an Android app.
That should do it!
Reference:
Conclusion:
- Enabling advanced networking in Windows Subsystem for Android allows Android apps to connect to other devices on the same network as your Windows PC, enabling wireless content playback.
- Disabling advanced networking may help resolve network issues with mobile apps, but it will prevent access to other devices on the network.
- To turn on or off advanced networking, install Windows Subsystem for Android on Windows 11 and access the “Advanced networking” tile in the WSA app settings. Then, toggle the feature on or off as needed.
- After enabling or disabling the advanced networking feature, restart the Windows Subsystem for Android for the changes to take effect.
This guide provides a comprehensive walkthrough on configuring advanced networking with WSA in Windows 11, offering a seamless experience between Android apps and the Windows environment. Feel free to share your feedback if you encounter any errors in the process or have additional insights.


Leave a Reply Cancel reply