
This article explains how to enable or disable the “Keep printed documents” feature in the print queue on Windows 11.
On Windows, when a print job has successfully been printed, the print queue on that printer is automatically cleared by default.
If you do not want the print queue automatically cleared after a successful job, you can turn on the “Keep printed documents” feature. This feature lets you keep a copy of printed documents in the print queue after printing them.
This can be particularly useful in environments where documents must be resent frequently or where users require a backup of their output for record-keeping purposes.
Enable or Disable Keep Printed Documents in Print Queue using the Settings app
As mentioned, users can enable or disable a printer feature to keep printer copies after a successful print job.
Here’s how to do it.
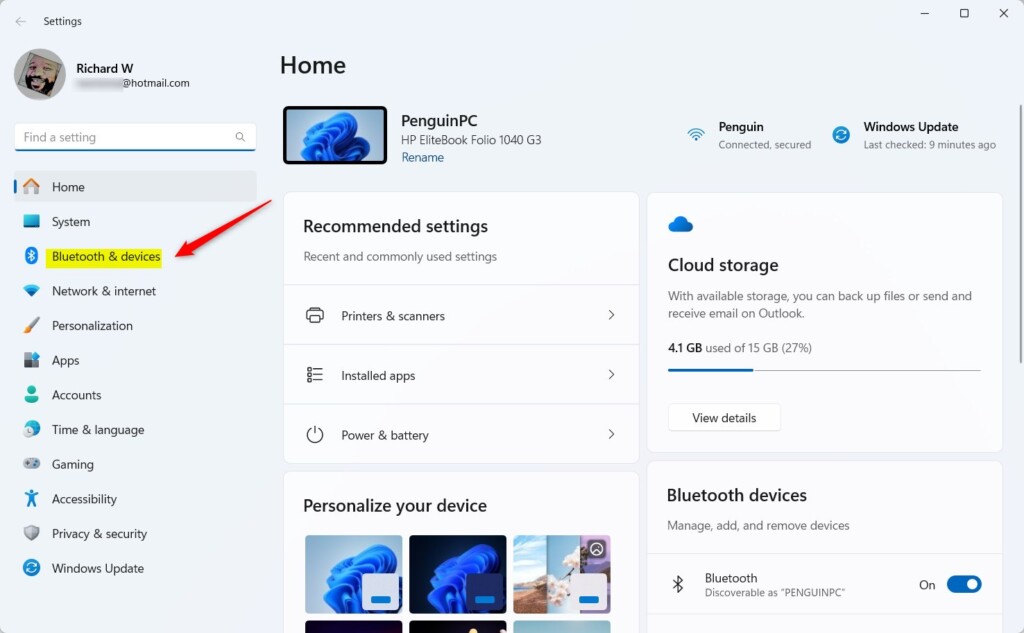
First, open the Windows Settings app.
You can do that by clicking on the Start menu and selecting Settings. Or press the keyboard shortcut (Windows key + I) to launch the Settings app.
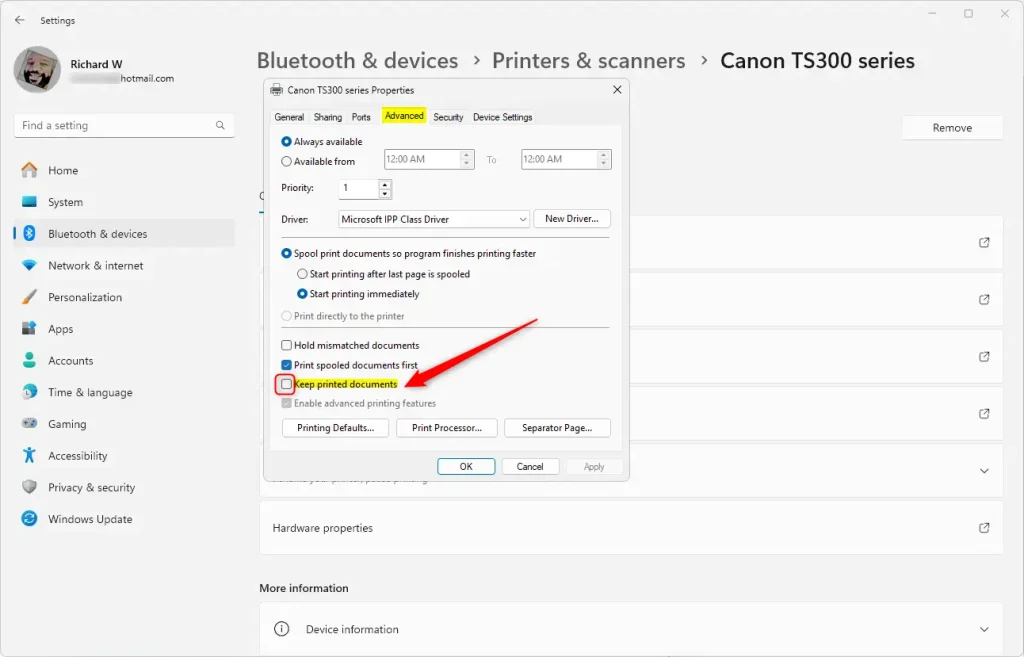
When the Setting app opens, click the Bluetooth & devices button on the left.
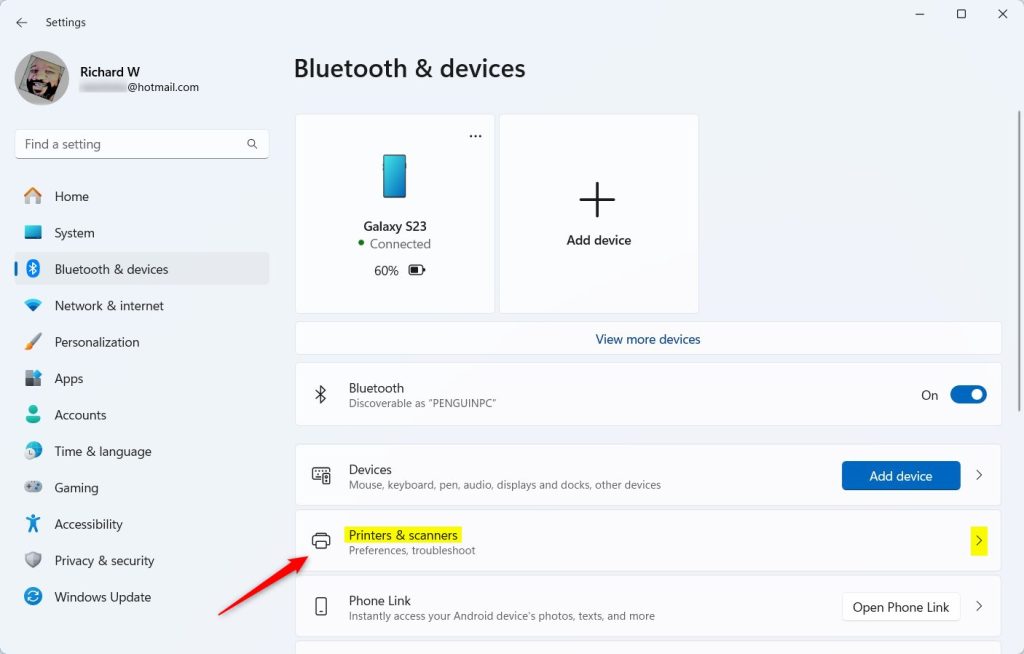
On the right, select the Printer & scanners tile to expand it.
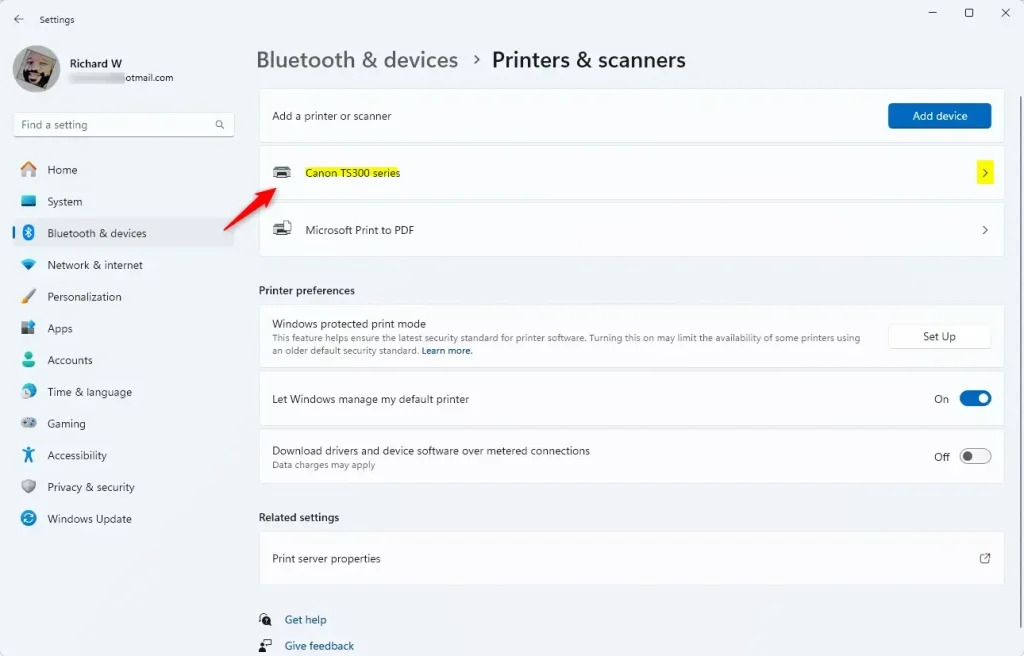
On the Printer & scanners setting pane, select the printer you want to configure to keep printed copies of documents.
Next, click the “Printer properties” tile to open.

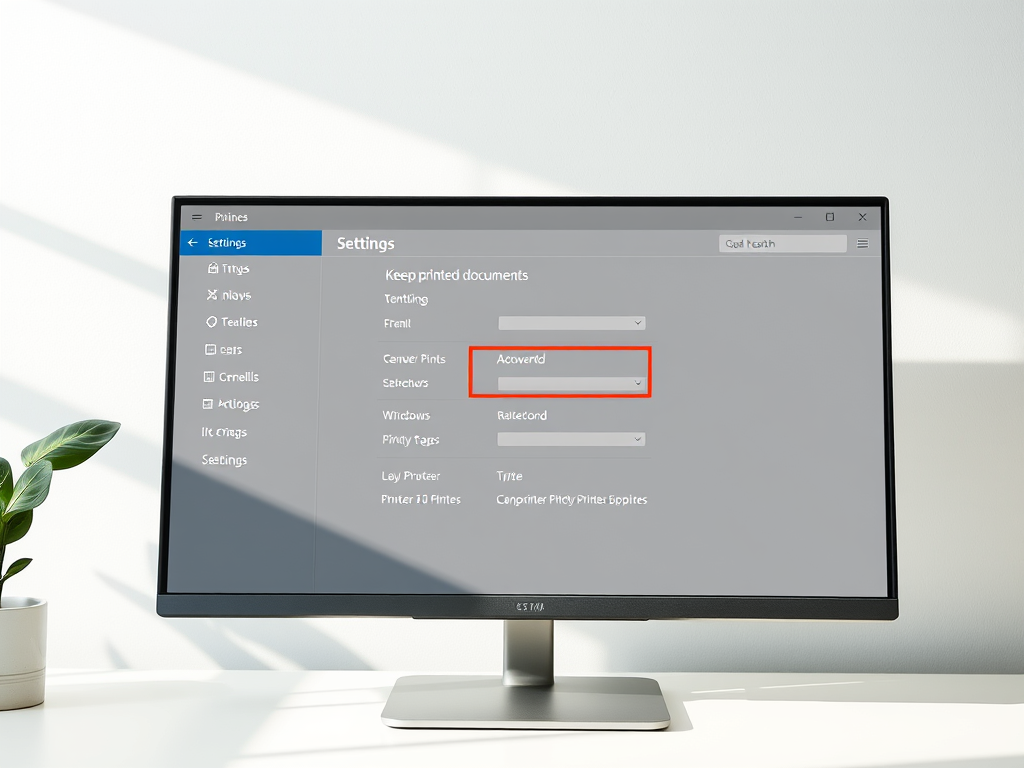
On the pop window of the printer properties, select the “Advanced” tab, and check or uncheck the box next to “Keep printed documents” to enable or disable the feature.
You can close the Settings app when you are done.
Turn on or off the “Keep printed documented” feature using Print Management
Another way to enable or disable the “Keep printed documents” feature for printers is to use the print management app.
To do that, follow the steps below.
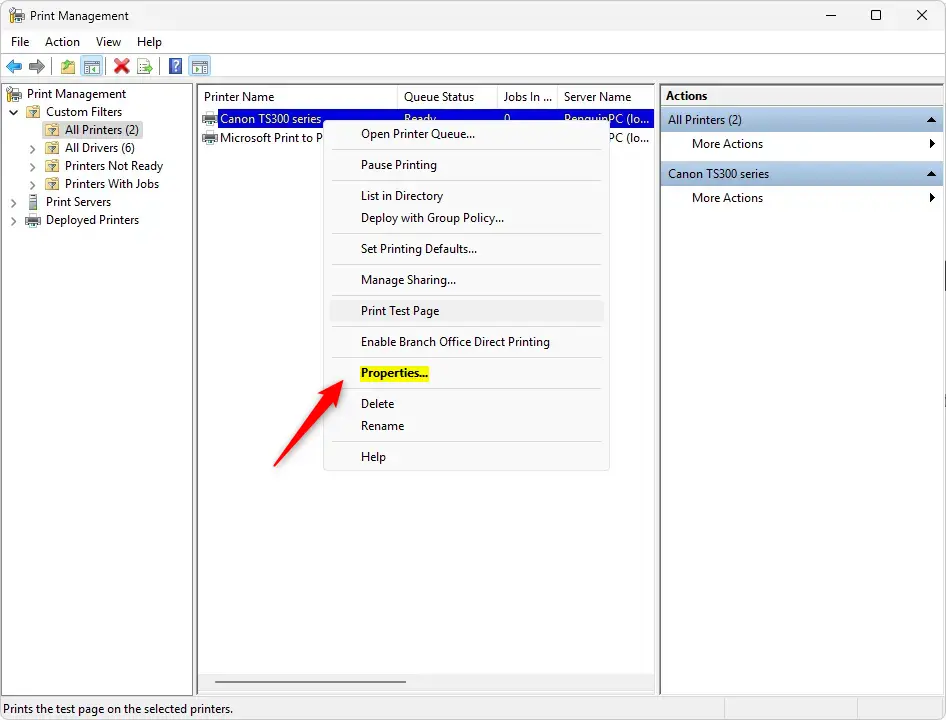
First, open Print Management (printmanagement.msc).
Next, Expand Custom Filters in the left pane and select All Printers—Right-click on the printer you want to configure and choose Properties.
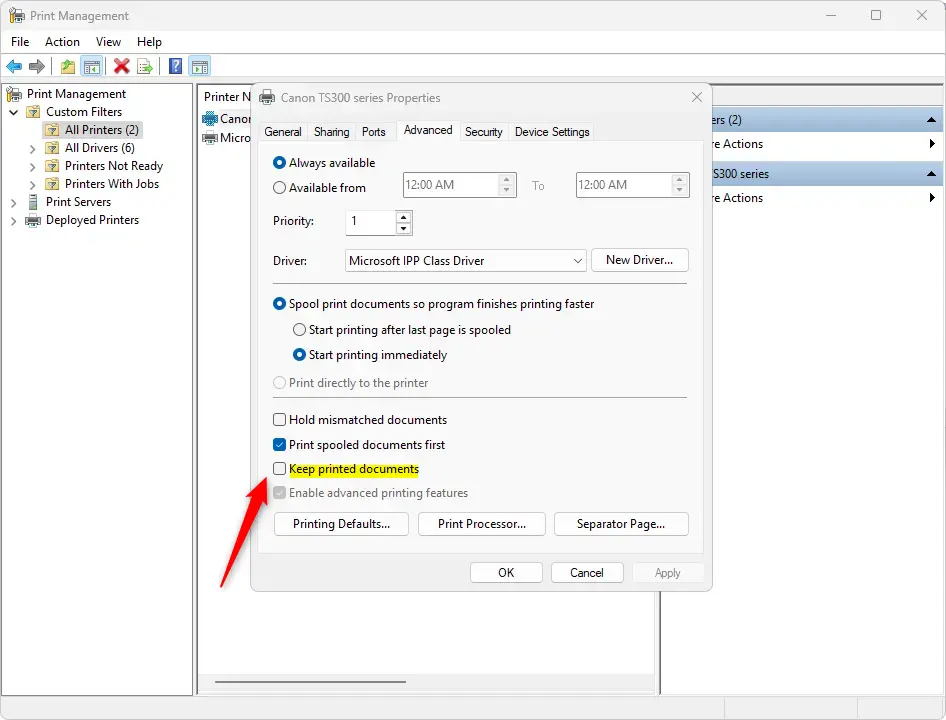
Select the “Advanced” tab on the printer properties window and check the box next to “Keep printed documents” to enable or disable the feature.
Close Print Management when finished.
That should do it!
Conclusion:
Enabling or disabling the “Keep printed documents” feature in Windows 11 can enhance the management of printed outputs. Here are the key points to remember:
- This feature allows users to maintain a copy of printed documents in the print queue.
- It is beneficial in environments where resending documents frequently is necessary.
- Users can easily enable or disable this feature through the Settings app or Print Management.
- The process involves accessing the printer properties and modifying the settings within the Advanced tab.
- Having printed documents saved can aid in record-keeping and improve workflow efficiency.
With these steps, you can ensure that your printing setup meets your needs effectively.
Leave a Reply Cancel reply