
This article describes how to enable or disable reserved storage in Windows 11.
Reserved Storage is a Windows 11 feature that allocates part of the system disk for temporary files, caches, and other types of files.
Windows reserves this part of the disk to maintain predictable and stable space usage on your computer, ensuring that critical OS functions always have access to disk space.
Reserved Storage typically occupies about 7 GB of space. However, this size can vary depending on factors such as disk space, running processes, and the number of installed applications. Generally, you should avoid deleting Reserved Storage, as it plays a crucial role in the functioning of Windows.
If you want to delete the reserved storage space, you can do so. However, it is not recommended. If there is no reserved storage on the system, you can follow the steps below to recreate it.
Turn off reserved storage space in Windows 11
Windows creates reserved storage space to maintain predictable and stable disk usage, ensuring that critical operating system functions always have access to necessary disk space.
However, the user can delete this reserved Storage, although not recommended.
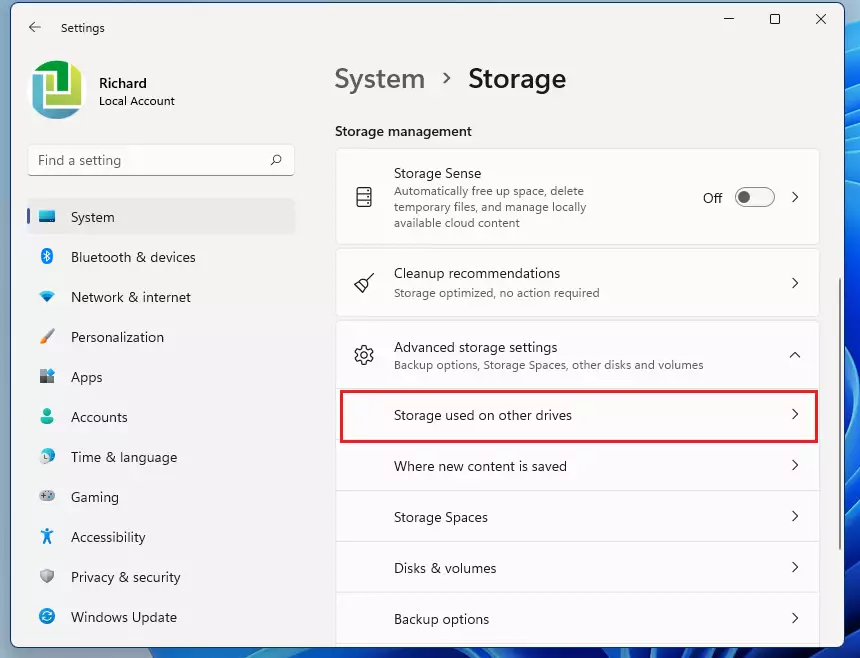
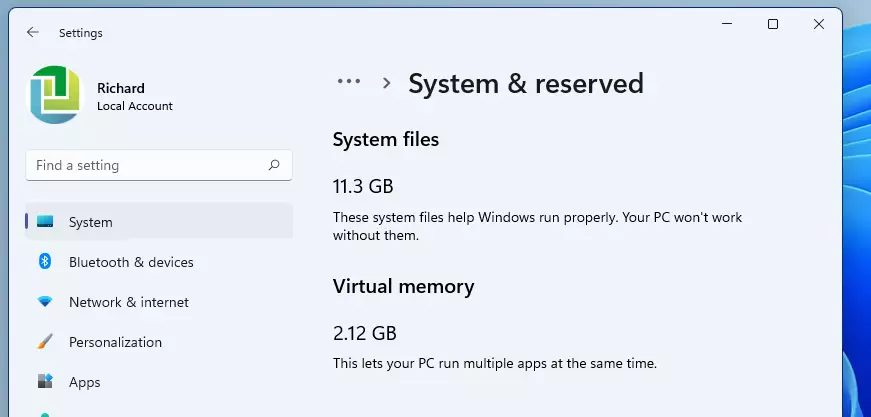
To view your computer’s reserved Storage, go to the Start menu ==> Settings ==> System ==> Storage ==> Advanced storage settings ==> Storage used on other drives.
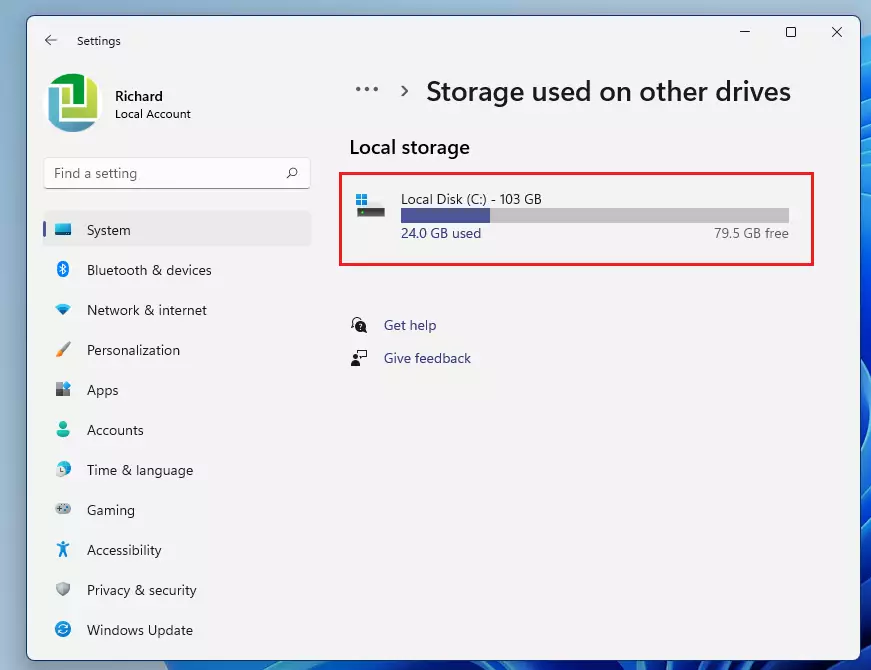
Then click on the Local Disk (C:).
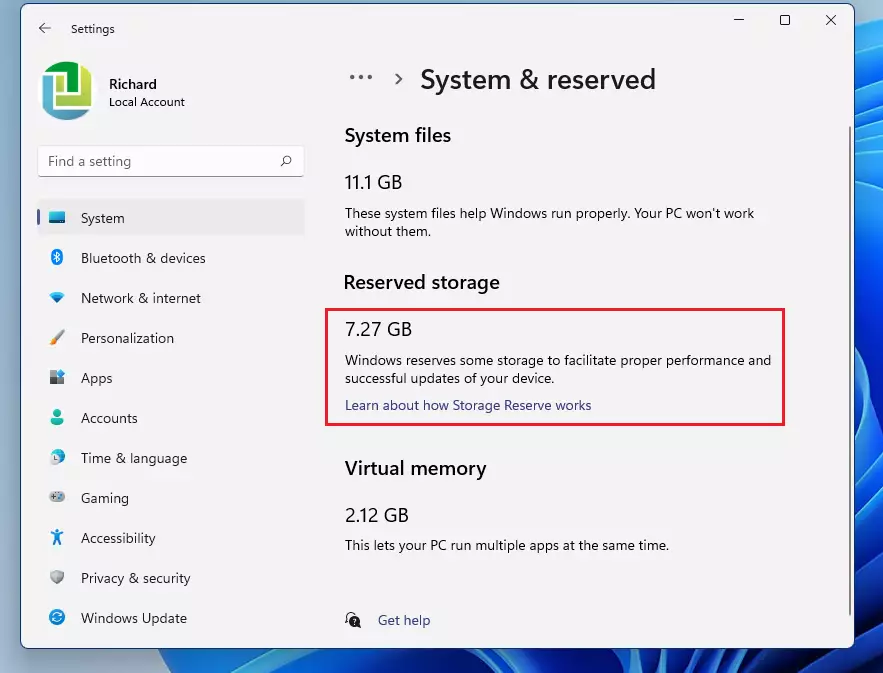
Next, select System & Reserved. On that window, you should see your computer Reserved Storage.
Now, to disable the reserved Storage, click on Start, search for Command Prompt. Right-click the Command Prompt and select Run as administrator.

When the Command Prompt app opens, run the commands below to turn off Windows 11 reserved storage.
DISM /Online /Set-ReservedStorageState /State:Disabled
The reserved Storage should take a few minutes to disappear from the settings pane.
The below image shows Windows 11 without reserved Storage
Enable reserved Storage in Windows 11
If you decide to restore Windows reserved storage, you can run the commands below to recreate it.
Again, open the Command Prompt as an administrator, then run the commands below.
DISM /Online /Set-ReservedStorageState /State:Enabled
The reserved Storage should be recreated.
That’s it!
Conclusion:
- Reserved Storage in Windows 11 helps maintain predictable disk space usage and ensures critical system functions have necessary resources.
- Deleting Reserved Storage is generally not recommended, as it can impact system performance and update capabilities.
- Users can easily enable or disable Reserved Storage using the Command Prompt with administrative privileges.
- Monitoring the Reserved Storage can help manage disk space effectively, especially in systems with limited storage capacity.
- Consider keeping Reserved Storage activated to optimize overall system stability and performance.


Leave a Reply Cancel reply