
This article explains how to free up space by deleting restore points in Windows 11.
A restore point can be quite helpful in situations where you’ll want to revert to an earlier version to correct issues in Windows.
If you encounter a problem in Windows, a restore point can roll back the operating system to a previous, functional state. This can be a lifesaver, especially if the issues cannot be fixed or easily resolved.
In that case, you can restore a computer to a specific date and time, saving tons of work and money to get your laptop working again.
That said, restore points can also take up much disk space. If your computer is in a good state and you’re running low on disk space, you can delete Windows restore points to free up some disk space.
Delete restore points in Windows 11
As mentioned above, a restore point can be a lifesaver when restoring Windows to an earlier version to correct issues.
Without a restore point, you may have to reset or reinstall Windows.
To delete a repoint in Windows, follow these steps:
Windows 11 has a centralized location for the majority of its settings. Everything can be done, from system configurations to creating new users and updating Windows from its System Settings pane.
To get to System Settings, you can use the Windows key + I shortcut or click on Start ==> Settings, as shown in the image below:

Alternatively, you can use the search box on the taskbar and search for Settings. Then select to open it.
In Windows Settings, click System, and select the About tile on the right pane of your screen, as shown in the image below.

On the About settings pane, click on the System protection link as highlighted below.

Click on Configure to bring up the Windows restore point settings window on the System Protection properties window.

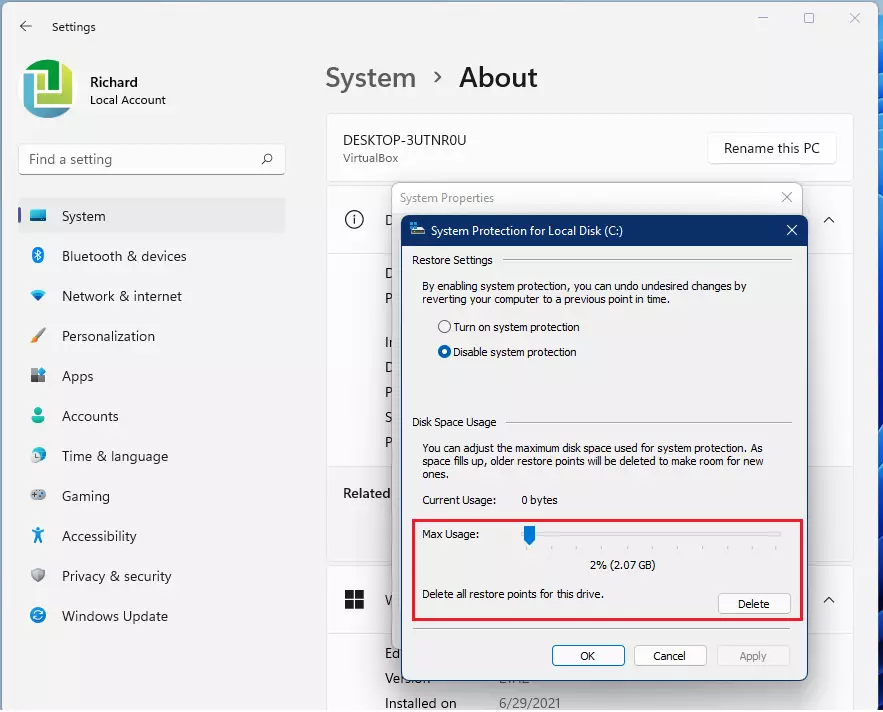
On the System Protection for Local Disk (C:) window, use the slider to adjust the amount of storage for checkpoints. Reduce the space used if you’re running low on the local disk.
If that’s not enough, you can delete all restore points by clicking the Delete button.
When prompted, click the Continue button.
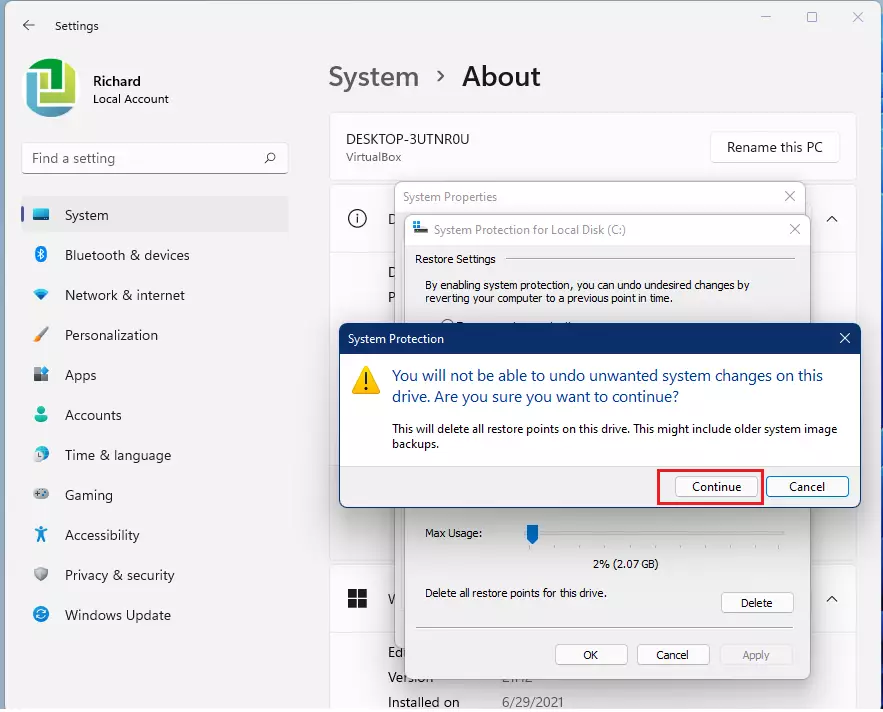
You should see a prompt confirming that the restore points are deleted.

That should do it!
Conclusion:
- Deleting restore points can help free up valuable disk space on your Windows 11 computer.
- It’s important to remember that restore points are crucial for system recovery and troubleshooting.
- Always consider adding additional storage if possible, rather than deleting restore points.
- Utilize these steps carefully if you delete restore points to ensure you do not lose critical recovery options.
- Regularly monitor your disk space and manage restore points to balance storage and system safety.


Leave a Reply Cancel reply