How to Connect Your Bluetooth Printer or Scanner to Windows 11
Connecting a Bluetooth printer or scanner to Windows 11 lets you print and scan wirelessly, freeing up desk space and offering more placement options. A Bluetooth printer or scanner uses short-range radio waves to communicate with your PC, eliminating the need for USB cables.
This connection process involves a few simple steps within Windows 11’s settings. You’ll usually need to put your printer or scanner into pairing mode first. Windows 11 then searches for available Bluetooth devices.
Once your PC finds the device, you accept the pairing request. Windows 11 has included Bluetooth support for printers and scanners since its initial release. Following these steps ensures your new wireless device is ready to go.
Ensure your printer or scanner is in pairing mode. Then, go to Windows Settings > Bluetooth & devices > Printers & scanners and click “Add device” to find and connect your Bluetooth peripheral. Follow any on-screen prompts to complete the setup.
Why Connect a Bluetooth Printer or Scanner?
Bluetooth allows devices to communicate wirelessly. Connecting your printer or scanner this way means no USB cable will be needed to hook it up to your computer. This flexibility lets you place your printer or scanner anywhere, keeping your workspace cleaner.
What Happens When You Connect It?
Once connected, your computer will recognize the printer or scanner. You’ll then be able to send documents to print or start scanning photos and papers directly from your PC. Using your devices becomes a lot more convenient.
Step 1Get Your Printer or Scanner Ready
To connect your Bluetooth printer or scanner to Windows 11, start by getting your device ready to be found by your computer.
- Turn on your Bluetooth printer or scanner.
- Put it into “pairing mode” or “discoverable mode.” Check your printer or scanner’s manual if you’re not sure how to do this.
Step 2Turn on Bluetooth in Windows
Before you can connect your Bluetooth printer or scanner, make sure Bluetooth is turned on in Windows 11.
- Click the Start button. It looks like the Windows logo and is usually in the bottom-left corner of your screen.
- Click the Settings gear icon.
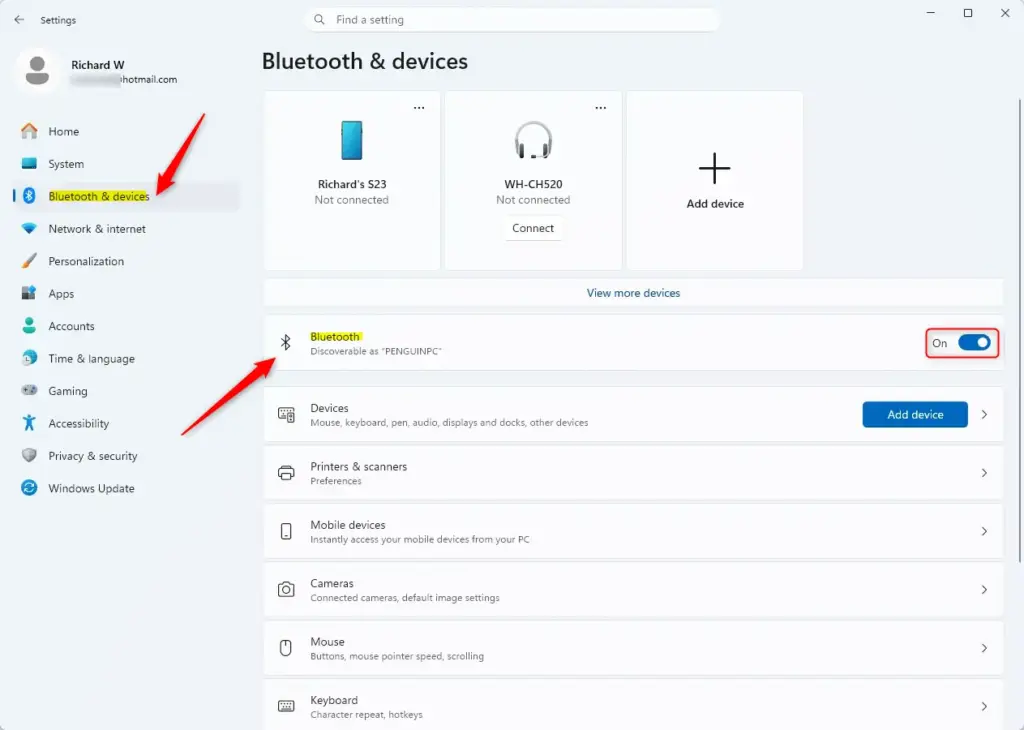
- In the Settings window, click on Bluetooth & devices. This might be in the left-hand menu.
- Find the Bluetooth toggle switch. Make sure it is turned On.
Step 3Add Your Printer or Scanner in Windows Settings
Once Bluetooth is on for both your computer and your device, you can add your Bluetooth printer or scanner in Windows 11 Settings.
- Go back to the Settings window.
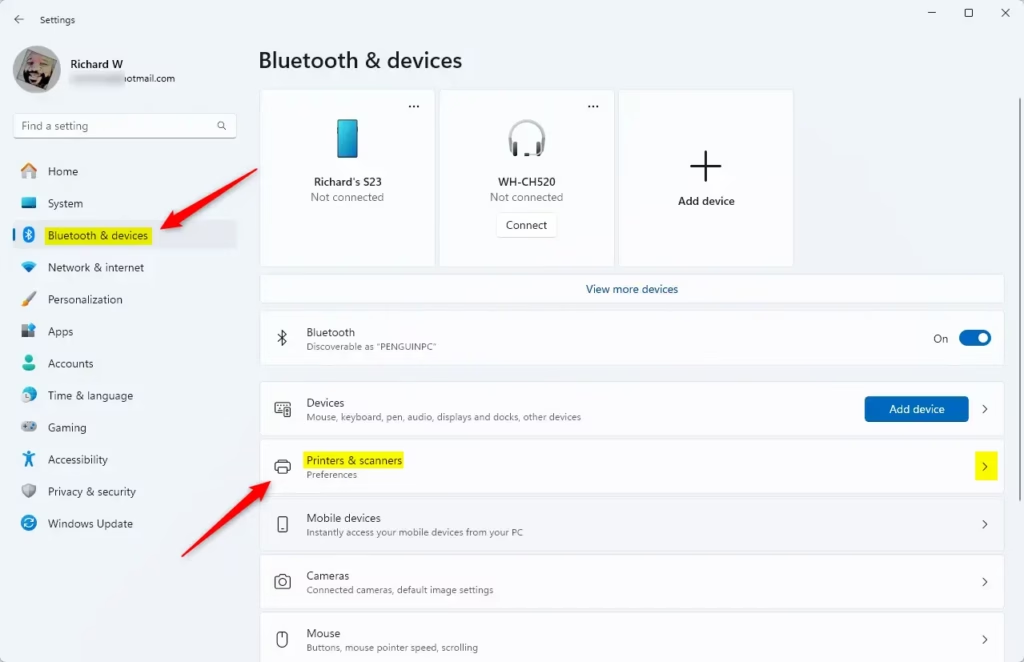
- Go to Bluetooth & devices.
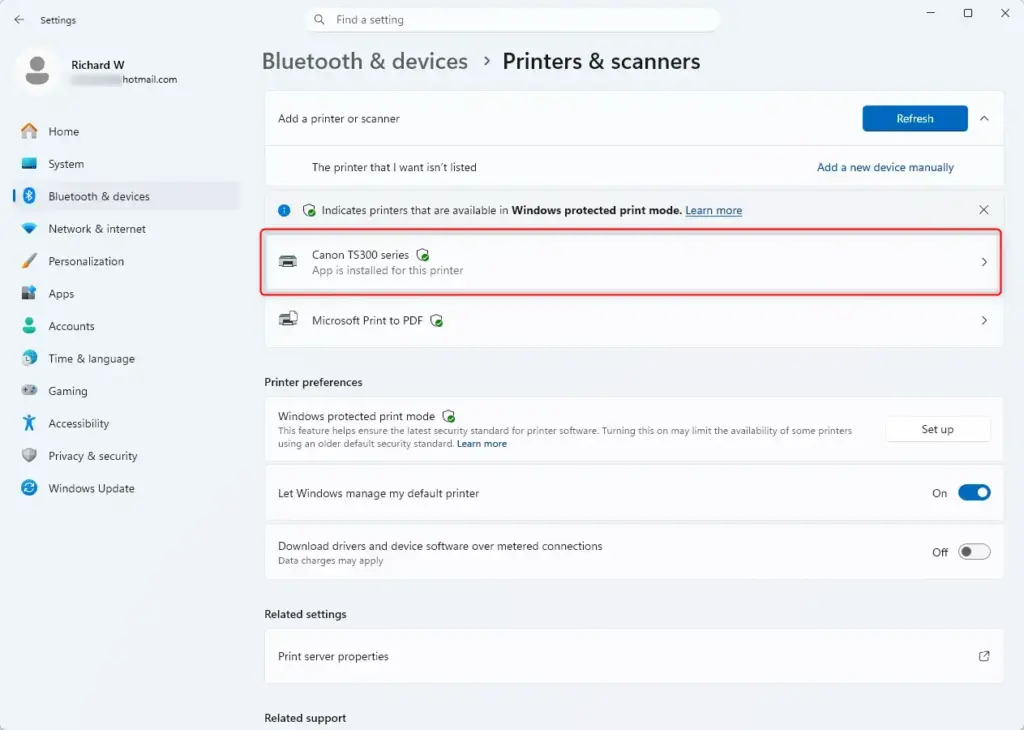
- Click on Printers & scanners.
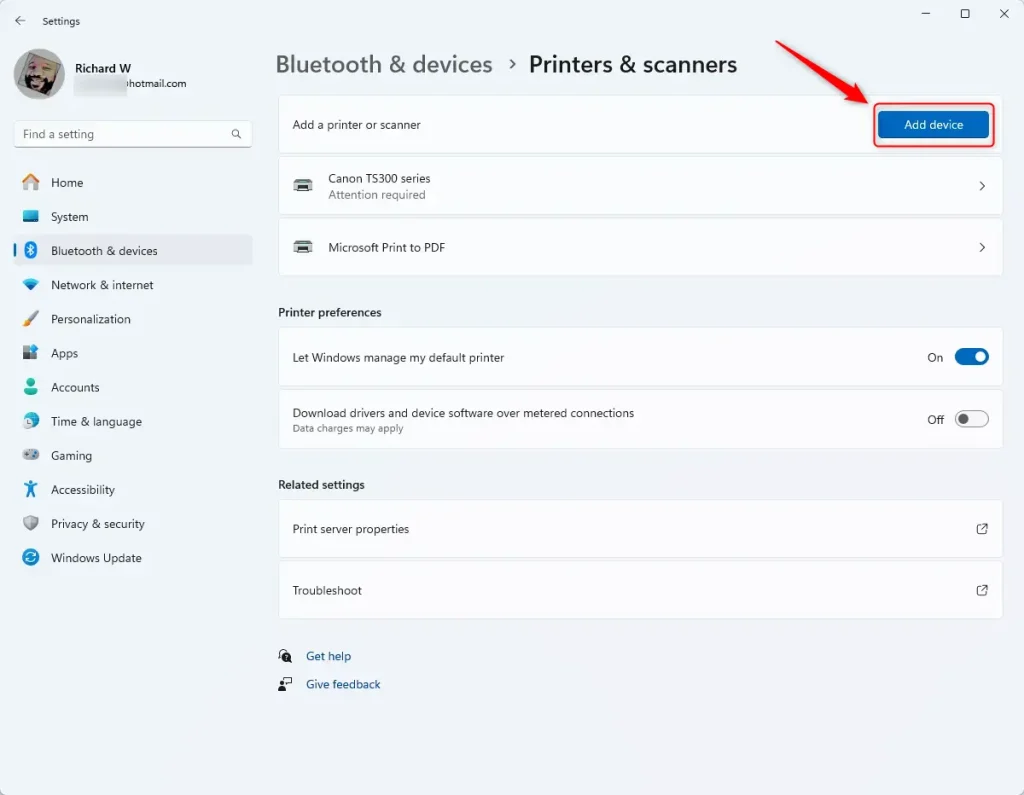
- Click the button that says Add device or Add printer or scanner.
- Windows will start looking for nearby printers and scanners. This might take a minute or two.
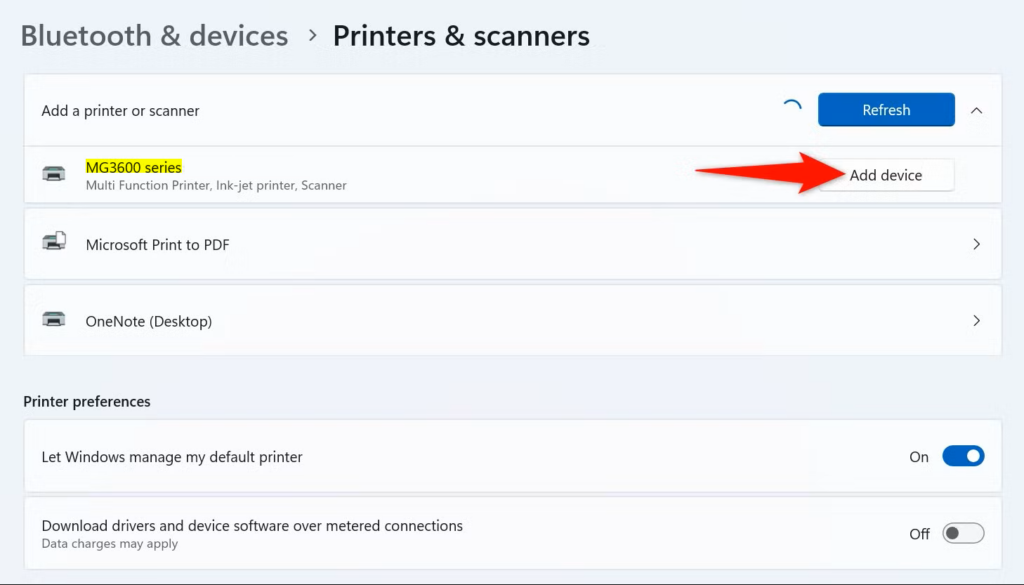
- When your Bluetooth printer or scanner shows up in the list, click on it. Then, click the Add device button that appears.
Step 4Follow Any On-Screen Prompts
After Windows finds your Bluetooth printer or scanner, follow any on-screen prompts to finish setting it up on Windows 11.
- After you click “Add device” for your printer or scanner, Windows might show you more instructions.
- Follow these instructions carefully. You might need to confirm a PIN on your printer/scanner, enter a code, or just wait for the installation to finish.
- When it’s done, you should see your printer or scanner listed under Printers & scanners in Windows Settings.
Step 5Test Your Connection
After connecting your Bluetooth printer or scanner to Windows 11, test your connection by trying to print a document or scan an item.
- Open a document or picture you want to print or scan.
- For printing: Click File, then Print. Or press Ctrl+P. Make sure your new Bluetooth printer is chosen from the list of printers. Then, click Print.
- For scanning: Open the Windows Scan app. You can search for it in the Start menu. Pick your Bluetooth scanner from the list, set up your scan options, and click Scan.
Reference:
Summary
Connecting your Bluetooth printer or scanner to Windows 11 involves making your device discoverable, turning on Bluetooth in Windows, adding the device through Settings, and following any prompts.
Was this guide helpful?

About the Author
Richard
Tech Writer, IT Professional
Richard, a writer for Geek Rewind, is a tech enthusiast who loves breaking down complex IT topics into simple, easy-to-understand ideas. With years of hands-on experience in system administration and enterprise IT operations, he’s developed a knack for offering practical tips and solutions. Richard aims to make technology more accessible and actionable. He's deeply committed to the Geek Rewind community, always ready to answer questions and engage in discussions.

No comments yet — be the first to share your thoughts!