
If you want to share photos or pictures from your Windows 11 PC but want to make the files smaller (so they send faster or take up less space), you can compress the images before sharing. Windows 11 now makes this easier by letting you pick image quality when you share files.
What’s New?
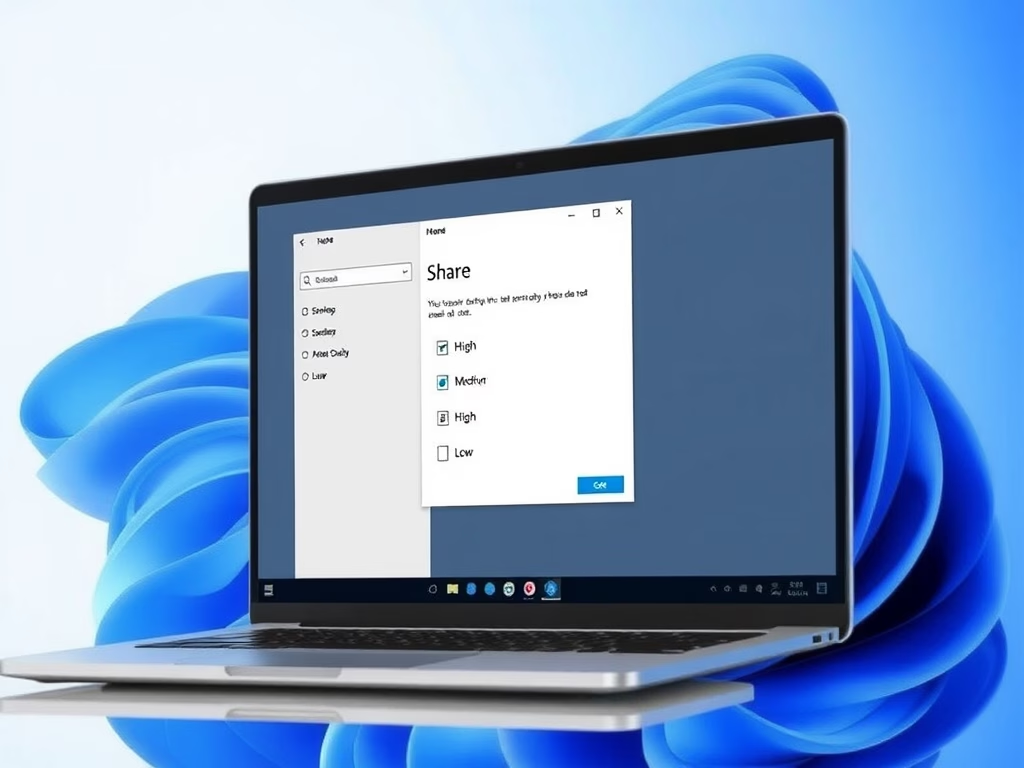
Windows 11 has a feature called Windows Share that helps you send files to apps, emails, phones, or nearby devices. Recently, Microsoft added a simple way to choose how much to compress images when sharing. Instead of picking a number from 0 to 100, you can just choose High, Medium, or Low quality.
This feature is available starting with Windows 11 build 26120.4151. To use it, you need to turn it on using a small tool called ViVeTool (don’t worry, it’s easy!).
Step 1: Enable the Compression Feature with ViVeTool
ViVeTool lets you unlock hidden or new features in Windows 11. Here’s a simple guide to get started:
- Download and learn how to use ViVeTool here: How to enable hidden features with ViVeTool
- Open the Windows Terminal app as an administrator. You can find it by clicking the Start button and typing “Windows Terminal,” then right-click and choose Run as administrator. More info: Open Windows Terminal as admin
- In the terminal, type this command and press Enter:
vivetool /enable /id:55390938
- Restart your computer to apply the change.
Step 2: Compress Images When Sharing
Now that the feature is enabled, here’s how to compress an image when you share it:
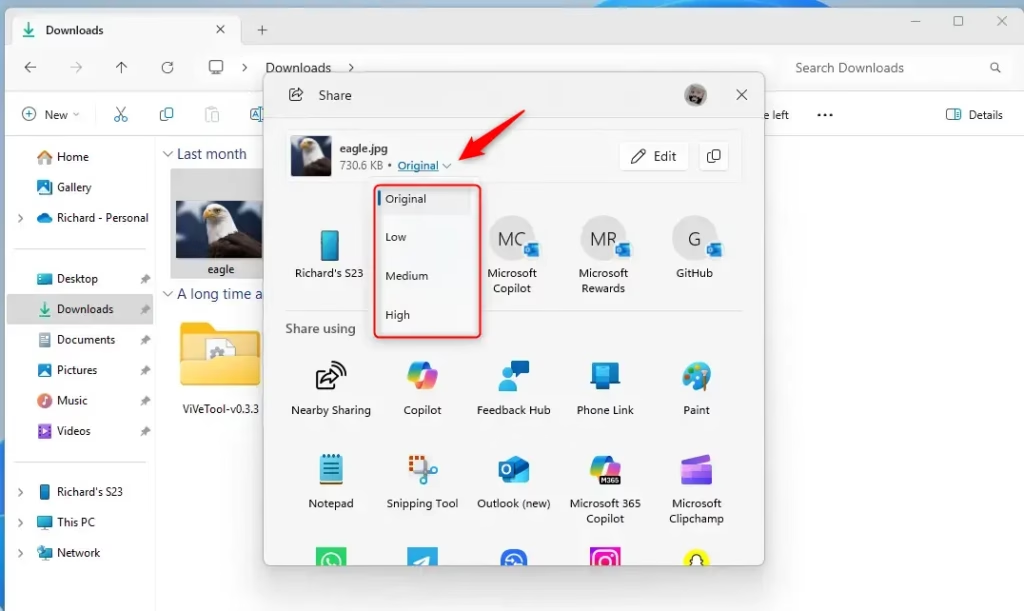
- Find the image file you want to share (like a photo or screenshot).
- Right-click on the image file.
- Choose Share from the menu at the top or from the right-click menu.
- In the sharing window, click on More options (usually a dropdown menu).
- Pick the quality you want: Original (no compression), High, Medium, or Low.
This lets you make the file smaller if you choose Medium or Low, which helps send images faster or save space.

Summary
- Windows 11 now lets you pick image quality when sharing pictures to control file size.
- You can choose from High, Medium, or Low compression levels.
- Use ViVeTool and a simple command to enable this feature if you don’t see it yet.
- Compressing images helps you share pictures faster and saves space.
Want to read more? Check out the official Microsoft blog here: Microsoft Blog on Windows 11 build 26120.4151
Leave a Reply Cancel reply