How to clear your Clipboard history in Windows 11
Clipboard history in Windows 11 lets you see and manage multiple items you’ve copied.
When you copy text or an image, it normally disappears from your clipboard once you copy something new. Windows 11’s Clipboard History keeps a record of recent copies, showing up to 25 items.
You can open this history by pressing the Windows key and V together. If you have sensitive information stored there, or just want to clean it up, clearing your clipboard history removes everything saved.
Open Clipboard History with Windows key + V, then click “Clear all” at the top. Alternatively, go to Settings > System > Clipboard and click the “Clear” button under “Clear clipboard data.
How to Clear Your Clipboard History
Ready to tidy up your clipboard? Here are two methods to clear it all.
Method 1Using the Settings App
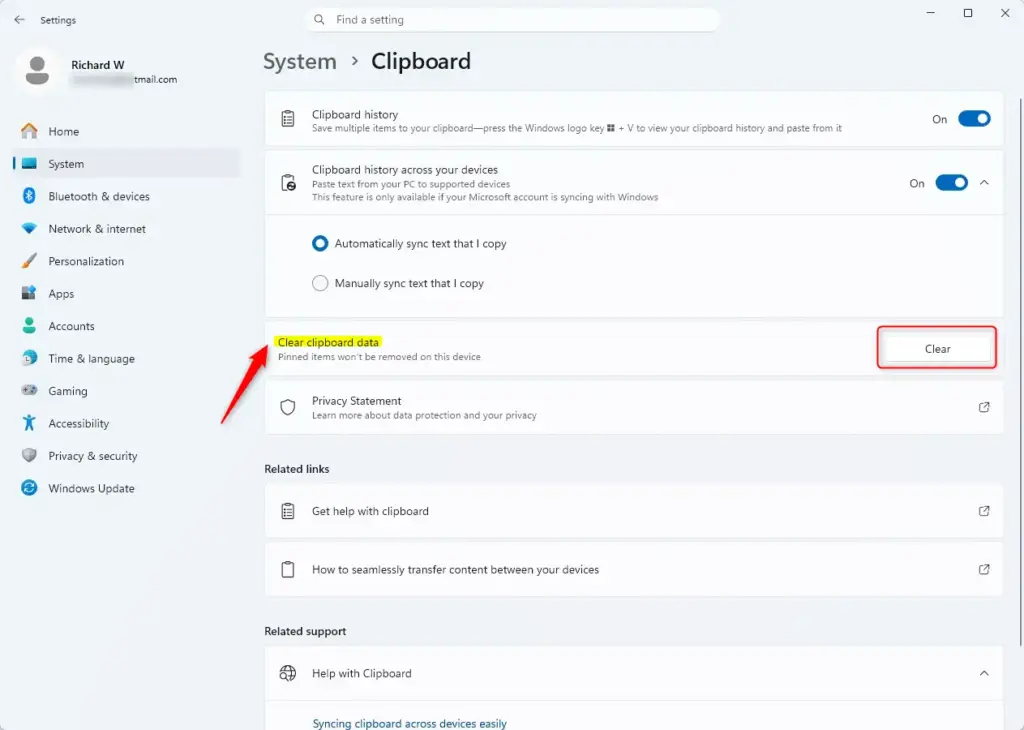
You can clear your entire clipboard history in Windows 11 using the Settings app, which removes all saved items from your computer and any synced online copies.
- Open Settings: Click the Start button (the Windows icon, usually in the bottom-left corner). Then click the Settings cog icon. You can also press the Windows key + I on your keyboard.
- Go to System: In the Settings window, click on System.
- Find Clipboard: On the left side, scroll down and click on Clipboard.
- Clear Your Data: Look for a section that says “Clear clipboard data”. Click the Clear button.

Method 2Clearing Directly from Clipboard History
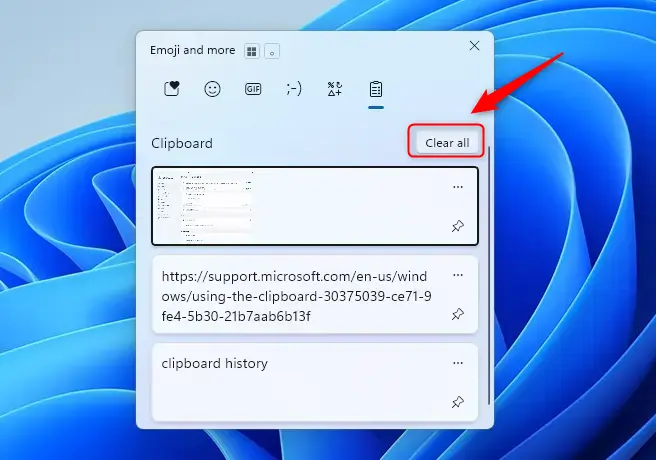
Clearing your clipboard history in Windows 11 is quick using the Windows key + V shortcut, which lets you see and remove all your copied items directly from the history panel.
- Open Clipboard History: Press the Windows key + V on your keyboard. This shows a list of what you’ve copied.
- Find ‘Clear all’: At the top of the clipboard history list, you should see an option that says Clear all. Click it.
- Confirm (if asked): Windows might ask if you’re sure. If it does, click Confirm or Yes.
Clearing Individual Items
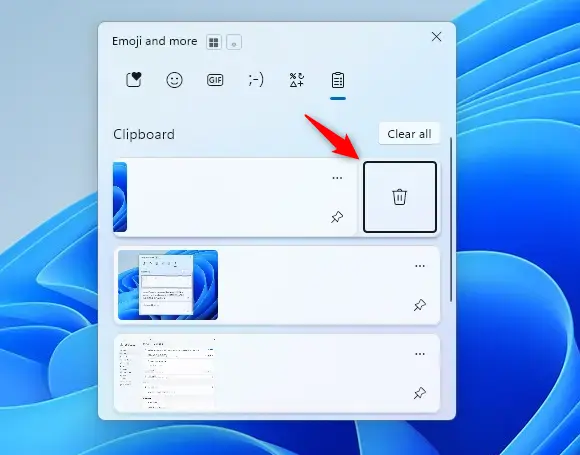
If you only want to remove one specific item from your Windows 11 clipboard history, perhaps something sensitive you copied by accident, you can easily delete individual items.
- Open Clipboard History: Press Windows key + V.
- Find the Item: Scroll through the list to find the item you want to remove.
- Select ‘See more’ or ‘…’: Next to the item, click the three dots (…) or the ‘See more’ option.
- Choose ‘Delete’: A small menu will appear. Click Delete.

Reference:
https://support.microsoft.com/en-us/windows/using-the-clipboard-30375039-ce71-9fe4-5b30-21b7aab6b13f
Summary
Clearing your clipboard history in Windows 11 helps keep your information private and your computer tidy, with options to clear everything at once via Settings or the Windows key + V shortcut, or to remove individual items.
Was this guide helpful?

About the Author
Richard
Tech Writer, IT Professional
Richard, a writer for Geek Rewind, is a tech enthusiast who loves breaking down complex IT topics into simple, easy-to-understand ideas. With years of hands-on experience in system administration and enterprise IT operations, he’s developed a knack for offering practical tips and solutions. Richard aims to make technology more accessible and actionable. He's deeply committed to the Geek Rewind community, always ready to answer questions and engage in discussions.


No comments yet — be the first to share your thoughts!