This brief tutorial shows students and new users how to choose the default Mic or Microphone in Windows 10.
When you have multiple input devices connected to Windows 10, you may often have to switch between these different connected devices to choose the most suitable one for a particular case.
Choosing the default Microphone in Windows 10 is important because it allows you to select the input device you want to use for your audio recordings, video calls, and other audio-related tasks.
When you have multiple microphones connected to your Windows 10 computer, you must switch between them to choose the most appropriate one for a particular task.
Setting the default microphone will help you avoid the hassle of switching between input devices every time you need to use a different microphone.
To get started with setting Windows default Mic, follow the steps below:
Choose Windows default Mic
There are multiple ways to select Windows default Microphone. One can quickly select the system-wide Mic for all apps using Windows systems settings.
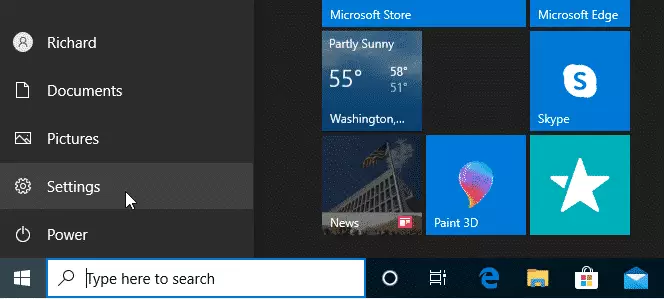
First, click the Start menu and select the gear icon on the left to open Settings. You can also press Windows + I to open it.
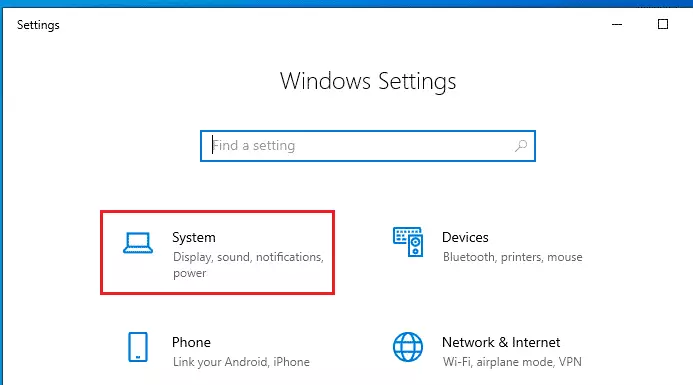
In the Settings window, select System.
Next, click Sound on the left windows sidebar. In the drop-down menu labeled “Choose your input device,” under Input, click the Mic or Microphone you’d like to use as your default.
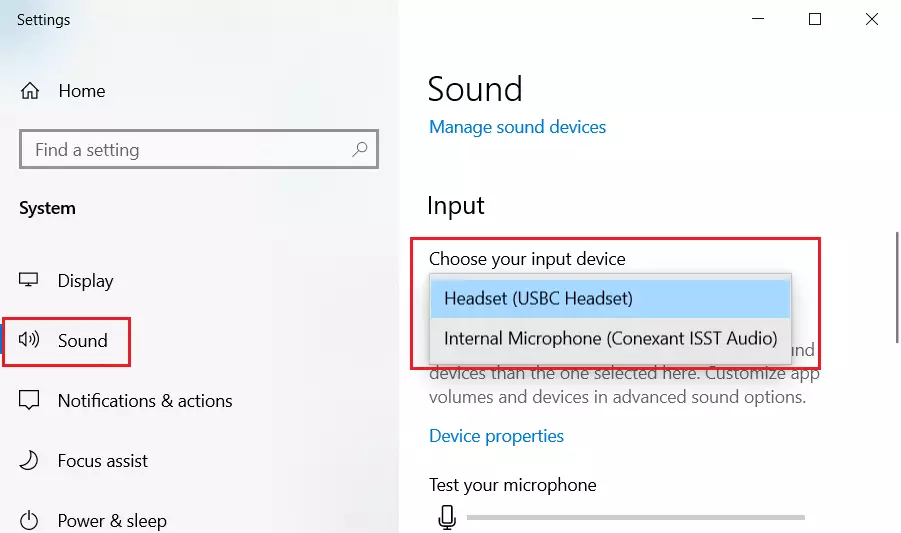
Again, this will apply to all apps. However, certain apps may be customized to override this setting and allow users to choose a different input device.
Quickly switch Input devices
Another way to quickly switch Windows input devices is via the taskbar. To choose between input devices quickly, right-click the speaker icon in the system tray and select Sounds, as shown in the image below.
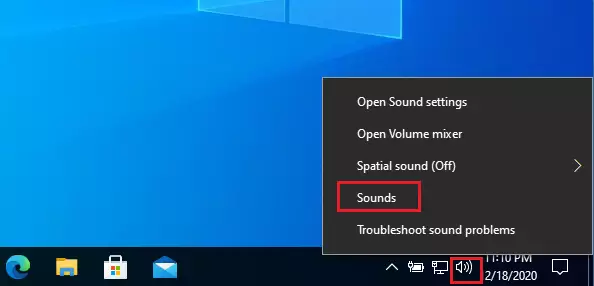
Then click on the Recording tab and select the recording device from the list you want to use.
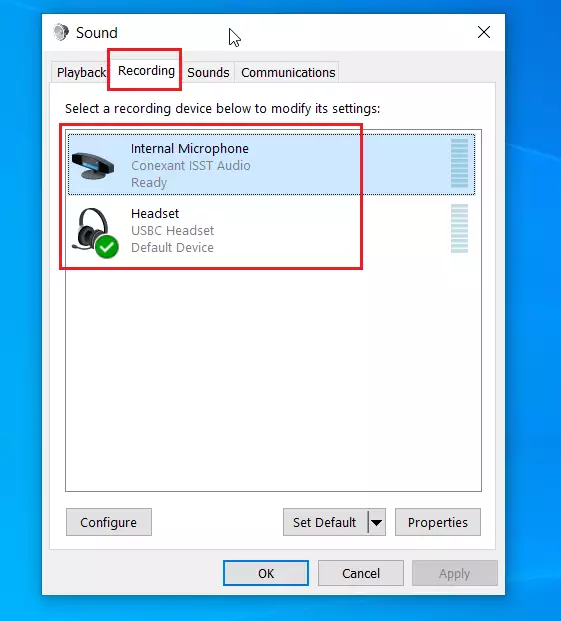
If you don’t see the connected mic device on the list, it may be that it is not recognized in Windows.
Conclusion:
- Choosing the default microphone in Windows 10 is crucial for a seamless audio experience during recordings and calls.
- Setting a preferred mic helps you avoid the hassle of manually switching input devices each time.
- You can adjust the default mic through the Settings app or quickly switch via the taskbar.
- Custom apps may have their settings that override the system default.
- Regularly check your audio settings to ensure the correct device is selected, especially if you connect new microphones or audio devices.
Leave a Reply Cancel reply