How to Check if You’re Using the Microsoft Basic Display Adapter
You are using the Microsoft Basic Display Adapter if your Windows PC lacks optimal graphics performance, especially in visually demanding tasks like gaming or video playback.
The Microsoft Basic Display Adapter is a generic driver included with Windows, offering fundamental display capabilities but missing the advanced features and speed of dedicated graphics card drivers from manufacturers like NVIDIA, AMD, or Intel. Identifying its use is crucial for enhancing your PC’s visual experience.
This generic driver can lead to slower frame rates, lower resolutions, and fewer display features compared to your graphics card’s native driver. For instance, if your graphics card is an NVIDIA GeForce RTX 3070, you definitely want its specific driver, not the basic adapter.
Fortunately, checking for the Microsoft Basic Display Adapter is straightforward, with two primary methods available through Windows tools to help you diagnose your system.
Open Device Manager by right-clicking the Start button and selecting ‘Device Manager’. Expand ‘Display adapters’. If ‘Microsoft Basic Display Adapter’ is listed, your system is using it. The DirectX Diagnostic Tool’s ‘Display’ tab also shows the adapter name.
Method 1Using Device Manager
Device Manager is like your computer’s hardware control panel. It shows all your connected devices and their status, including their drivers. Let’s see if your graphics driver is the basic one.
- Open Device Manager: The fastest way is to right-click your Start button. A menu will appear. Look for ‘Device Manager’ and click it.
- Expand Display Adapters: Once Device Manager is open, find ‘Display adapters’. Click the small arrow next to it. This will show the display adapter(s) your computer has.
- Look for the Microsoft Basic Display Adapter: Check the names under ‘Display adapters’ carefully. If you see ‘Microsoft Basic Display Adapter’ listed, your system is using this driver for that adapter. If you see a name from your graphics card maker (like NVIDIA, AMD, or Intel), that adapter is likely using its correct driver.
Method 2Using the DirectX Diagnostic Tool
The DirectX Diagnostic Tool, or dxdiag, is another Windows tool. It gives detailed information about your system’s parts, including graphics hardware and drivers. It’s great for fixing graphics problems.
- Open the Run Dialog: Press the
Windows key + Rkeys on your keyboard together. This opens the ‘Run’ dialog box. It’s a small window to open programs quickly.
- Launch DirectX Diagnostic Tool: In the ‘Open:’ box, type
dxdiag.exe. Then click ‘OK’ or press Enter. The DirectX Diagnostic Tool window will open.
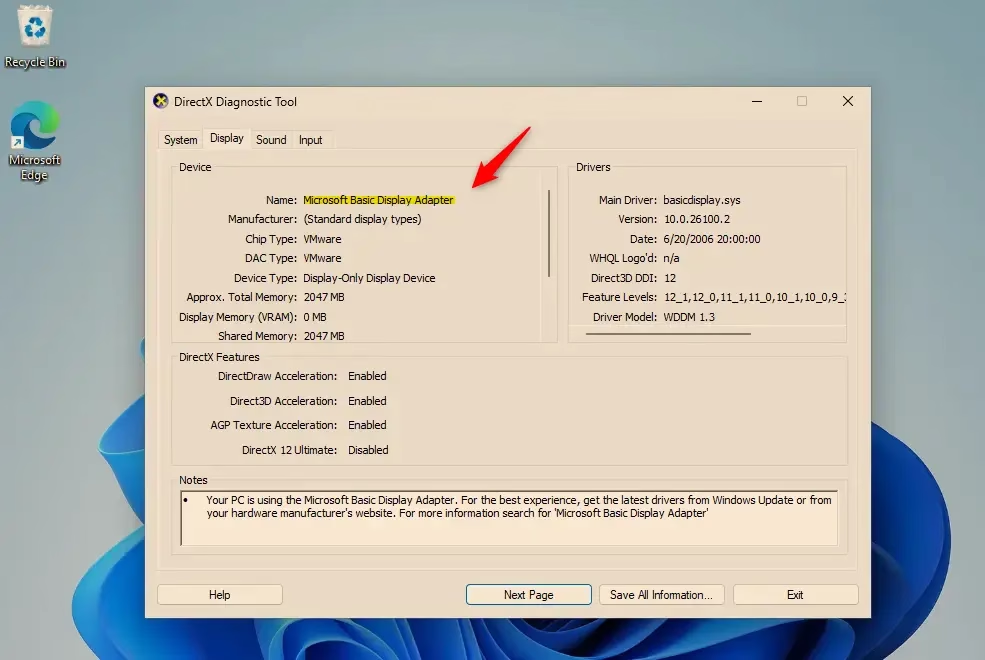
- Go to the Display Tab: In the DirectX Diagnostic Tool, click the ‘Display’ tab at the top. If you have more than one graphics adapter, you might see several ‘Display’ tabs, like ‘Display 1’, ‘Display 2’, etc.
- Check the Device Name: On the Display tab, look for the ‘Device’ section. Find the line that says ‘Name:’. If the name listed here is ‘Microsoft Basic Display Adapter,’ your system is using this generic driver for that display adapter.
Summary
You can check if your Windows 11 PC is using the Microsoft Basic Display Adapter using Device Manager or the DirectX Diagnostic Tool. If you find it’s using the basic adapter, you should install the driver from your graphics card manufacturer. This will likely improve your computer’s performance, especially for graphics-related tasks.
How to check which Display adapter is being used?
Open Device Manager by right-clicking the Start button and selecting 'Device Manager'. Expand 'Display adapters'. If you see 'Microsoft Basic Display Adapter', that's what's currently in use. Otherwise, your dedicated graphics card's driver should be listed.
Do I need a Microsoft Basic Display adapter?
No, you generally do not need the Microsoft Basic Display Adapter. It's a generic driver for basic functionality. For optimal graphics performance, gaming, and video, you should use the specific driver for your dedicated graphics card (NVIDIA, AMD, Intel).
What Display adapter am I using?
To check your display adapter, open Device Manager (right- click Start button). Under 'Display adapters', if you see 'Microsoft Basic Display Adapter', that is what your system is using. If a specific graphics card name (e.g., NVIDIA GeForce) is listed, that's your active adapter.
What is a Microsoft Basic Display adapter?
The Microsoft Basic Display Adapter is a generic driver included with Windows. It provides fundamental display capabilities but lacks the advanced features and performance of dedicated drivers from NVIDIA, AMD, or Intel. It's often used as a fallback when a specific graphics driver isn't installed.
Was this guide helpful?

About the Author
Richard
Tech Writer, IT Professional
Richard, a writer for Geek Rewind, is a tech enthusiast who loves breaking down complex IT topics into simple, easy-to-understand ideas. With years of hands-on experience in system administration and enterprise IT operations, he’s developed a knack for offering practical tips and solutions. Richard aims to make technology more accessible and actionable. He's deeply committed to the Geek Rewind community, always ready to answer questions and engage in discussions.

No comments yet — be the first to share your thoughts!