
This article describes steps to change how Windows Subsystem for Android (WSA) consumes resources in Windows 11.
Windows Subsystem for Android (WSA) creates a virtual machine that provides the environment to install and run Android applications as natively installed on Windows.
After you install WSA on Windows, every time you start an Android app, the app will request to spin a virtual machine, which can add extra delay. By default, WSA sets its resource consumption to “As needed” or on-demand so your machine doesn’t always consume resources when the Android subsystem isn’t being used.
If you typically run Android apps and have a machine with more than enough resources, you set this feature to always run in the background so that apps can start quickly.
Below is how to do that on Windows 11
How to change Windows Subsystem for Android to always or not run in the background on Windows 11
As mentioned above, by default, WSA sets its resource consumption setting to “As needed” or on-demand so that your machine isn’t constantly consuming resources when the Android subsystem isn’t being used.
Below is how to change that setting in Windows 11.
If you haven’t installed the Windows Subsystem for Android, follow the post below to learn how to install it.
How to install Windows Subsystem for Android on Windows 11
Once installed, go to the Start menu, and search for Windows Subsystem for Android. Under Best match, select and open Windows Subsystem for Android app.
When the app opens, go to its Settings pane.
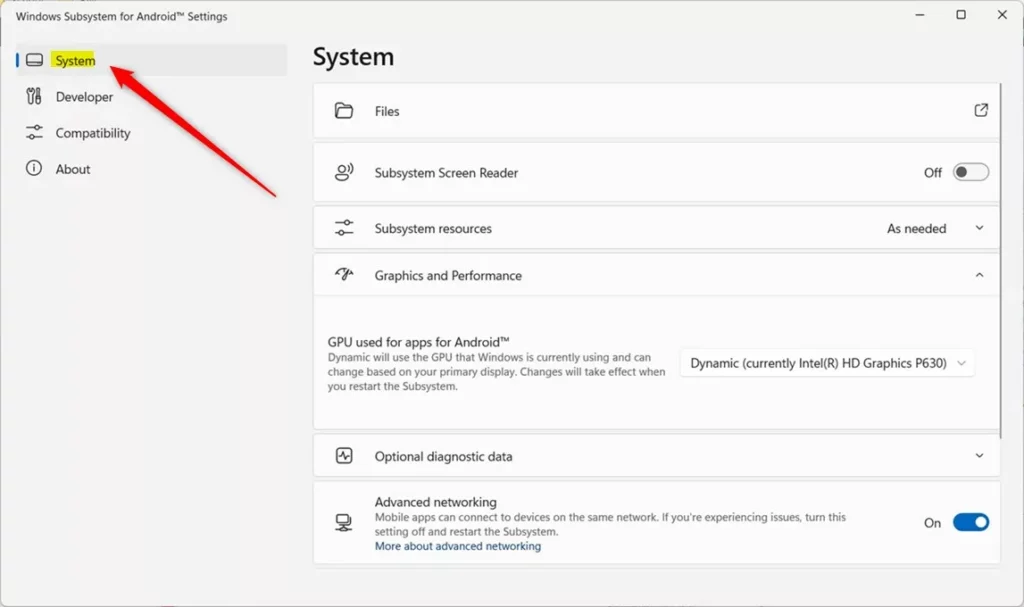
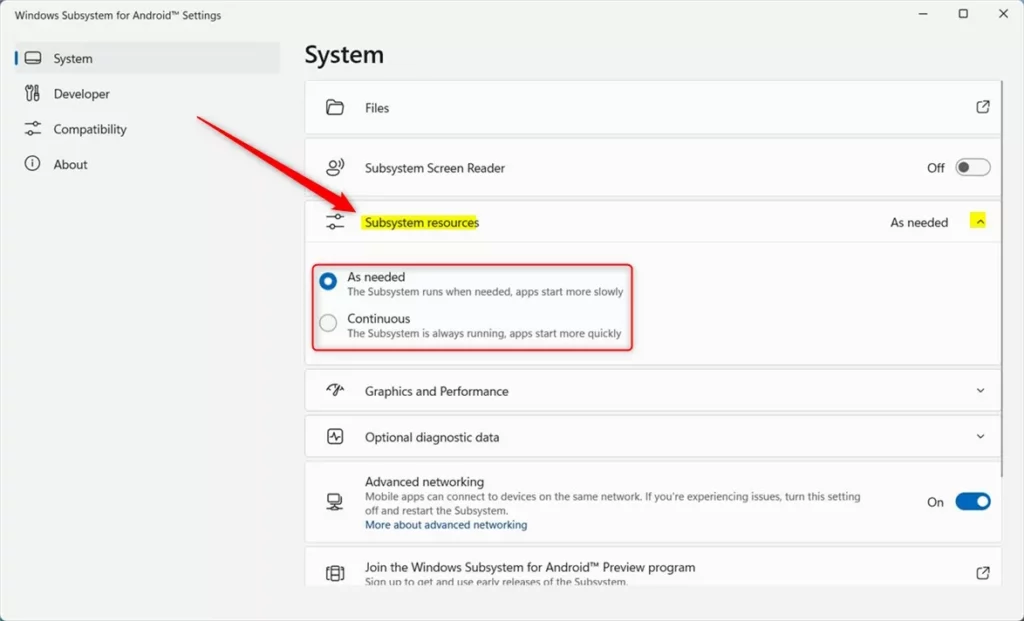
Next, click to expand the “Subsystem resources” tile, then choose how you want Windows to handle WSA resources:
- As needed – Subsystem runs when needed, apps start more slowly
- Continuous – Subsystem always running, apps start more quickly
The setting you choose above will apply to how Windows handles WSA.
That should do it!
Conclusion:
- Windows Subsystem for Android (WSA) on Windows 11 allows you to change resource consumption settings to optimize performance.
- Adjusting the subsystem resources to “Continuous” ensures that Android apps start more quickly, especially on machines with abundant resources.
- Conversely, setting the resources to “As needed” can help prevent unnecessary resource consumption when the Android subsystem is not in use.
- These simple steps empower you to tailor WSA resource management according to your needs and system capabilities.
Leave a Reply