
This article explains how to change the default download location in Windows 11.
By default, Windows creates a Downloads folder in each user’s profile. This is the default location used when downloading files, pictures, and other data from the internet in Windows 11.
Windows also allows users to move the Downloads folder to any location, including the Desktop. If your primary partition is running low on free storage space and you usually download large files, you may want to change the Downloads location to a partition on a larger drive.
How do I change the Downloads folder in Windows 11
As mentioned above, one can move or change the download location in Windows 11 to any location they like, including the Desktop.
To do that, follow the steps below.
The easiest way to change the default download location in Windows 11 is to use the Move command within the Download folder’s Properties context menu.
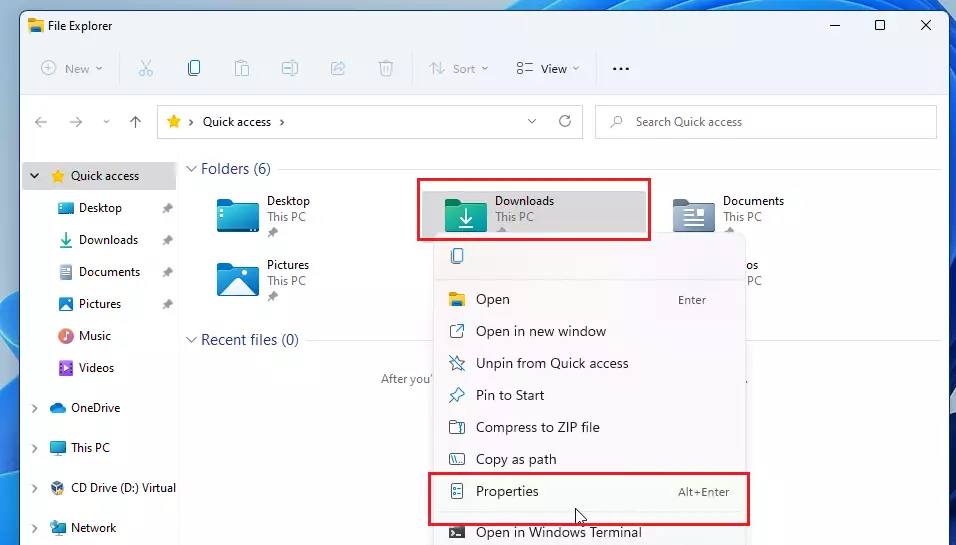
First, select the File Explorer folder icon in the taskbar at the bottom of your screen.
Once the File Explorer opens, right-click or tap, hold on to the Downloads folder, and select Properties from its pop-out menu.
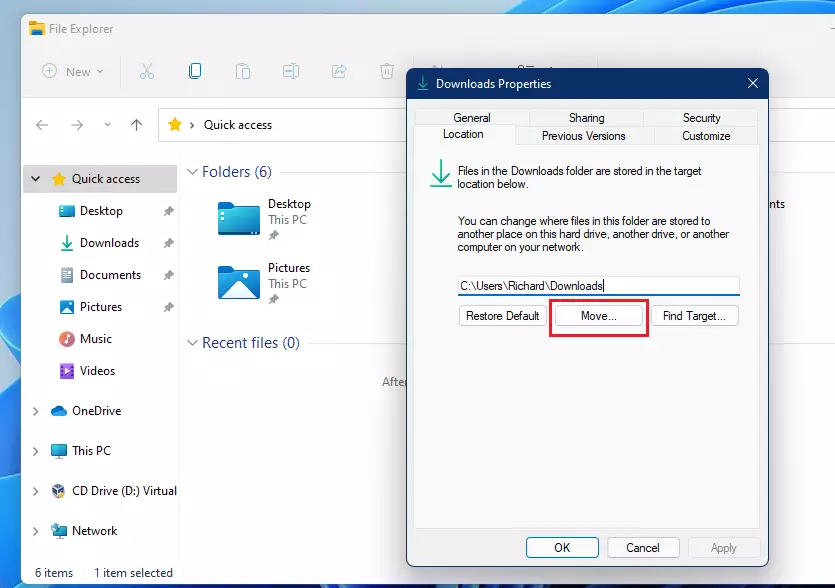
When the Properties window opens, select the Location tab, then select the Move button.
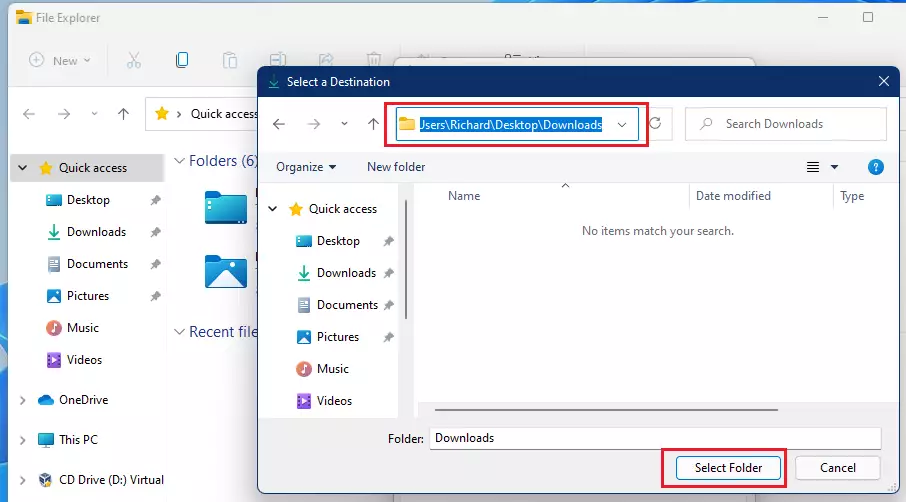
For this post, we will move the Downloads folder to our Desktop. We created a folder called Downloads on the Desktop, which we will use as our new Downloads folder.
Next, navigate through File Explorer to choose the Downloads folder created on your Desktop, then click Select Folder.
Once you choose a location, select OK. You’ll get a prompt like the one below asking if you want to move all files from the old location to the new one.
Click Yes to apply the changes.
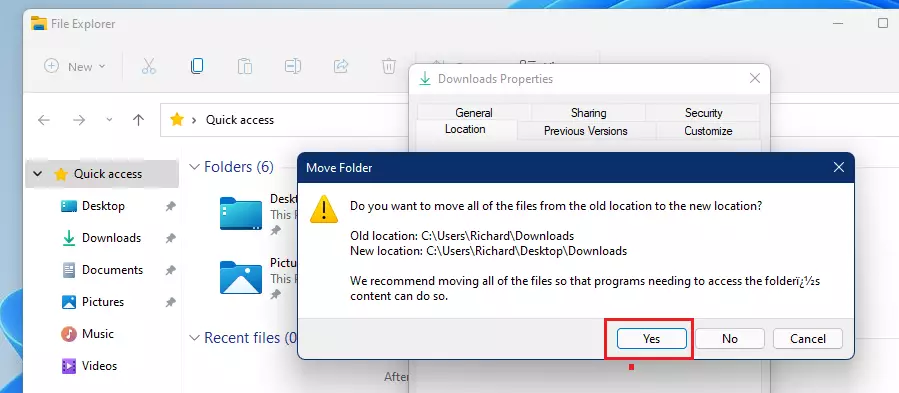
After that, any file you download from the internet will automatically be saved in the Downloads folder on your Desktop.
That’s it!
Conclusion:
- Changing the default Downloads folder in Windows 11 is a straightforward process.
- Users can move the Downloads folder to any location, such as a larger partition or the Desktop, to manage storage space effectively.
- The steps involve using the Properties context menu to access the Location tab and selecting a new folder.
- Once completed, all downloaded files will automatically save to the new location, enhancing organization and accessibility.
- This process is similar in Windows 10, although the interface may differ slightly.

Leave a Reply Cancel reply