

Do you use BitLocker to protect your files in Windows 11? If so, you should know how to change your BitLocker password. This guide will show you easy steps to update your password and keep your data safe.
BitLocker is a security feature that locks your drive. Only you can open it with a password. It works on your main computer drive as well as external USB drives.
Why change your BitLocker password? Changing your password regularly gives extra protection to your files.
What happens when you change it? You will need to use your new password every time you want to access your protected drive.
When your drive is protected with BitLocker, you need to enter the password to access your files. If you want to change this password, your drive must be unlocked first. You need to enter your current password to unlock it.
How to Change Your BitLocker Password
There are three simple ways to change your BitLocker password in Windows 11. Choose the method that works best for you.
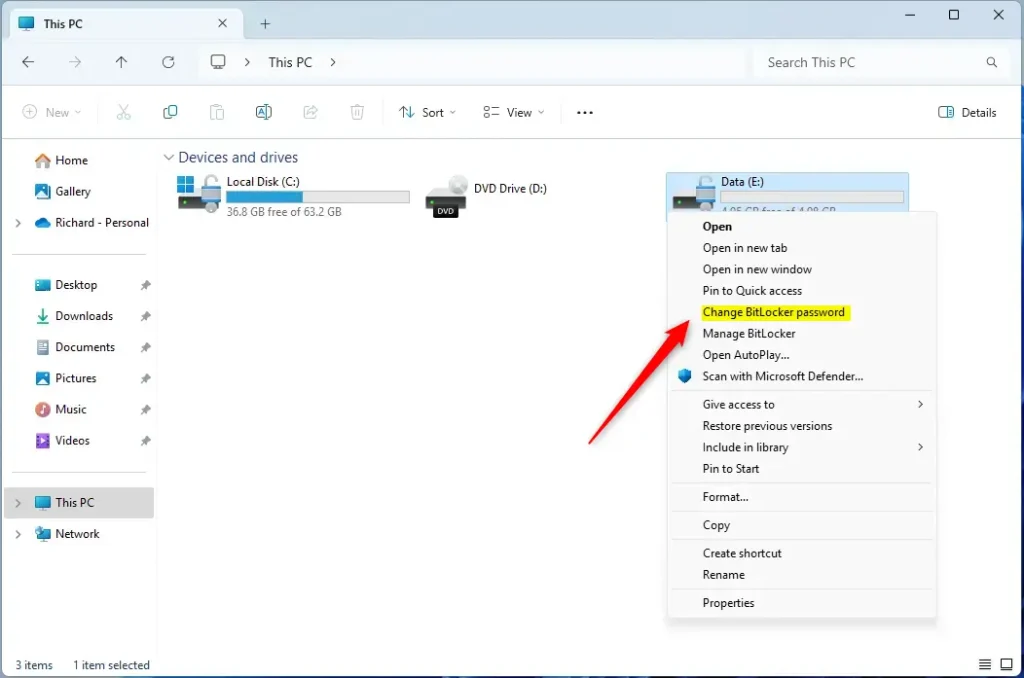
1. Change Password Using File Explorer
- Open File Explorer. Click the folder icon on your taskbar or press Windows + E on your keyboard.
- Find the drive that is protected by BitLocker. It will have a lock icon.
- Right-click on that drive. Choose “Show more options”. Click “Change BitLocker password”.
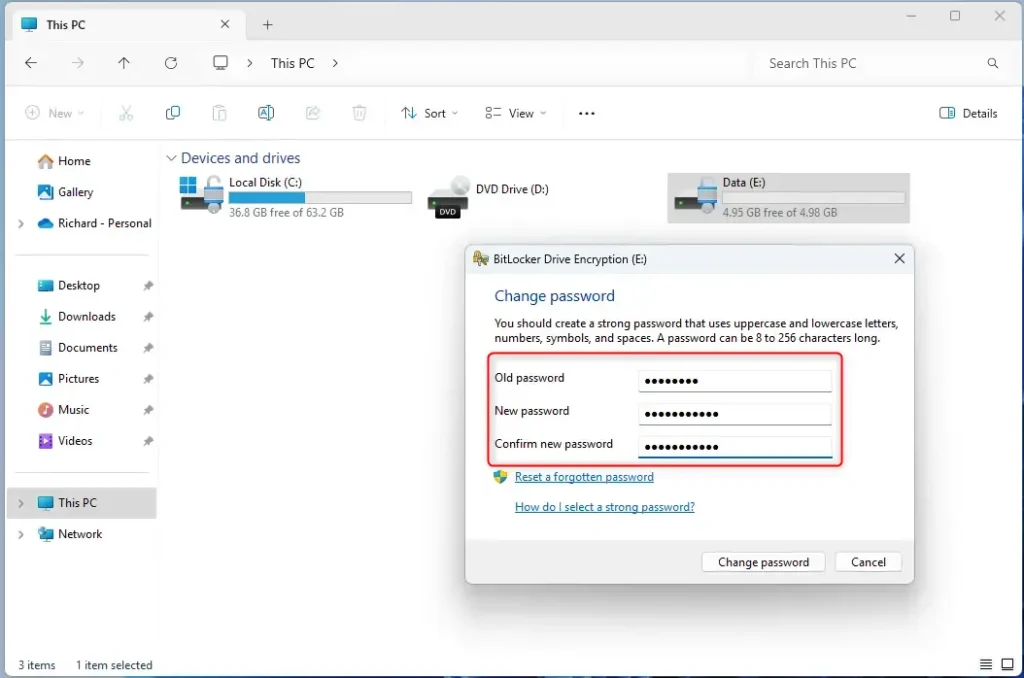
- A window will pop up. Type your old password. Then enter your new password twice to confirm.
- Click “Change password” to finish.
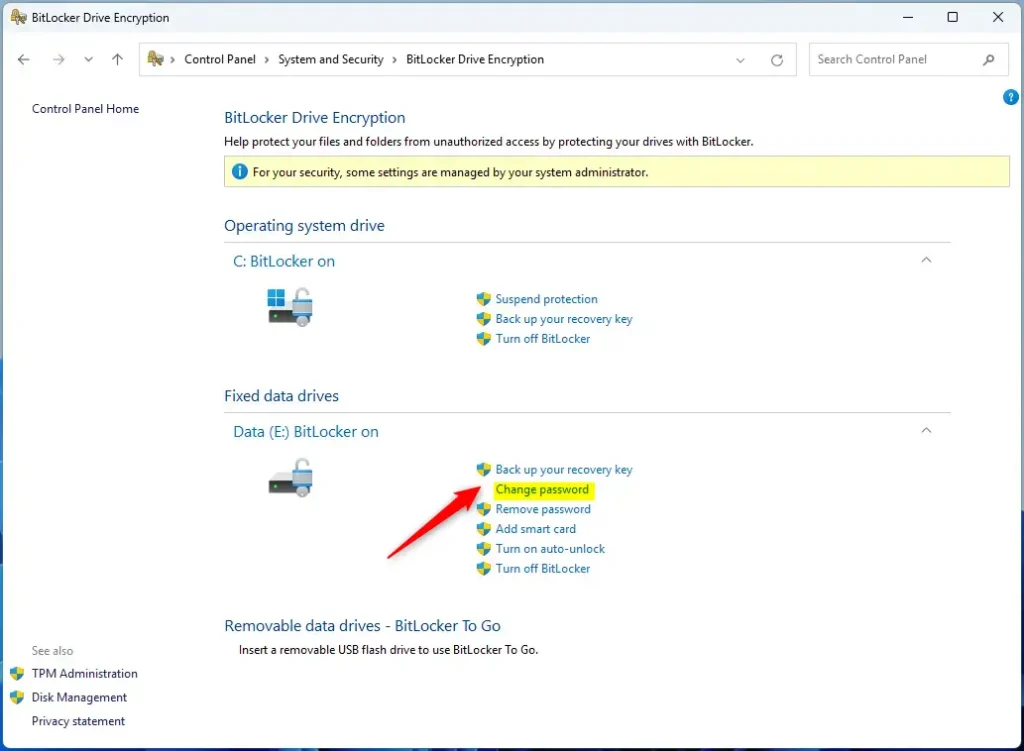
2. Change Password Using Control Panel
- Open Control Panel. Type “Control Panel” in the Start menu search and click it.
- Go to System and Security → BitLocker Drive Encryption.
- Find the drive you want to change the password for. Click “Change password”.
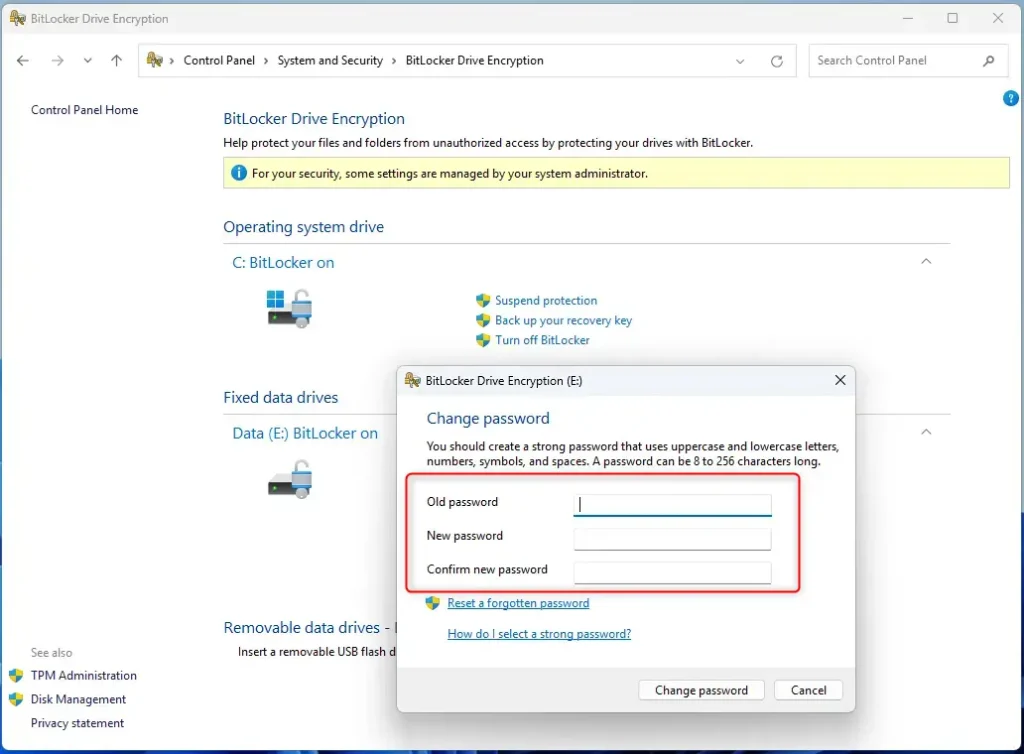
- Enter your old password. Then enter your new password twice. Click “Change password” to apply.
3. Change Password Using Windows Terminal
⚠️ Admin privileges required for this step.
If you like using commands, this method might be for you.
- Open Windows Terminal as an administrator. Search for “Windows Terminal” in Start. Right-click it. Select “Run as administrator”.
- Type the following command and press Enter. Replace
E:with your drive letter:
manage-bde -changepassword E:
- When prompted, enter your old password. Then enter your new password twice.
- Press Enter to finish.
Tip: To find your drive letter, open File Explorer. Look for the letter next to your drive. For example: C:, D:, or E:.
Summary
- Changing your BitLocker password helps keep your data safe.
- You can change the password using File Explorer, Control Panel, or Windows Terminal.
- Make sure your drive is unlocked before starting.
- Use a strong, unique password that you can remember.
- Changing your password regularly gives extra protection.
If you want to learn more about BitLocker or how to turn it on, check out this helpful guide: How to Turn On BitLocker in Windows 11.
Leave a Reply Cancel reply