
This article explains how to automatically set the “Do Not Disturb” status in the Zoom app on Windows 11.
Zoom is a video conferencing and online meeting platform that allows users to connect remotely. It offers Video and audio conferencing, screen sharing, and recording features.
There are many settings one can configure in the Zoom app on Windows. Users can download and install, start Zoom automatically when Windows starts, use dual monitors, turn Video and audio on or off screen lock, mute microphone when joining meetings, change where to save meeting recordings, turn message preview on or off, turn chat notifications on or off, turn new message sound on or off, change skin tone for emojis, and more.
When you use the Zoom app, users can set their status to “Do Not Disturb” using their profile settings. When their status is set to Do not disturb, other users will see that and try to avoid communicating with them.
The Zoom app makes it easy by allowing users to automatically change their status to Do not disturb during certain times. Instead of manually changing your status, the app will change your availability for the desired time.
Setting your status to “Do Not Disturb” can be useful when you don’t want to be disturbed during a meeting or when you need to focus on a task with minimal distractions. Setting your status to “Do Not Disturb” prevents unwanted notifications and distractions from popping up on your screen while working.
Setting it up to automatically change your status during certain times can also save you the hassle of manually changing it every time.
Automatically set Do No Disturb status in Zoom
As mentioned above, users can set up Do not disable status automatically during certain times without the hassle of manually changing it every time.
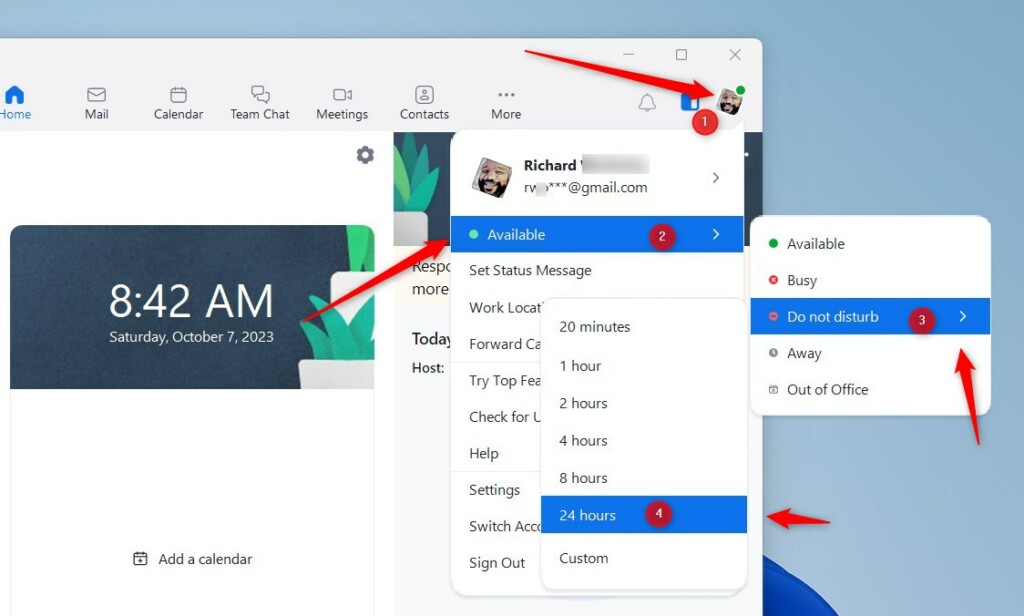
When you want to change your status in Zoom, click on your profile image at the top right corner, select Available -> Do not disturb -> and select the time you want to be in this state.
If you want the Zoom app to automatically change your status to Do not disturb, use the steps below.
First, open the Zoom app. You can do that by clicking Start and selecting the ‘All apps’ button on the Start menu.
Under All apps, scroll down alphabetically to the bottom and open the Zoom app.

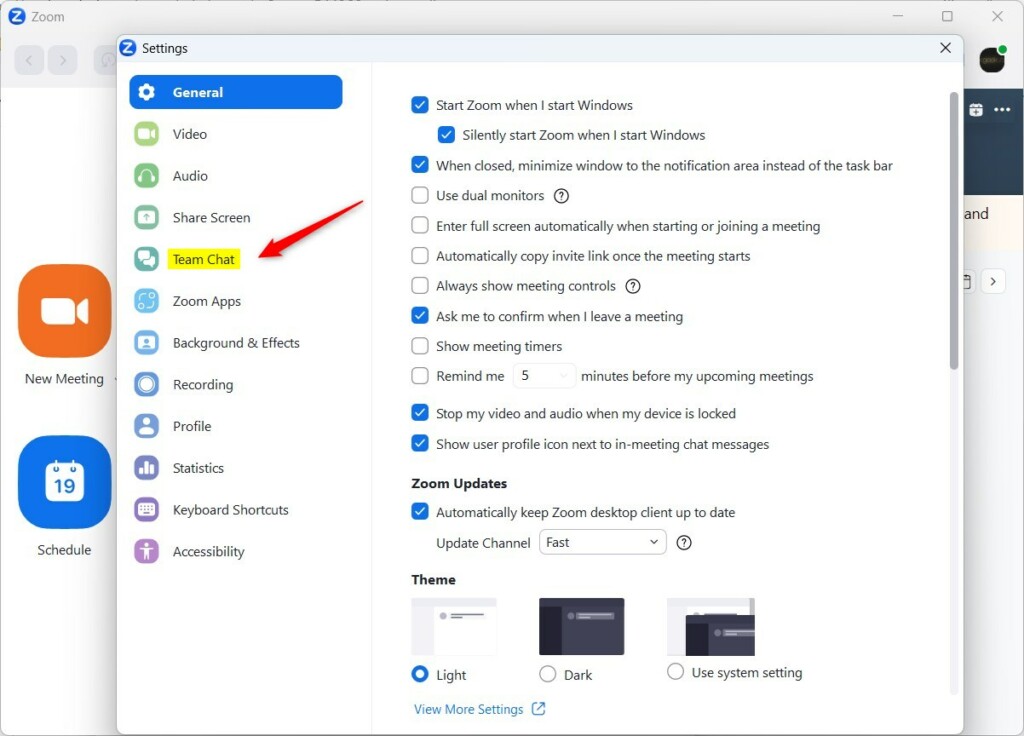
When the Zoom app opens, click the Settings (gear) to open its Setting pane.

Alternatively, click on your profile image at the top right and select Settings on the context menu.

Select the Team Chat button on the left menu when the Settings pane opens.
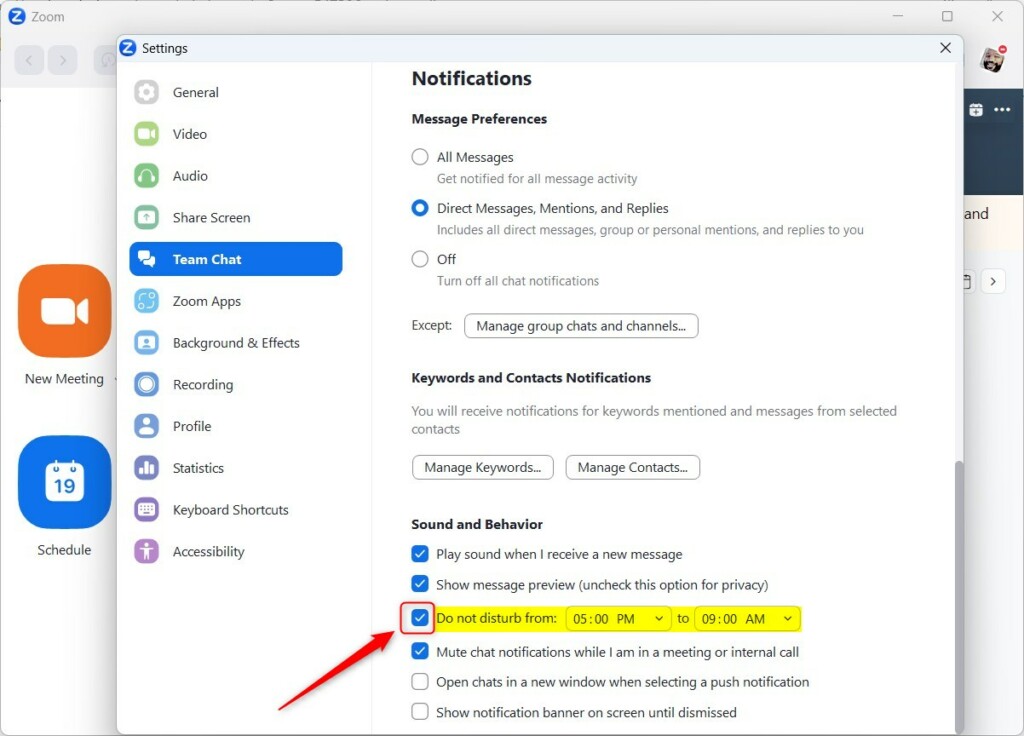
On the Team Chat settings page, scroll down to Sound and Behavior. Then, check the box next to “Do not disturb from: [start time to end time].”
Replace the start and end times with when you do not want to be disturbed and when you want to be available again.
That should do it!
Conclusion:
- Setting your status to “Do Not Disturb” can significantly reduce distractions during essential meetings or while focusing on critical tasks.
- Automatically setting the “Do Not Disturb” status in the Zoom app on Windows 11 can streamline the process and minimize the need for manual intervention.
- We hope this guide has helped you manage your availability in the Zoom app effectively. If you have any feedback or suggestions, please share them with us using the comments section below.

Leave a Reply Cancel reply