
This article explains how to add the Recycle Bin to the File Explorer navigation pane in Windows 11.
File Explorer is a built-in tool in Windows. It helps you access and manage files and folders on your computer’s hard drive, external drives, and network locations.
The Recycle Bin in Windows is a folder where deleted files and folders go temporarily before being permanently deleted. The Recycle Bin is usually on your desktop.
You can add the Recycle Bin to the File Explorer navigation pane. This makes it easy to access deleted items.
Why Add the Recycle Bin to File Explorer?
Adding the Recycle Bin to the File Explorer navigation pane is helpful. If you accidentally delete a file or folder, you can quickly restore it. You won’t need to search for the Recycle Bin on the desktop or in the Start menu.
It also helps keep your desktop clean and organized. You can remove the Recycle Bin icon from your desktop instead.
How to Add the Recycle Bin to the Navigation Pane in File Explorer
Adding the Recycle Bin to the File Explorer navigation pane requires accessing the Windows Registry and modifying the CLSID key {645FF040-5081-101B-9F08-00AA002F954E} by creating a DWORD value named System.IsPinnedToNameSpaceTree and setting it to 1, then restarting Windows to apply the changes.
- Flag: Requires admin privileges – Open the Windows Registry and navigate to this folder key path:
Computer\HKEY_CURRENT_USER\Software\Classes\CLSID\{645FF040-5081-101B-9F08-00AA002F954E}If you don’t see the
{645FF040-5081-101B-9F08-00AA002F954E}key, create a new key and name it that. - In the key’s right pane, look for
System.IsPinnedToNameSpaceTree(REG_DWORD). Double-click it to open it.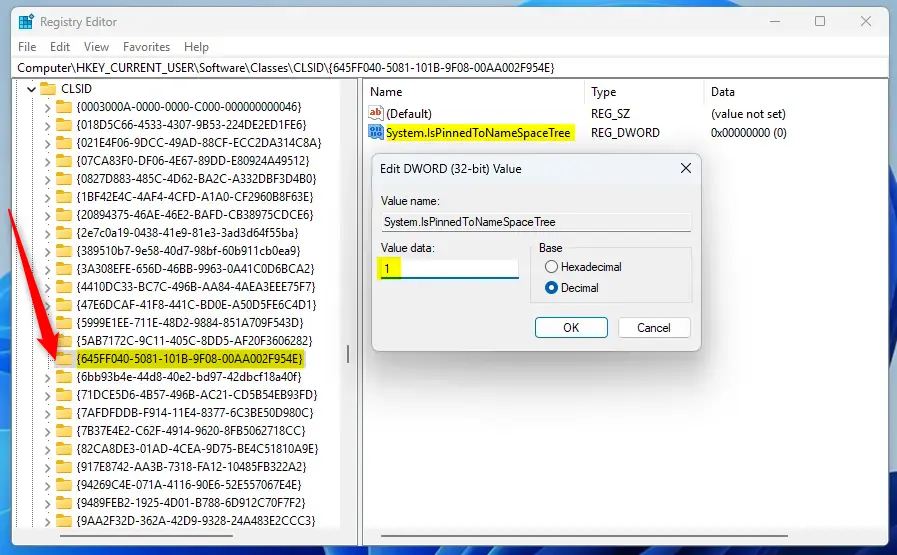
If you don’t see this item, right-click a blank area and create a new
DWORD (32-bit)registry item. Name itSystem.IsPinnedToNameSpaceTree. - Enter the value
1to display the Recycle Bin on the File Explorer navigation pane. - Save your changes and restart your computer.
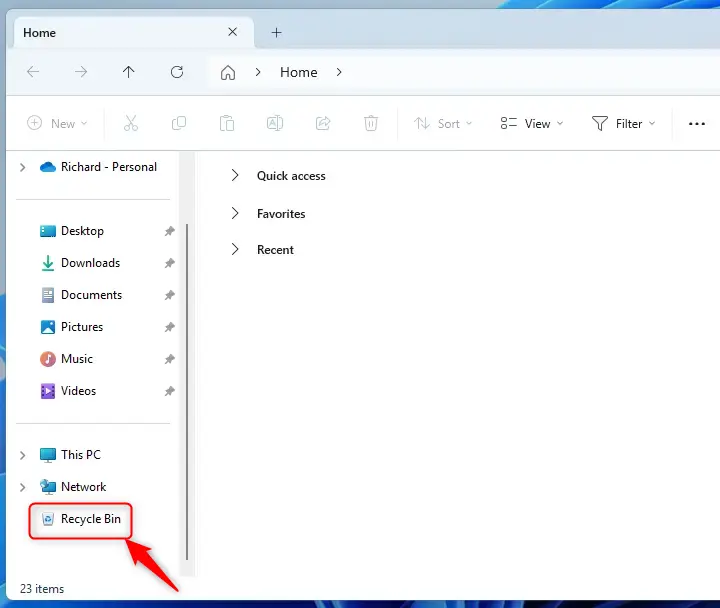
What Happens When Done: The Recycle Bin should now appear in the File Explorer navigation pane.
Summary
Adding the Recycle Bin to the File Explorer navigation pane gives you quick access to deleted items. The process involves making changes in the Windows Registry and restarting your computer. This feature helps you find and restore deleted files without cluttering your desktop. Removing the Recycle Bin icon from the desktop makes it cleaner and more organized.


Leave a Reply