This brief tutorial shows students and new users how to add AdSense ads on AMP pages when running WordPress websites or blogs.
Google AdSense is a program that allows web admins and anyone who runs a website or blog to earn income by adding AdSense ads to their pages.
When your users visit your pages and interact with ads on your pages, you get a chance to earn some money from these ads. The more users you have, the more you can earn.
It is easy to put AdSense ad units on regular WordPress pages. To do that, copy the ads unit provided when you log on to your AdSense account and create a new ad unit. Then, paste the codes on any of your pages, and in no time, ads should begin appearing.
However, if you’re running AMP pages, the process isn’t that simple.
You’ll have to do it differently to add AdSense to AMP pages.
The AMP Project is an open-source initiative that aims to make the web faster. If you’re running a WordPress blog or website and want to rank better in search engine result pages, you may want to enable AMP for your pages.
If you can’t turn on AMP for your sites, then make sure that your sites run faster when compared to others.
Install WordPress AMP Plugin
A simple way to enable AMP pages for WordPress sites running themes not built on AMP standards is to install a recommended AMP plugin called AMP.
The AMP plugin for WordPress supports fully integrated AMP publishing for WordPress sites, with robust capabilities and granular publisher controls.
After installing the plugin, activate it, and separate AMP pages will be created for your site.
Get AdSense Ads for AMP
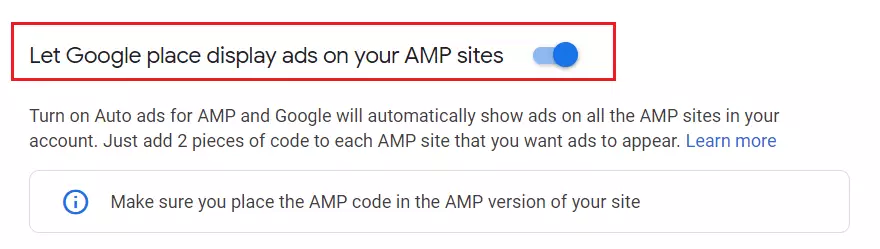
After installing the WordPress AMP plugin, go to your AdSense account and enable AMP ads. Turn on Auto ads for AMP, and Google will automatically show ads on your account’s AMP sites. Just add 2 pieces of code to each AMP site where you want ads to appear.
After enabling AMP ads in AdSense, you will be provided two pieces of code to add to your site. One will be added to your AMP header and the other to the body.
Copy the first piece of code that looks similar to the one below:
<script async custom-element="amp-auto-ads"
        src="https://cdn.ampproject.org/v0/amp-auto-ads-0.1.js">
</script>
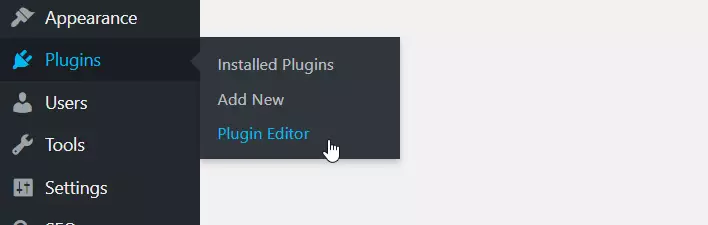
Then go to your WordPress dashboard and navigate to Plugins ==> Plugin Editor
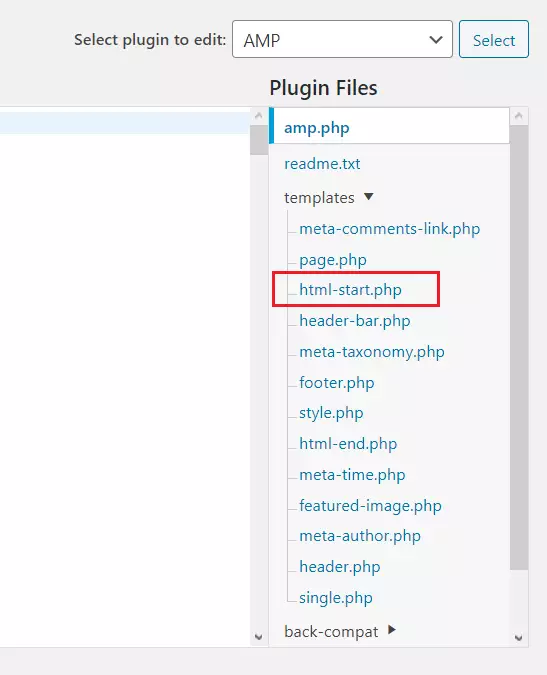
Then select the AMP plugin and open the html-start-php page.
Paste the code inside the <head> and </head> sections of the page as shown below:
<head>
<meta charset="utf-8">
<meta name="viewport" content="width=device-width,initial-scale=1,minimum-scale=1">
<?php do_action( 'amp_post_template_head', $this ); ?>
<style amp-custom>
<?php $this->load_parts( [ 'style' ] ); ?>
<?php do_action( 'amp_post_template_css', $this ); ?>
</style>
<script async custom-element="amp-auto-ads"
src="https://cdn.ampproject.org/v0/amp-auto-ads-0.1.js">
</script>
</head>
Next, copy the second piece of code and paste it into the body section of your AMP pages. In the same html-start-php page, paste the code in the body section as shown below:
<body class="<?php echo esc_attr( $this->get( 'body_class' ) ); ?>">
<amp-auto-ads type="adsense"
data-ad-client="ca-pub-933557045840574345">
</amp-auto-ads>
<?php do_action( 'amp_post_template_body_open', $this ); ?>
Save the page and exit
After saving the page, ads should show on your WordPress AMP pages after a few minutes.
Add AMP Code via Theme Function
Because WordPress plugins are frequently updated, and all changes will be lost after updating, it’s recommended that you add AMP code via the WordPress theme’s function.php file.
To add AdSense AMP header and body code via the WordPress theme function, go to WordPress Dashboard ==> Appearance ==> Theme Editor.
Then select the current theme, and ope the function.php file.
When the file opens, copy the two pieces of code into the file and save.
AMP Header code
add_action('amp_post_template_head','adsense_amp_head');
 function adsense_amp_head($amp_template) {
 ?>
 //Paste AdSense AMP header code here
 <?php
 }
AMP Body code
add_action('amp_post_template_footer','adsense_amp_footer');
function adsense_amp_footer($amp_template) {
?>
//Paste AdSense AMP body code here
<?php
}
Save the function.php file, and you’re done.
When you’re all done, AMP ads should appear on your site’s pages.
Conclusion:
This post shows students and new users how to add AMP ad units on WordPress AMP pages. If you find errors above, please comment below to report them.
You may also like the post below:
Leave a Reply Cancel reply