
This article explains how to connect to shares on Windows 11 from the Ubuntu desktop.
By default, when you open the Ubuntu file manager, it automatically detects network shares that are advertised on the local network. Similar to Windows systems, Ubuntu uses the SMB protocol to connect to these shared Windows resources.
When shared resources are advertised, Ubuntu and other desktop computers should be able to view and connect to them.
However, if the shares are not advertised, users on the same network must manually connect to the shares by entering the resource network address.
The steps below will guide you on how to do that.
Enable Network Discovery in Windows 11
As mentioned above, shares must be advertised for other devices to view or access. Network Discovery needs to be turned on in Windows to advertise shares to be viewed from other devices.
If your Windows devices cannot see or discover each other on your private network, Network Discovery will likely be disabled.
First, turn on Network Discovery in Windows 11.
If you haven’t done so, read the post below to learn how to enable Network Discovery in Windows 11.
How to enable Network Discovery on Windows 11
When you’re done, exit, and network discovery should be enabled.
Turn on Public Folder Sharing in Windows 11
Use the steps below to set up file sharing.
Windows 11 has a centralized location for the majority of its settings. Everything can be done, from system configurations to creating new users and updating Windows from its System Settings pane.
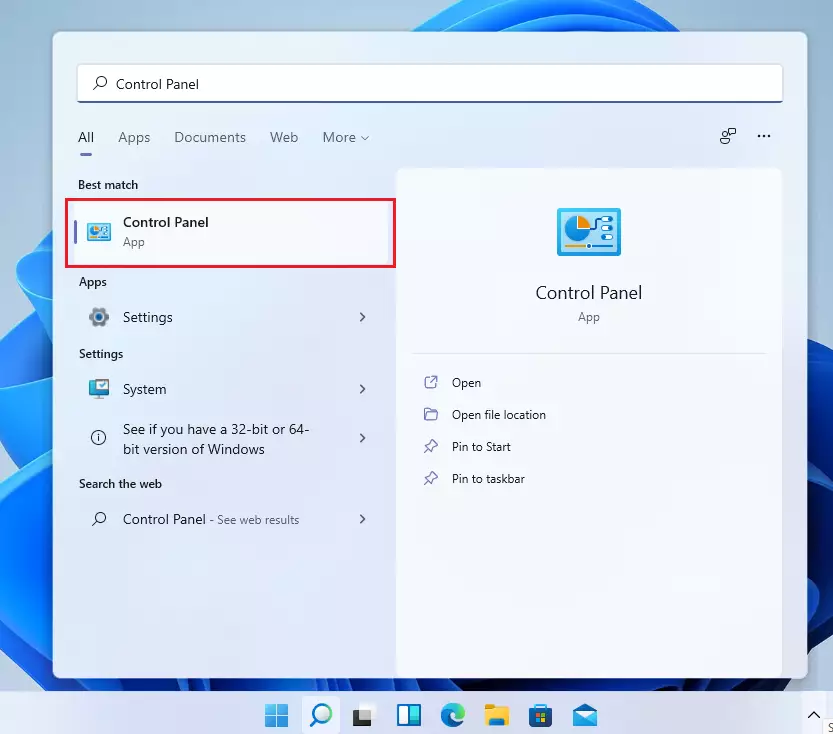
However, changing the account username is still done in the old Control Panel. To get to Control Panel, you can click on Start and start typing Control Panel as shown in the image below:
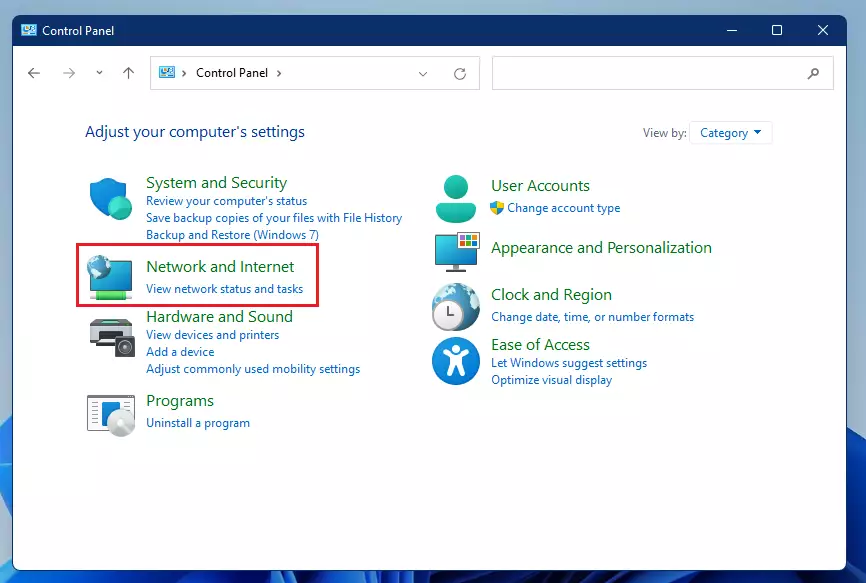
In the Control Panel, select Network and Internet, as highlighted in the image below.
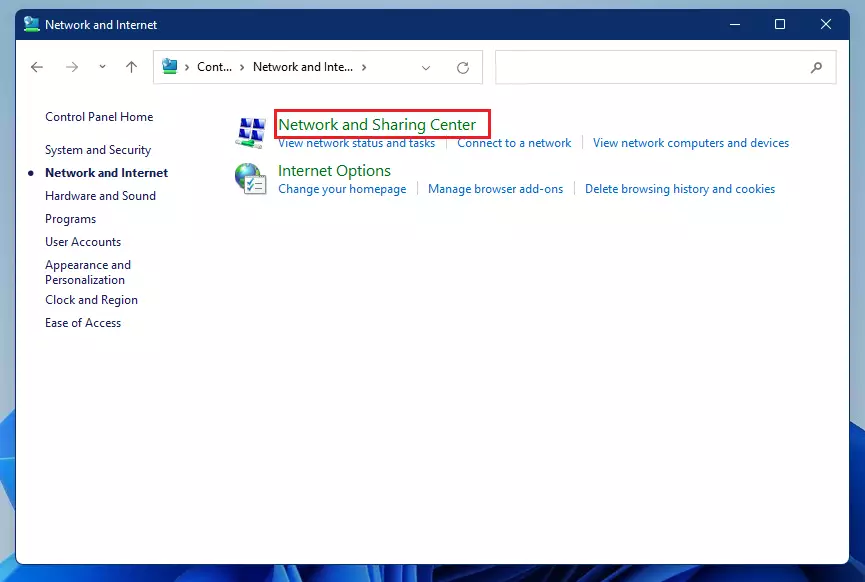
Select Network and Sharing Center on the next page, as highlighted below.
Next, select Change advanced sharing settings as highlighted below.

Select ‘Private’ (current profile) and enable File and printer sharing in the Advanced Sharing Center.
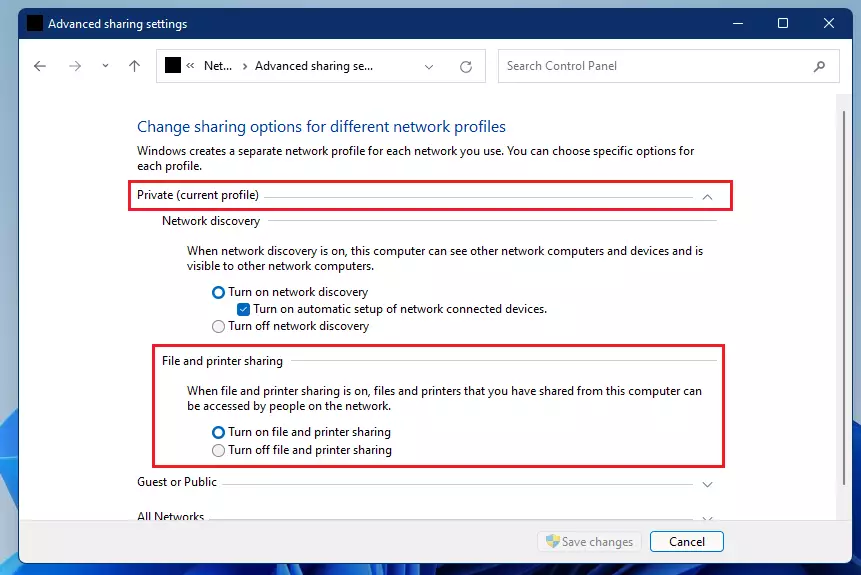
Save your changes and exit.
On the same Advance sharing options page, scroll down All networks.
You should see settings for Public folder sharing, Media streaming, File sharing connections, and Password-protected sharing. Windows should automatically turn on File and printer sharing in private networks. However, in some instances, this will not be enabled.
If you can not automatically find printers and shared resources in your private Network, then the File sharing option may be disabled.
Only people with accounts on the local computer or in the domain environment can access shared files and printers if you enable password-protected sharing.

Make your changes and save, then exit.
The settings above can easily be done using the commands below as administrator.
netsh advfirewall firewall set rule group="File and Printer Sharing" new enable=Yes
netsh advfirewall firewall set rule group="Network Discovery" new enable=Yes
It would be best to open the command prompt as administrator to run the above commands.
Access shares on Windows 11 from Ubuntu
Now that Network Discovery and file sharing are enabled, you can connect to Ubuntu and view shares on Windows devices.
To browse Windows files over the Network, open the File Manager application from the Activities overview (top left corner), click File Manager on the dock, and click Other Locations in the sidebar.
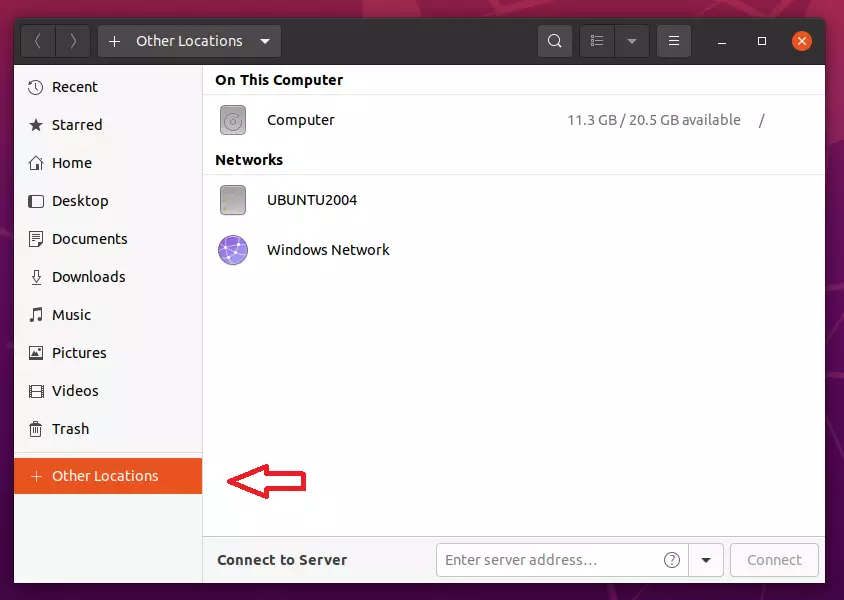
If Network Discovery and file sharing are enabled, you should see shared files and folders in the Windows Network folder above.
If not, run the commands below to install Samba.
sudo apt update
sudo apt install samba
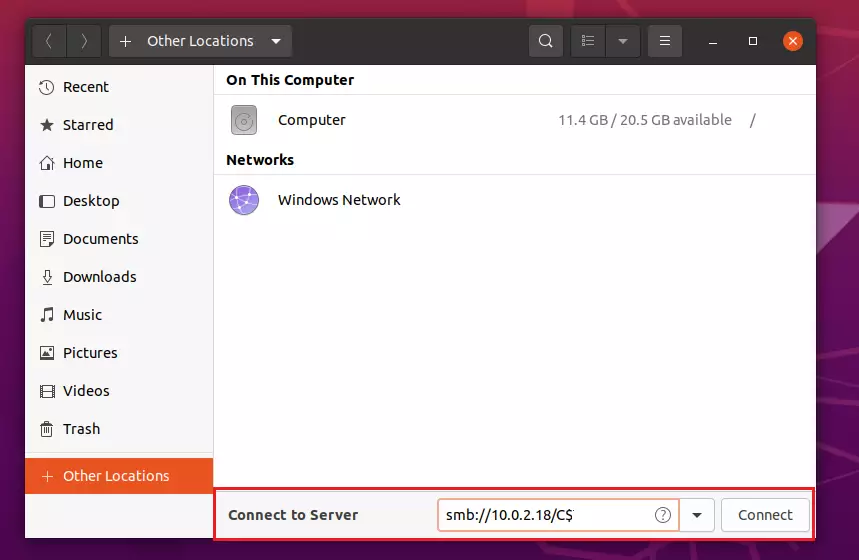
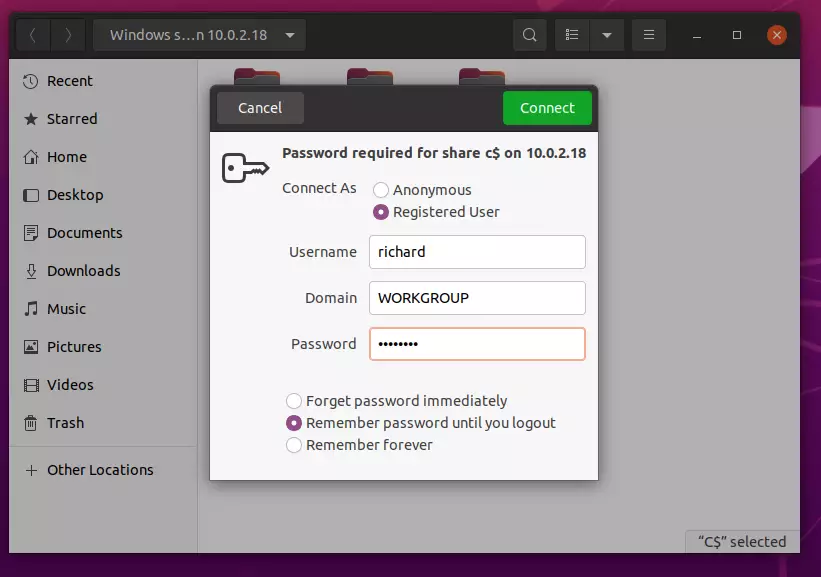
In the file manager, click Other Locations in the sidebar. In Connect to Server, enter the server’s address as a URL. Details on supported URLs are listed below. If you have connected to the server before, you can select it from the Recent Servers list.
Then click the Connect button when you’re ready to connect.
smb://servername/Share_name
Another format with multiple shared folders:
smb://10.0.2.18/users/Richard/Documents
Windows computers use a proprietary protocol to share files over a local area network. Computers on a Windows network are sometimes grouped into domains for organization and to better control access. If you have the right permissions on the remote computer, you can connect to a Windows share from the file manager.
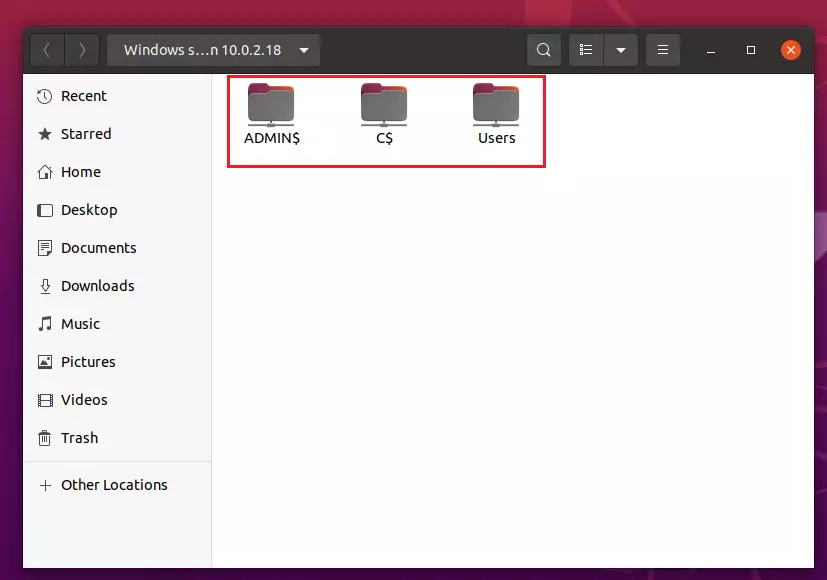
You should see Windows shares if you have access to them.
If accessing the shares and you’re prompted for login name and password, type in the Windows account login info. This account must have access to view the shared content.
How to access Ubuntu files from Windows
We’ll want to create a folder to share with Windows systems on the Ubuntu machine. Run the commands below to create a Samba folder in the system root directory.
sudo mkdir /samba
After that, set the group ownership to sambashare and permission to allow group members to access the folder.
sudo chgrp sambashare /samba
sudo chmod 2770 /samba
After changing the folder permission to allow sharing, run the commands below to add your Ubuntu account to allow access via Samba.
Replace yourusername with your Ubuntu account.
sudo smbpasswd -a yourusername
Next, set Samba’s Password and enable your Ubuntu account to access Samba shares.
sudo smbpasswd -a yourusername
sudo smbpasswd -e yourusername
Next, add your user account to the sambashare group.
sudo usermod -a -G sambashare yourusername
After that, open the Samba configuration file by running the commands below.
sudo nano /etc/samba/smb.conf
Then, add these lines at the bottom of the File and save.
[share]
    path = /samba
    browseable = yes
    read only = no
    force create mode = 0660
    force directory mode = 2770
    valid users = @sambashare
After saving the File, restart Samba by running the commands below.
sudo systemctl restart smbd
sudo systemctl restart nmbd
You should be able to access the /samba folder on the Ubuntu system using your account. When prompted, type in your Ubuntu username and Password.
That should do it!
Conclusion:
In summary, connecting Ubuntu to Windows 11 shares can streamline file sharing and collaboration across different systems. Here are the key takeaways:
- Seamless Integration: Ubuntu and Windows 11 can effectively communicate over the SMB protocol for file sharing.
- Network Discovery: Ensure that Network Discovery is enabled in Windows 11 for other devices to see shared resources.
- Public Folder Sharing: Set up Public Folder Sharing in Windows to allow easier access to shared files.
- Accessing Windows Shares from Ubuntu: Use the Ubuntu File Manager to browse and connect to Windows shares.
- Creating Samba Shares on Ubuntu: Easily create and share folders on Ubuntu by configuring Samba settings.
- User Permissions: Ensure correct user permissions are set for secure access to shared files.
- Troubleshooting: If issues arise, check for proper installation of Samba and confirm network settings on both systems.
By following these steps, users can enhance their productivity and ability to collaborate across the two platforms.
Leave a Reply to ubu_fan Cancel reply