
This article explains how to enable or disable the new “Administrator Protection” feature in Windows 11.
Administrator protection is an upcoming platform security feature in Windows 11. It aims to protect free floating admin rights for administrator users, allowing them to execute all admin functions with just-in-time admin privileges.
Today, the administrator approval runs in legacy mode and uses User Account Control (UAC) for elevation approval.
The new Administrator Protection uses Windows Security for a more secure elevation approval than User Account Control (UAC). This feature is off by default and needs to be enabled via group policy.
Starting with Windows 11 build 27718.1000, you can now enable Administrator Protection.
Use the new Administrator Protection feature in Windows
As mentioned, users can enable the new Administrator Protection feature in the latest build.
Here’s how to do it.
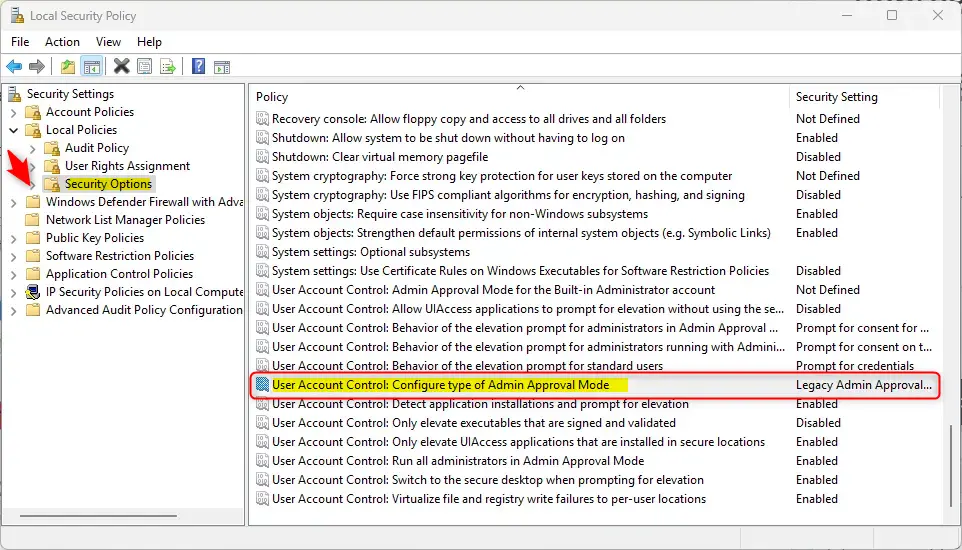
First, open the Local Security Policy (secpol.msc).
Then, expand the Local Policy > Security Options folders.
Local Policy > Security Options
Then, double-click the “User Account Control: Configure type of Admin Approval Mode” policy to open it.
On the policy window, choose one of the options available:
- Legacy Admin Approval Mode (Default)
- Admin Approval Mode with Administrator protection
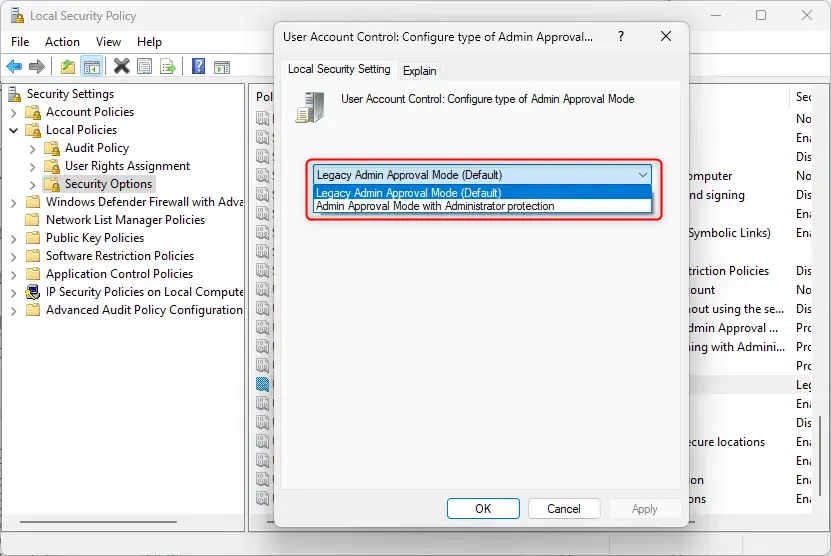
Select an option that fits your environment and click OK to save it.
Enable Administrator Protection using the Windows Registry
Yet another way to enable the new Administrator Protection feature in Windows 11 is to use the Windows Registry editor.
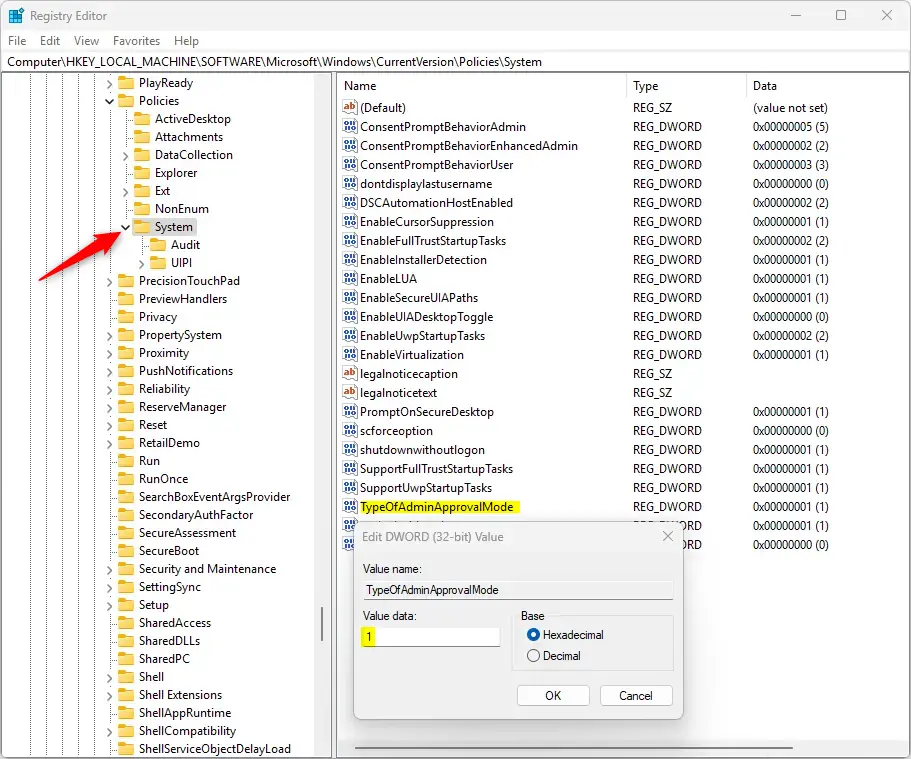
First, open the Windows Registry editor as administrator.
Then, navigate to the registry key below.
Computer\HKEY_LOCAL_MACHINE\SOFTWARE\Microsoft\Windows\CurrentVersion\Policies\System
Next, double-click the TypeOfAdminApprovalMode (DWORD) 32-bit Value name on the System key’s right pane to open it.
Then, enter a value 2 to enable the new Administrator Protection feature. Enter the value 1 to disable it.
If you do not see the “TypeOfAdminApprovalMode” item, right-click a blank area and create a new DWORD 32-bit Value registry item.
Then, type the name “TypeOfAdminApprovalMode” and enter a value data 2 or 1 to enable or disable the new Administrator Protection feature.
Save your changes and restart your computer.
That should do it!
Reference:
Conclusion:
In summary, enabling or disabling the Administrator Protection feature in Windows 11 provides enhanced security for admin tasks. Here are the key points to remember:
- Administrator Protection enhances the security of admin privileges by offering just-in-time access.
- It is currently an optional feature that users can enable via Group Policy or the Windows Registry.
- The two modes available are:
- Legacy Admin Approval Mode (Default)
- Admin Approval Mode with Administrator Protection
- Use the Local Security Policy or the Windows Registry editor to make changes.
- Restart your computer after making these changes to apply them effectively.
Taking advantage of this feature helps ensure better control and security over administrative tasks in Windows 11.


Leave a Reply to Enable Administrator Protection via Windows Security app in Windows 11 – Geek Rewind Cancel reply